

LNB configuration
English screenshots coming: some of the pictures below still show the receiver and the web interface in Romanian. The rows, keys and steps described on this page are the English ones.
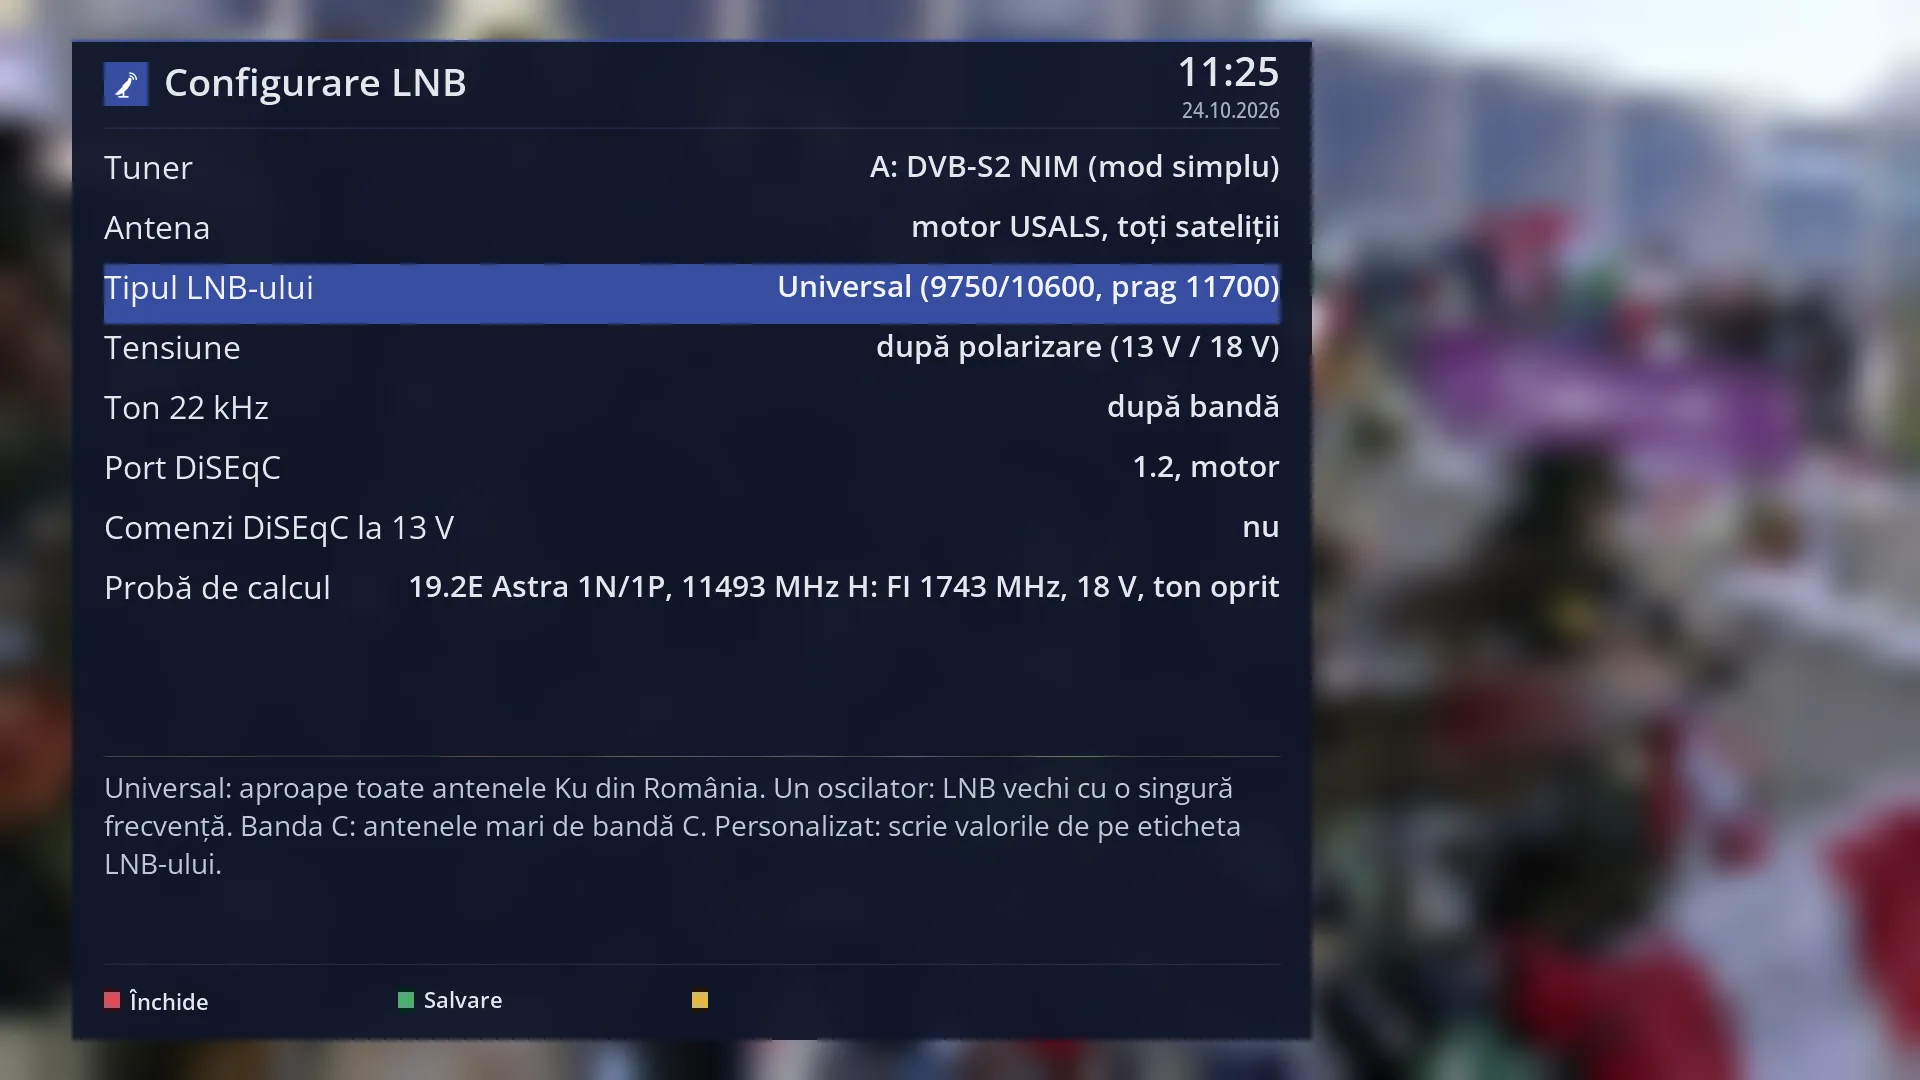
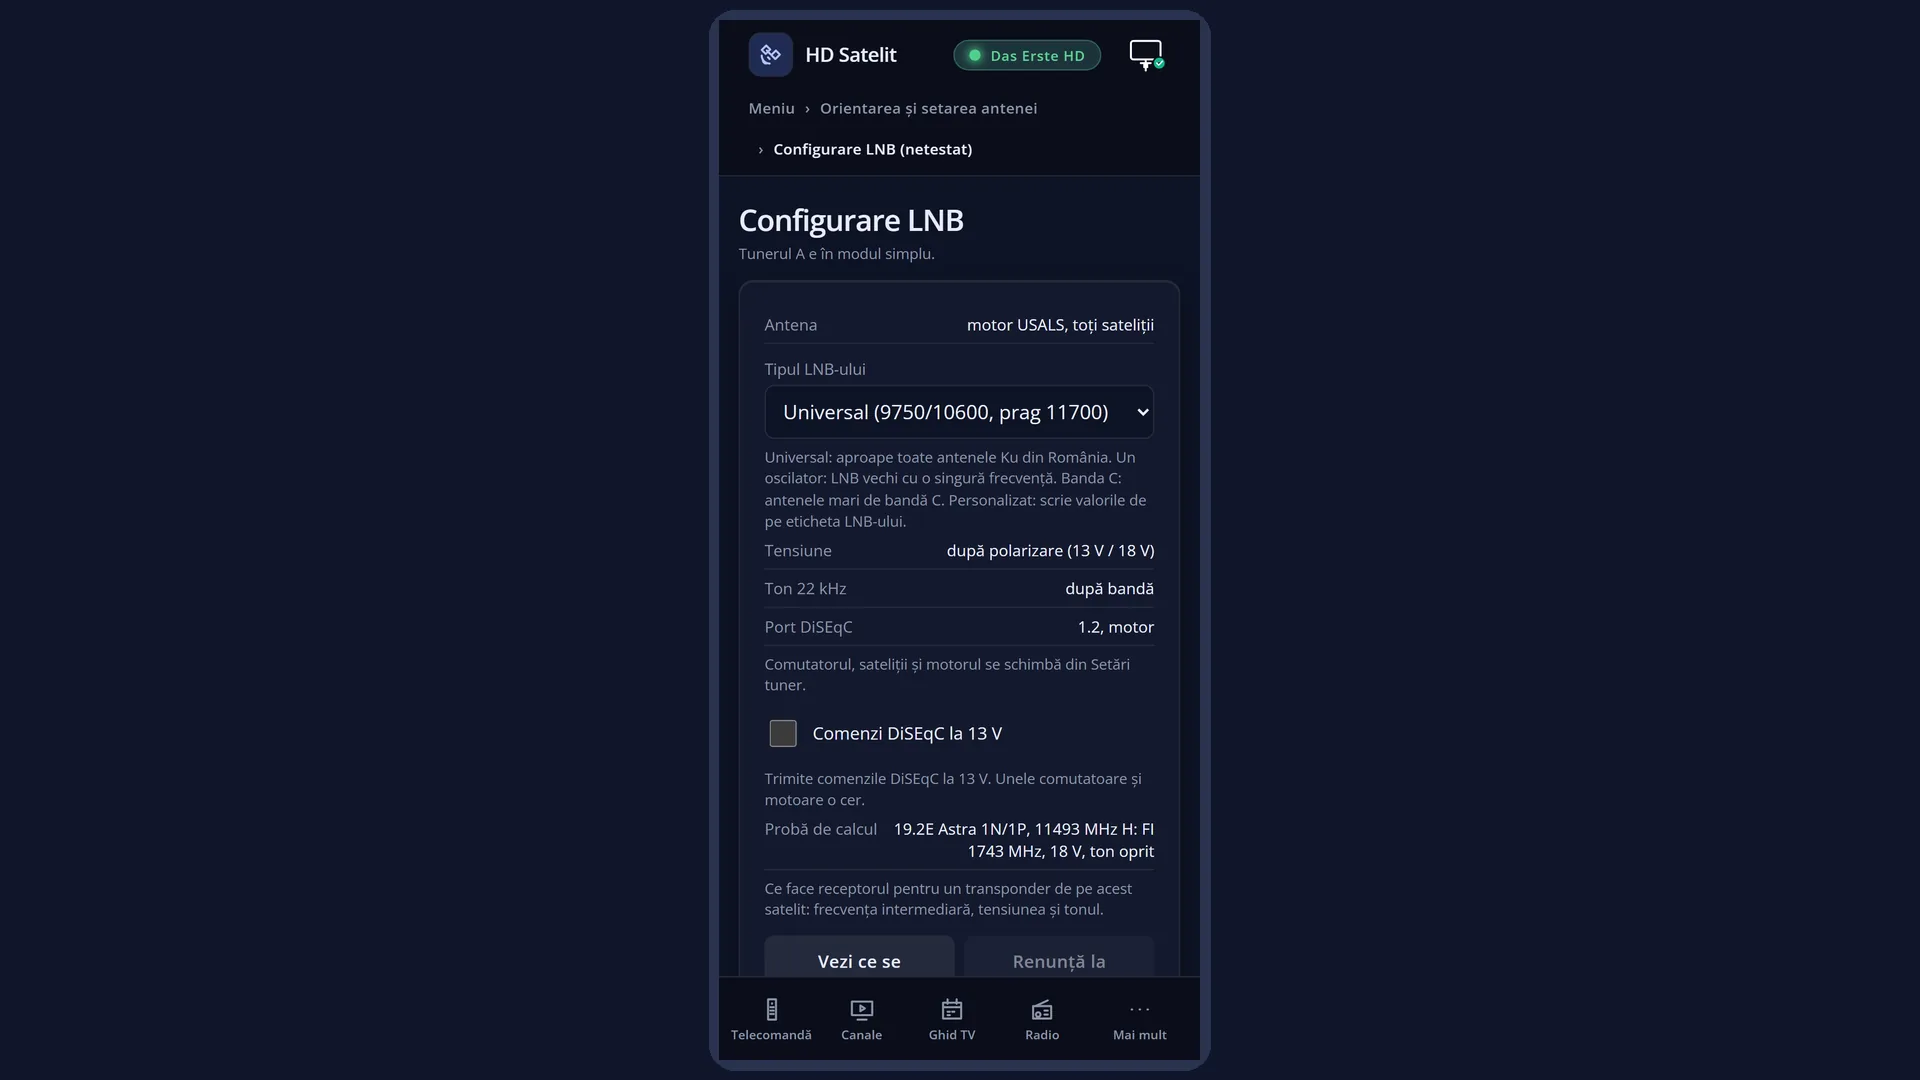
- 1 The tuner and its mode (simple or advanced).
- 2 How the dish is connected; changed in Tuner settings.
- 3 The LNB type: the only choice most people make.
- 4 The voltage, the tone and the DiSEqC port; read-only in simple mode.
- 5 The DiSEqC commands at 13 V.
- 6 The test: the intermediate frequency, the voltage and the tone for a real transponder.
- 7 The explanation of the selected row.
- 8 RED closes, GREEN saves; YELLOW “What it was before”, after a change.
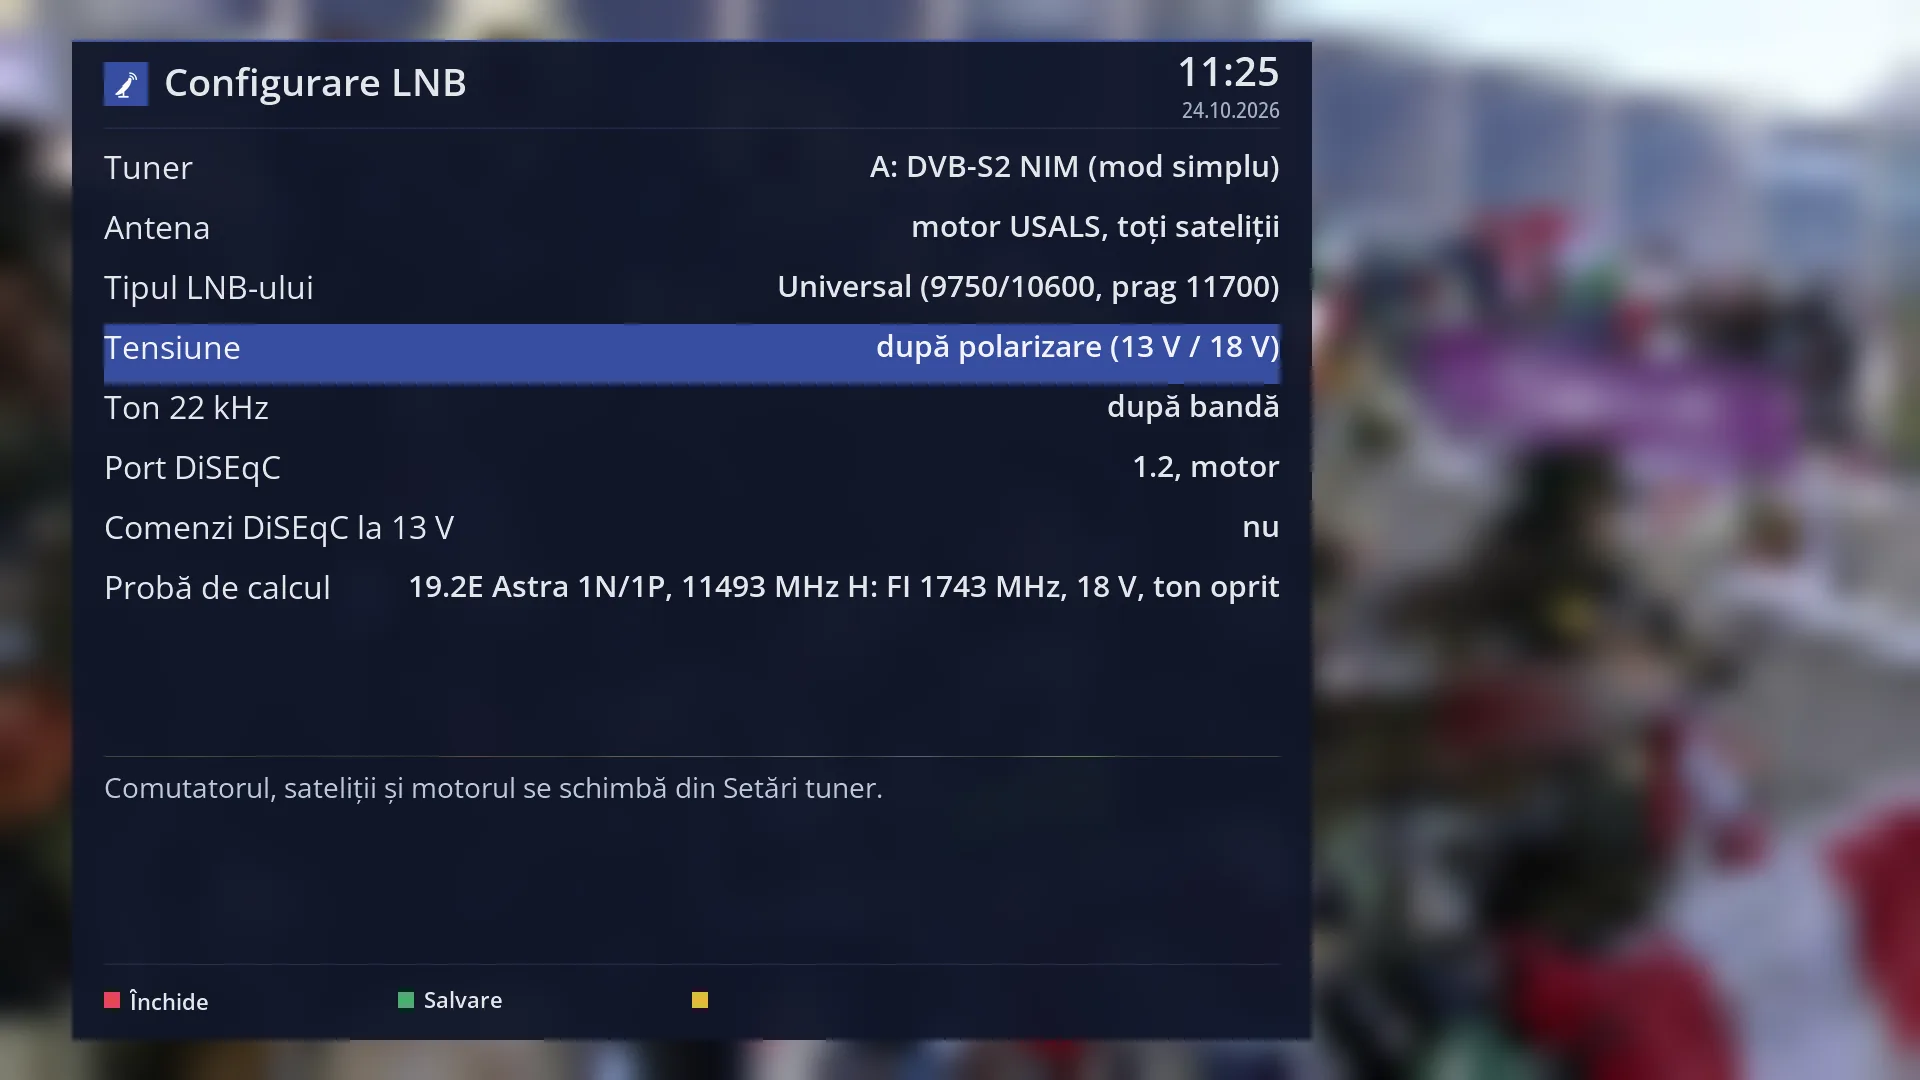
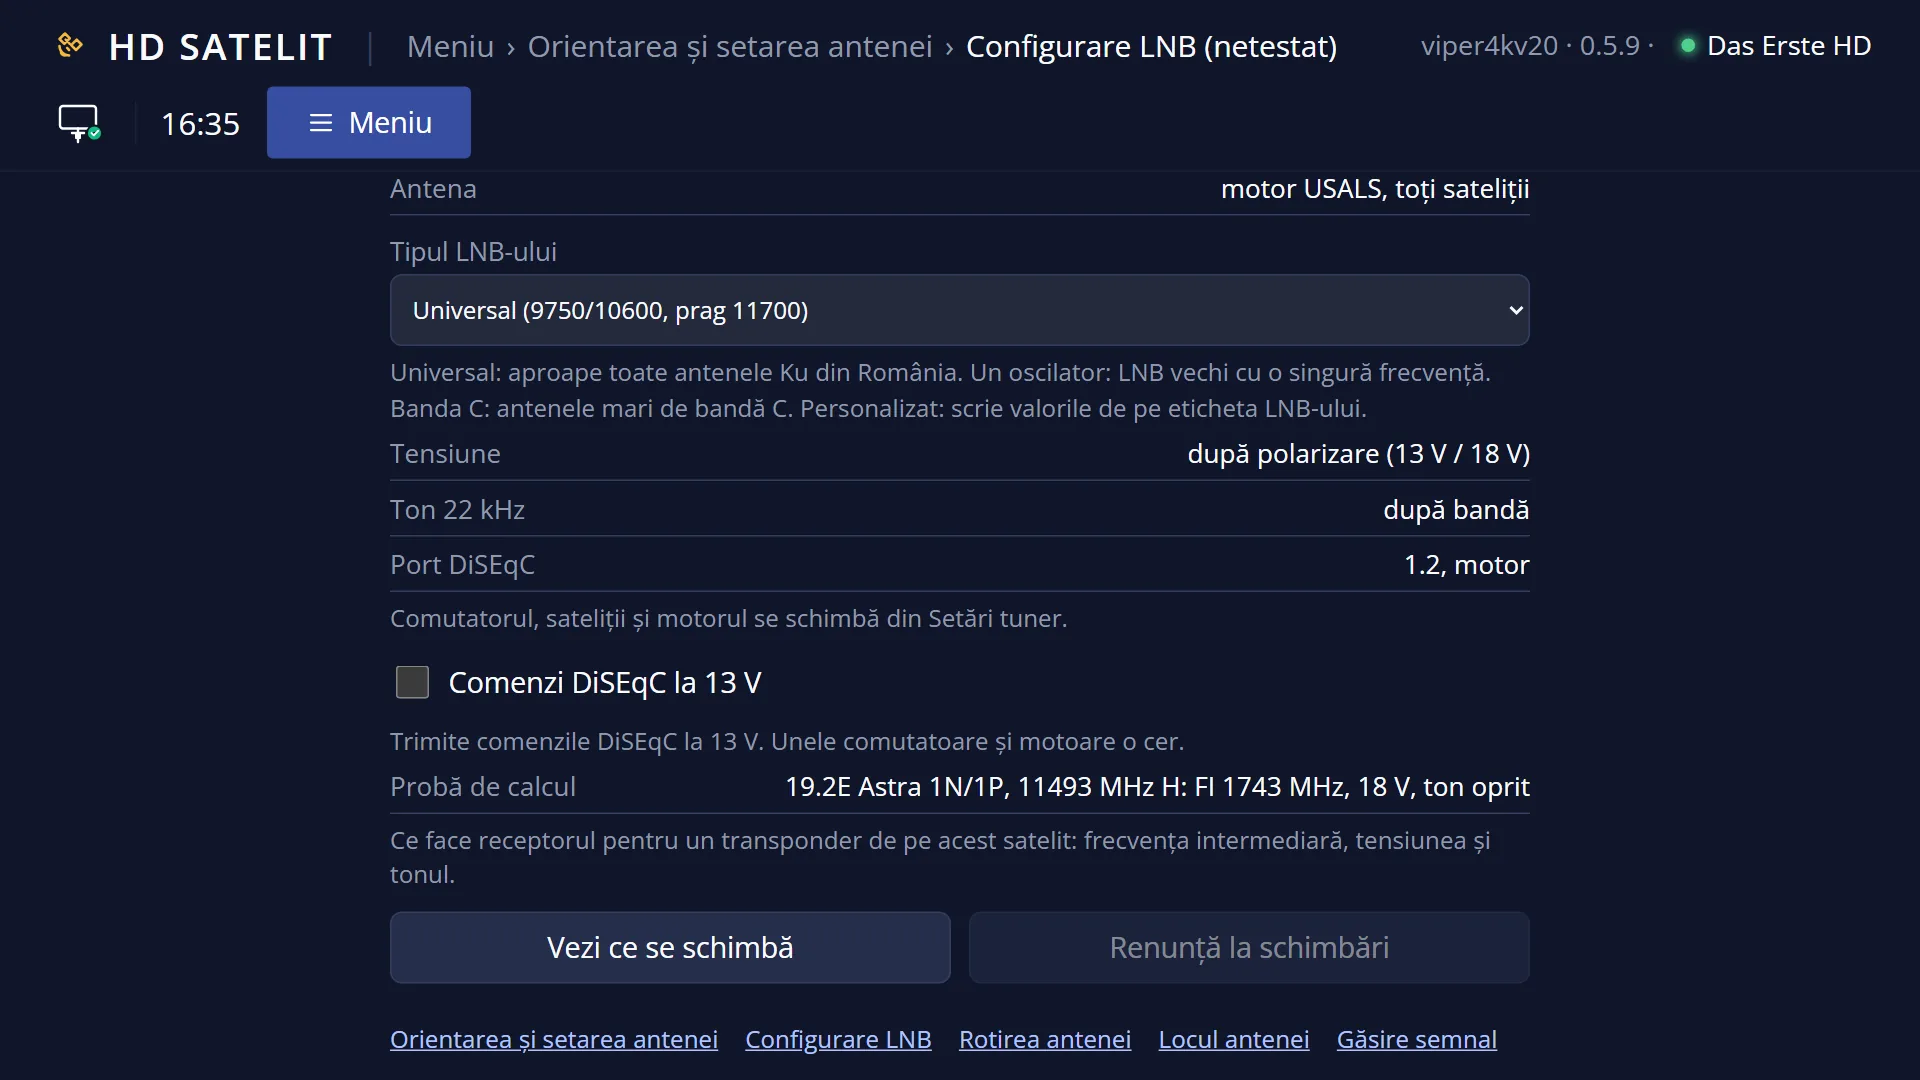
- 1 The selected row: “Voltage: by polarization (13V / 18 V)”.
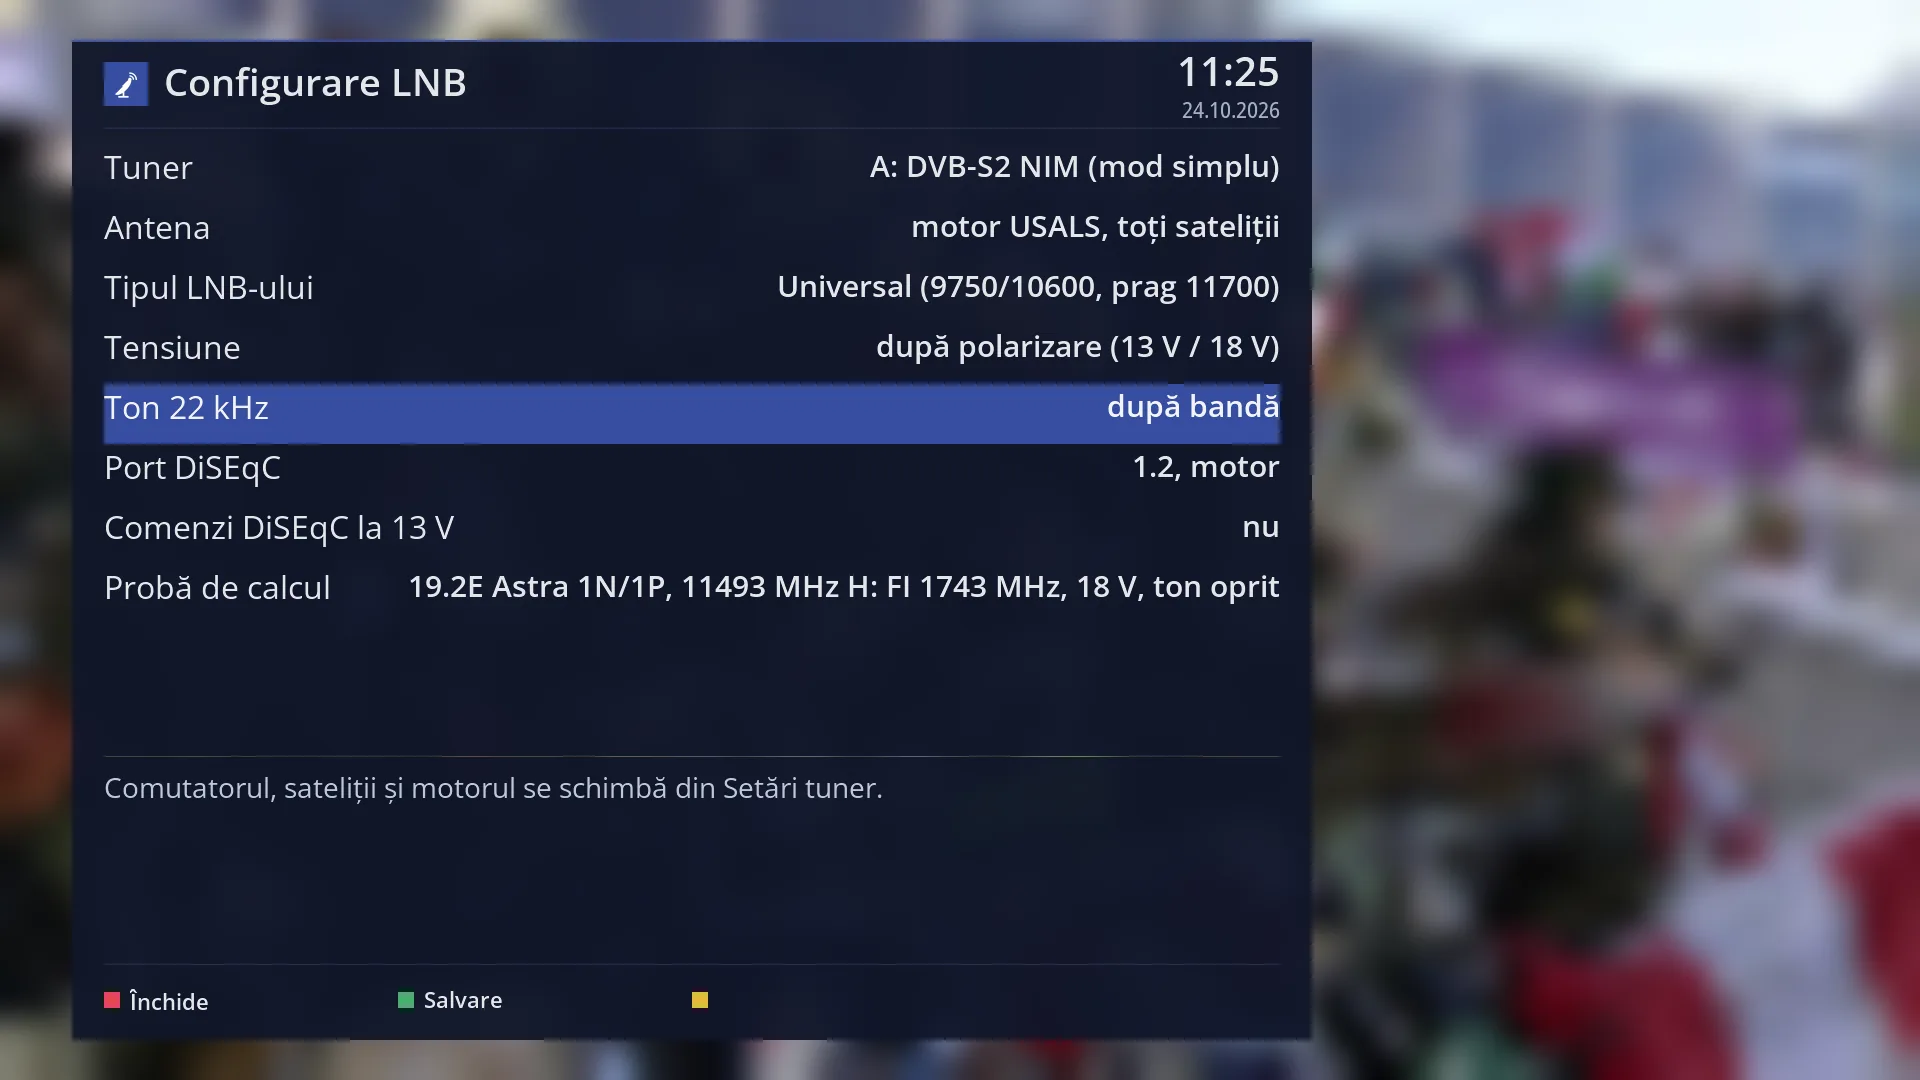
- 1 The selected row: “22 kHz tone: by band”.
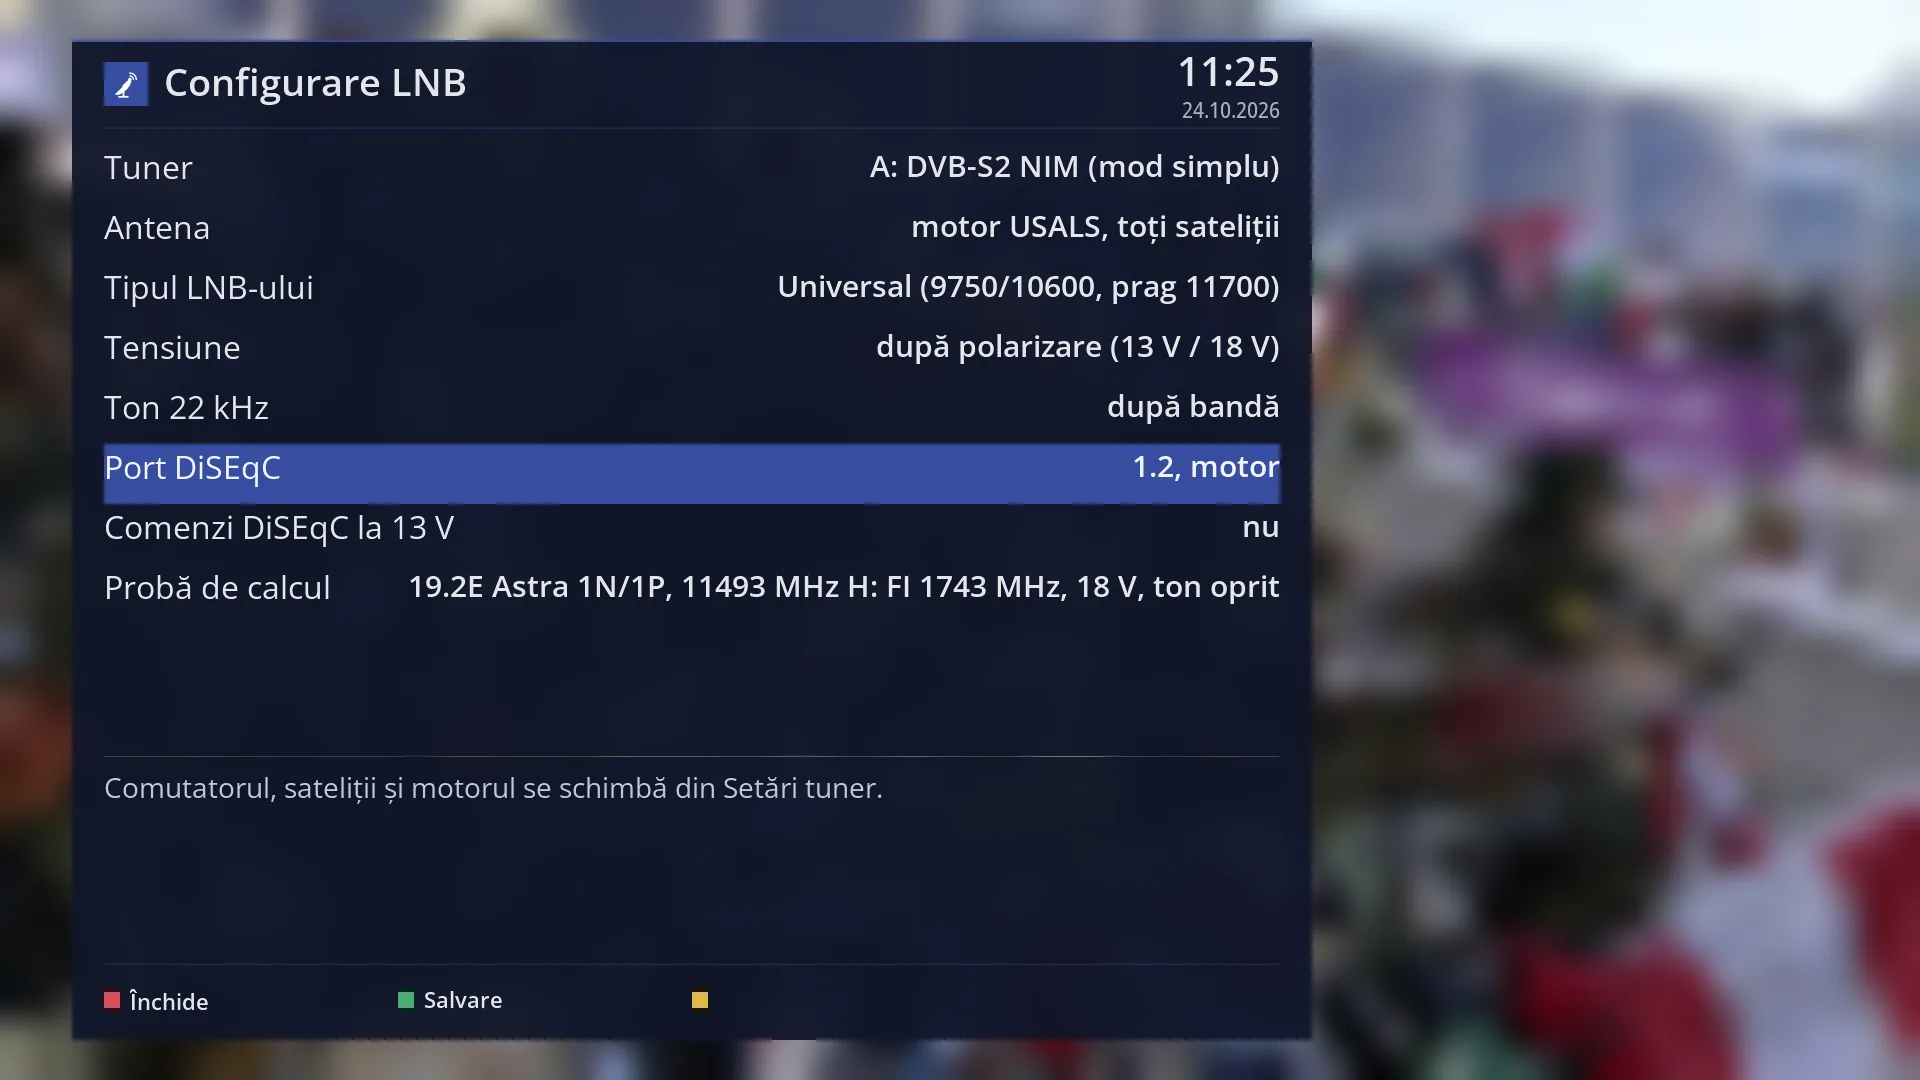
- 1 The selected row: “DiSEqC port: 1.2, motor”.
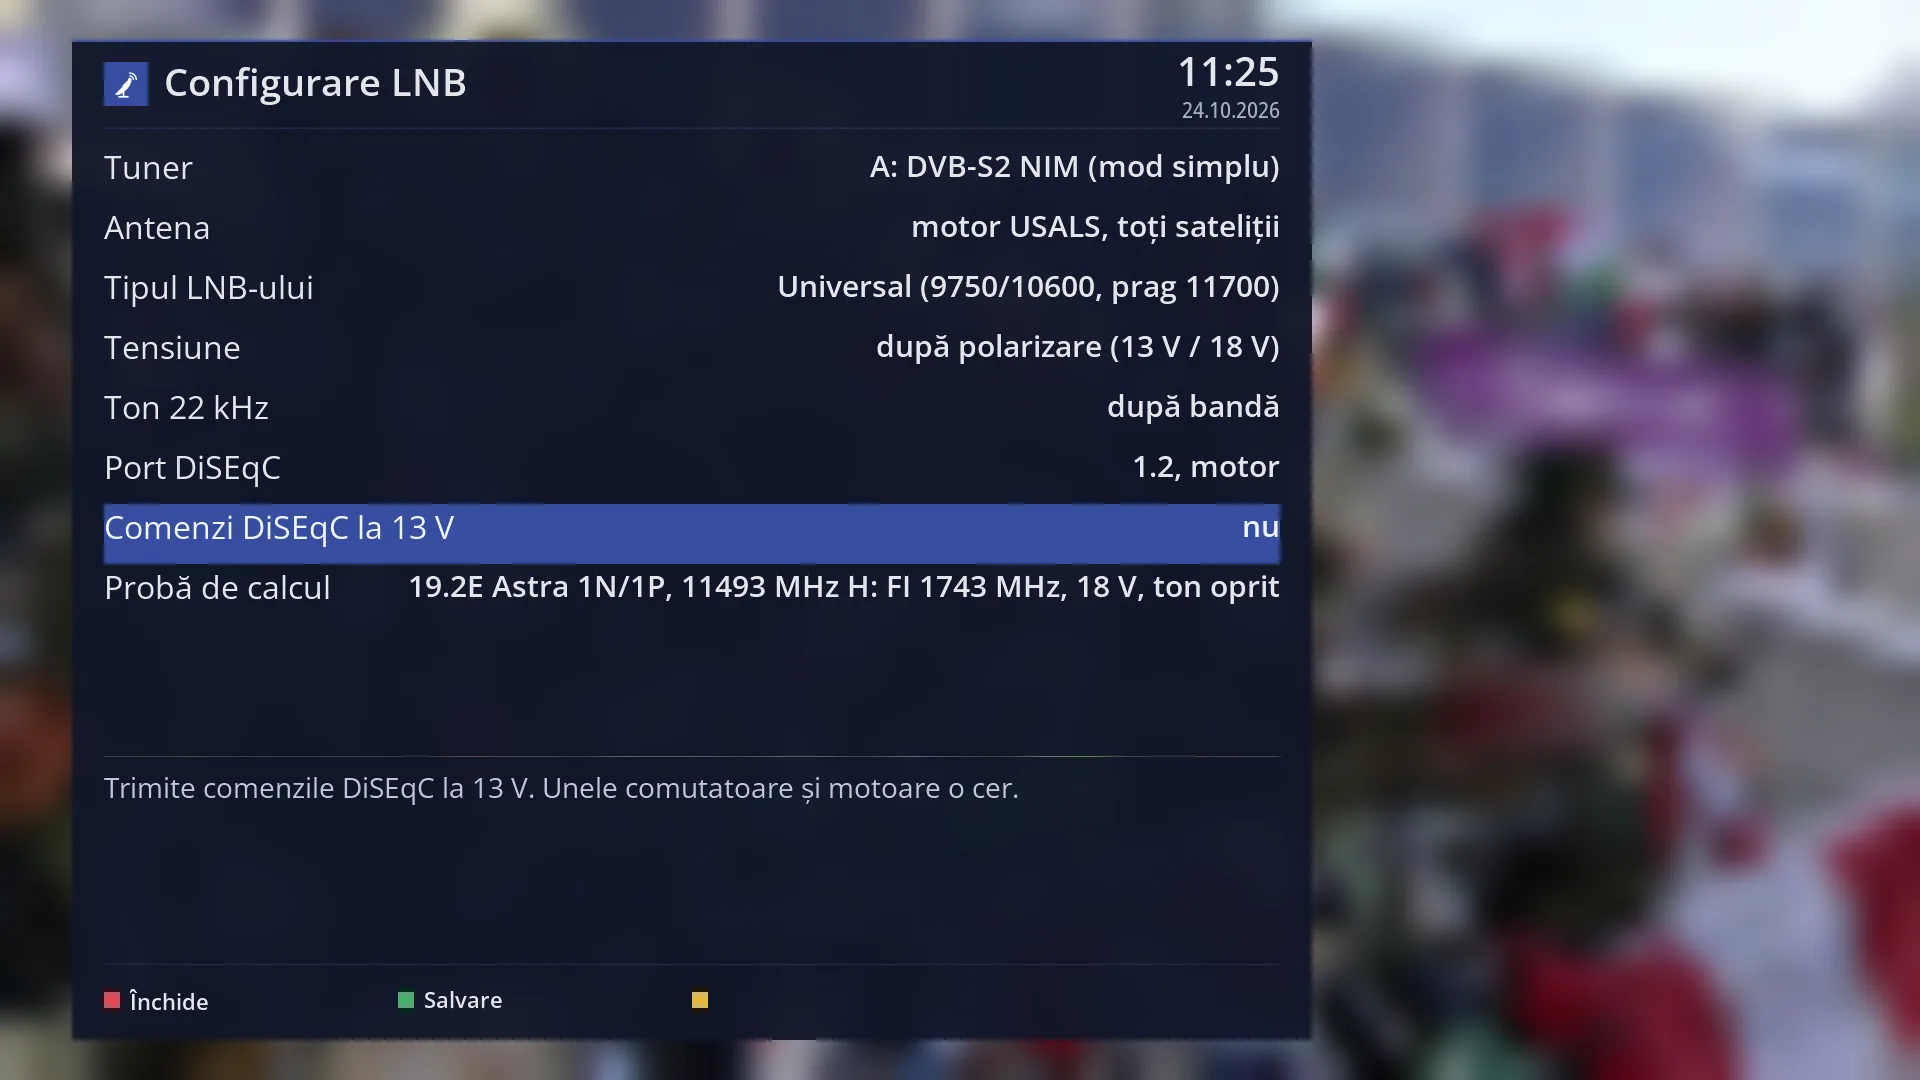
- 1 The selected row: “DiSEqC commands at 13 V: no”.
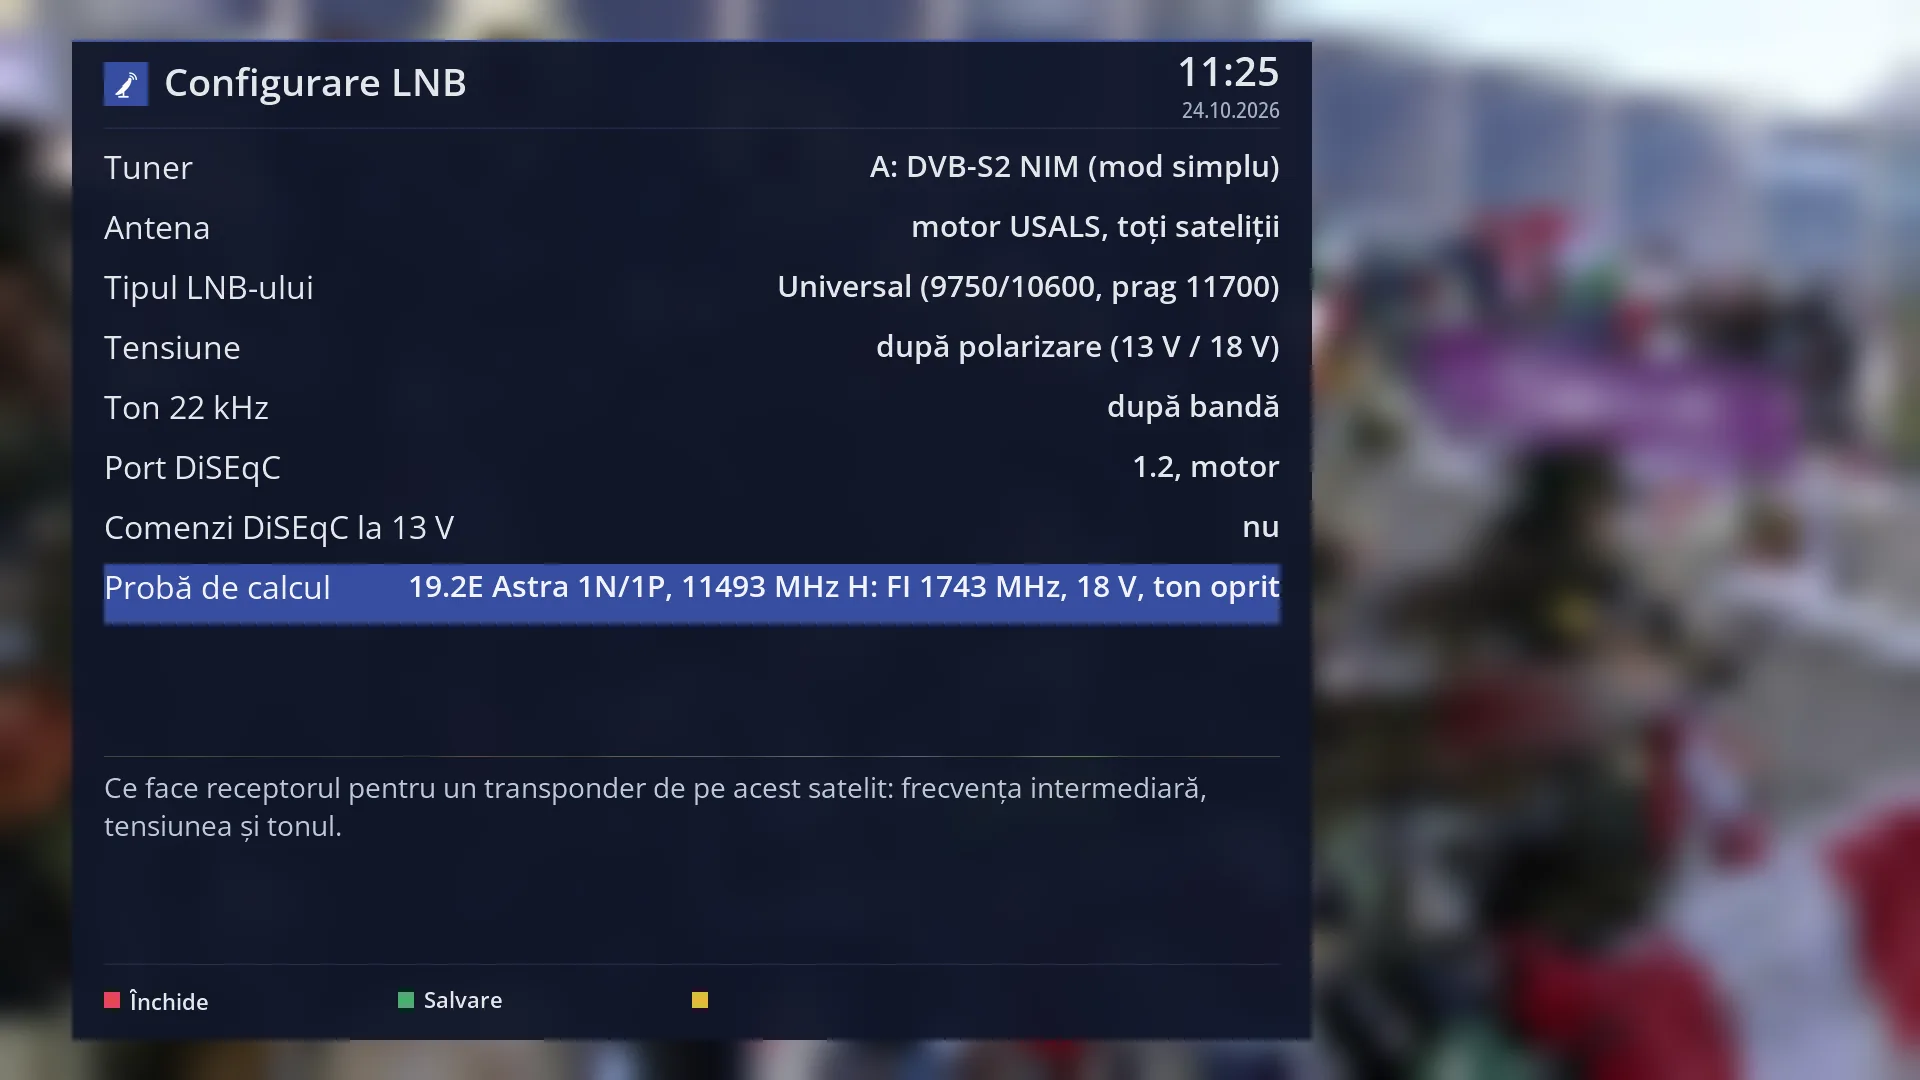
- 1 The selected row: “Test calculation: 19.2E Astra 1N/1P, 11493 MHz H: IF 1743 MHz, 18 V, tone off”.
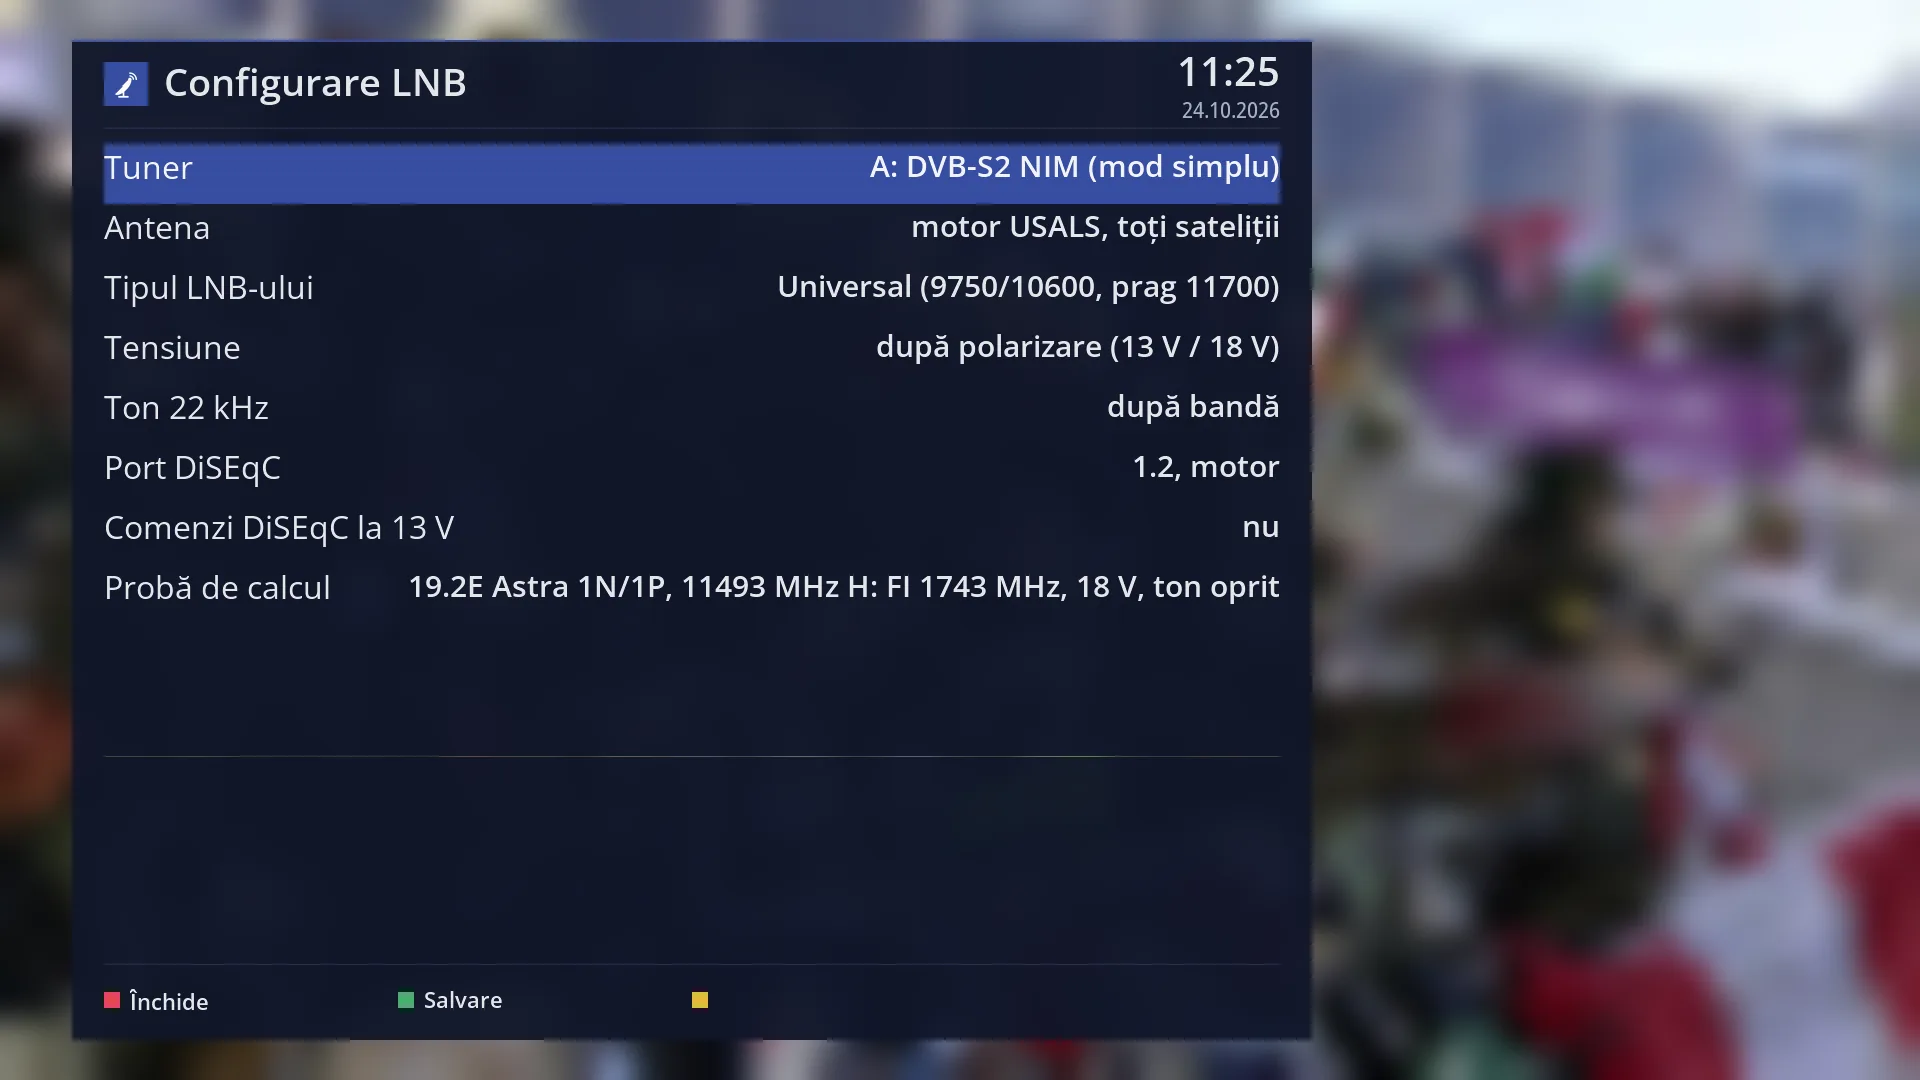
- 1 The selected row: “Tuner: A: DVB-S2 NIM (simple mode)”.
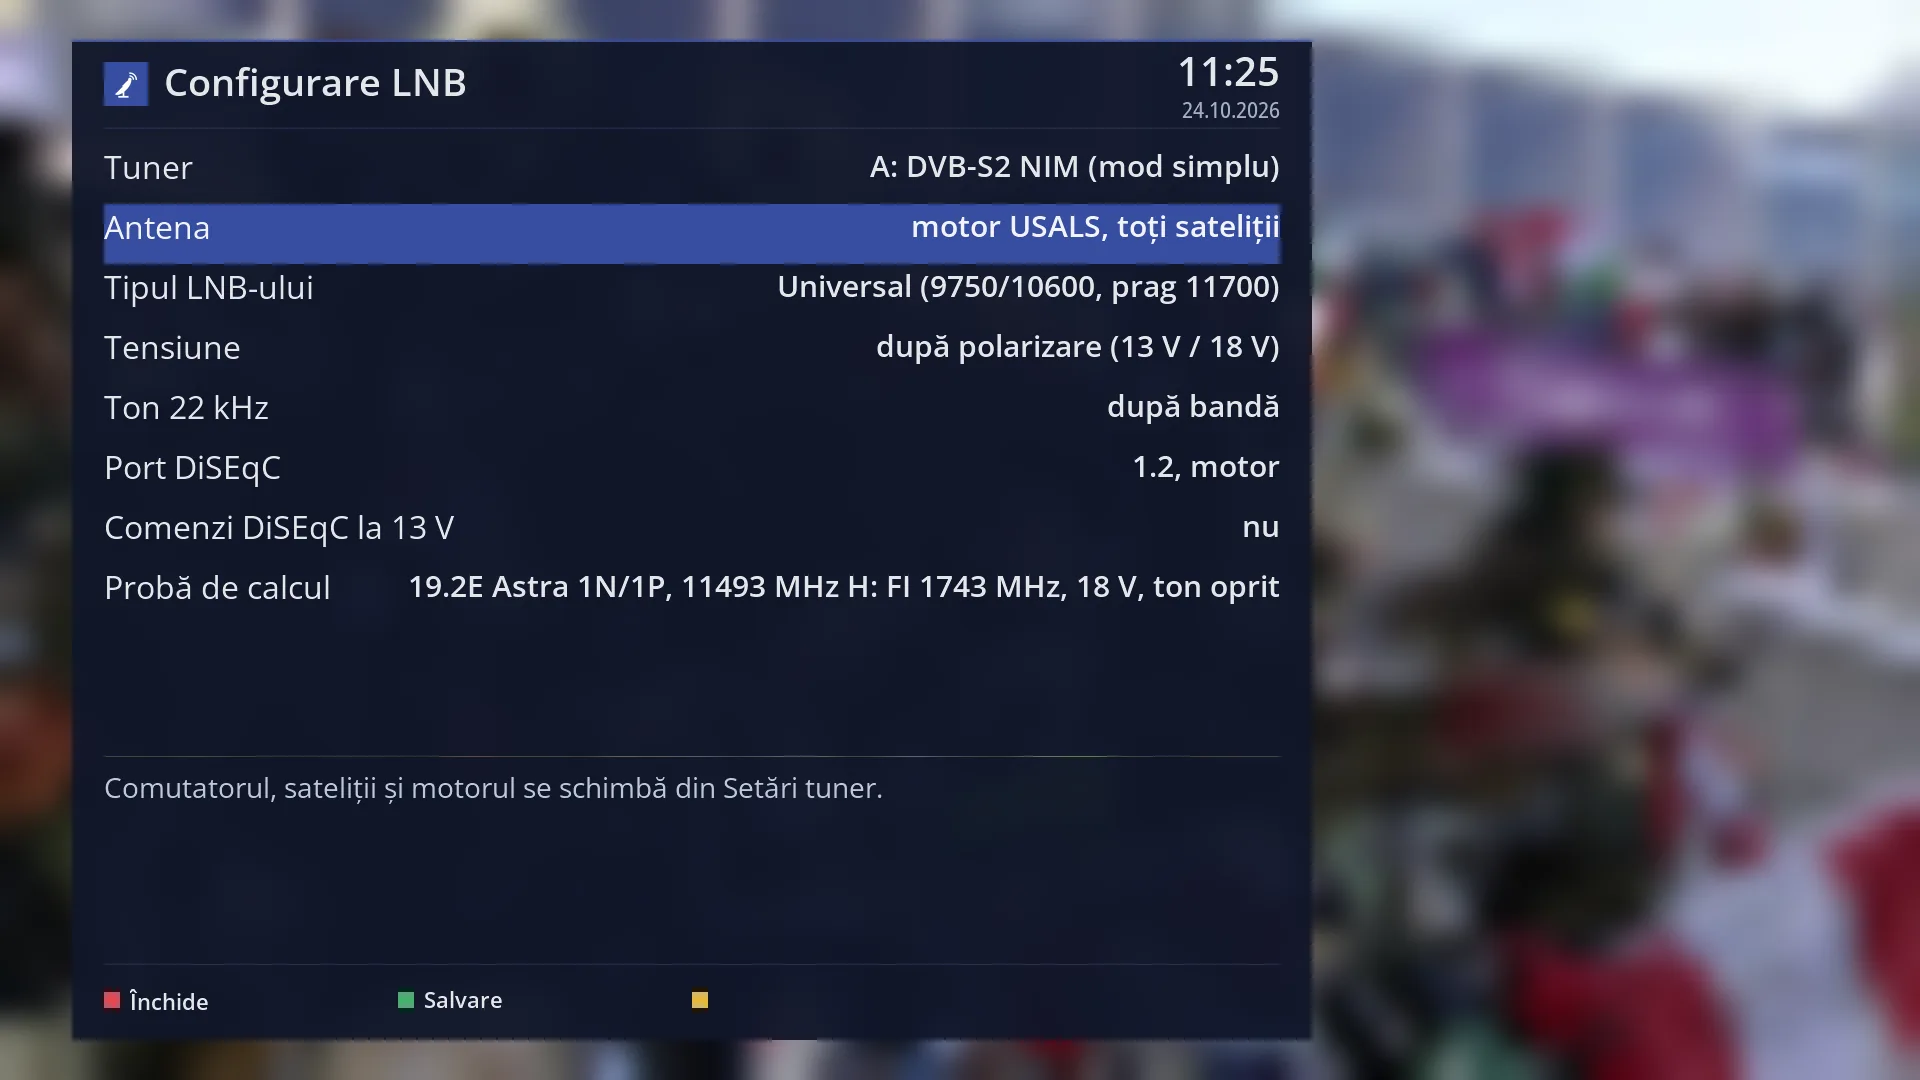
- 1 The selected row: “Dish: USALS motor, all satellites”.
What it is for
“LNB configuration” is a simpler screen for the LNB type (the head on the dish) and a few of its settings: the voltage, the 22 kHz tone and the DiSEqC switch port. It changes the same settings as “Tuner settings”, no others.
It is designed so that you cannot break anything. Before saving, you see everything that changes. After applying, the receiver checks the signal on the channel that is playing, and the new settings are kept only if you answer “Yes”. “No”, EXIT or 60 seconds without an answer means going back to what it was before.
The “Test calculation” row shows, for a real transponder on your satellite, what the receiver does with the chosen LNB: the intermediate frequency, the voltage and the tone. This way you can see in advance whether the chosen type fits.
Most Ku dishes in Romania have a universal LNB, which is the factory value. Change the type only if the LNB label says something else. The switch, the satellites and the motor are changed in “Tuner settings”.
The entry appears in the menu marked “(not tested)”: it is finished but not yet tried on the receiver. The same settings, with the same check, are also in the web interface, on the /antena/lnb page.
How to get here
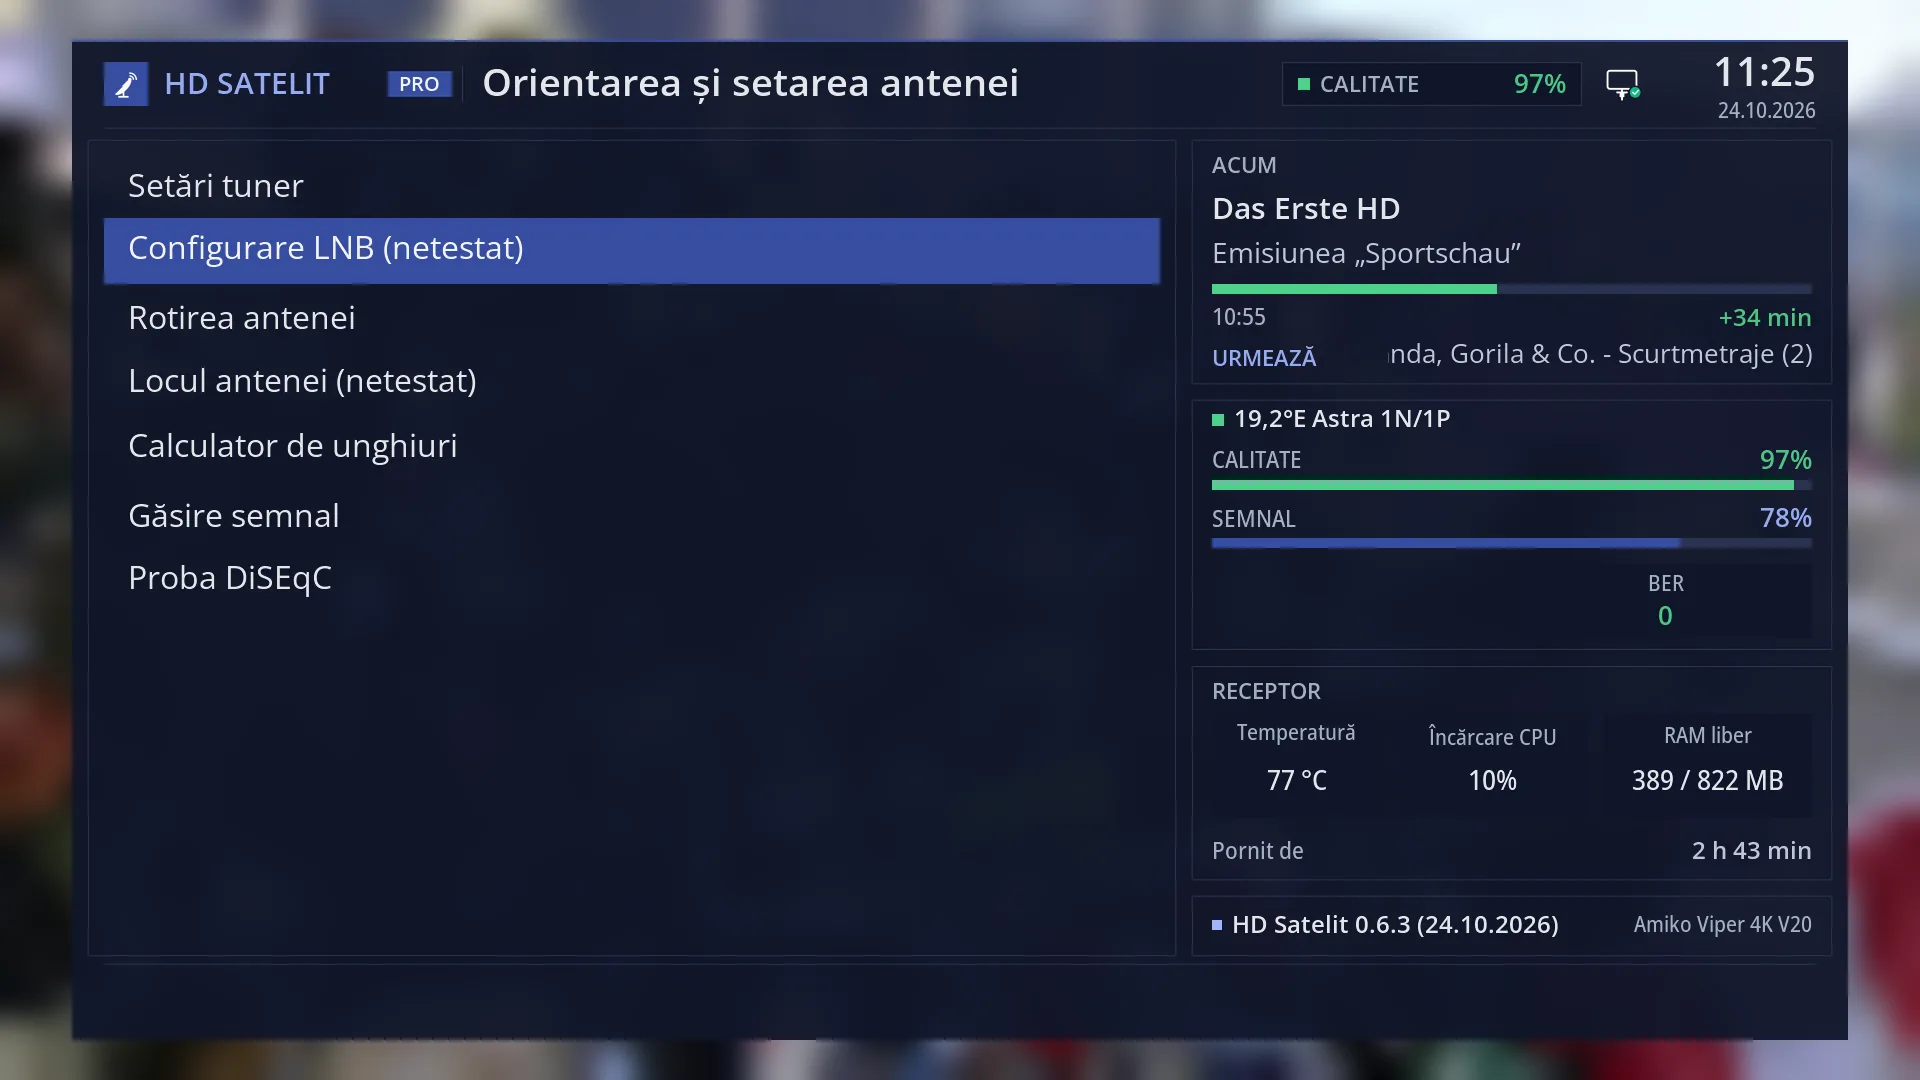
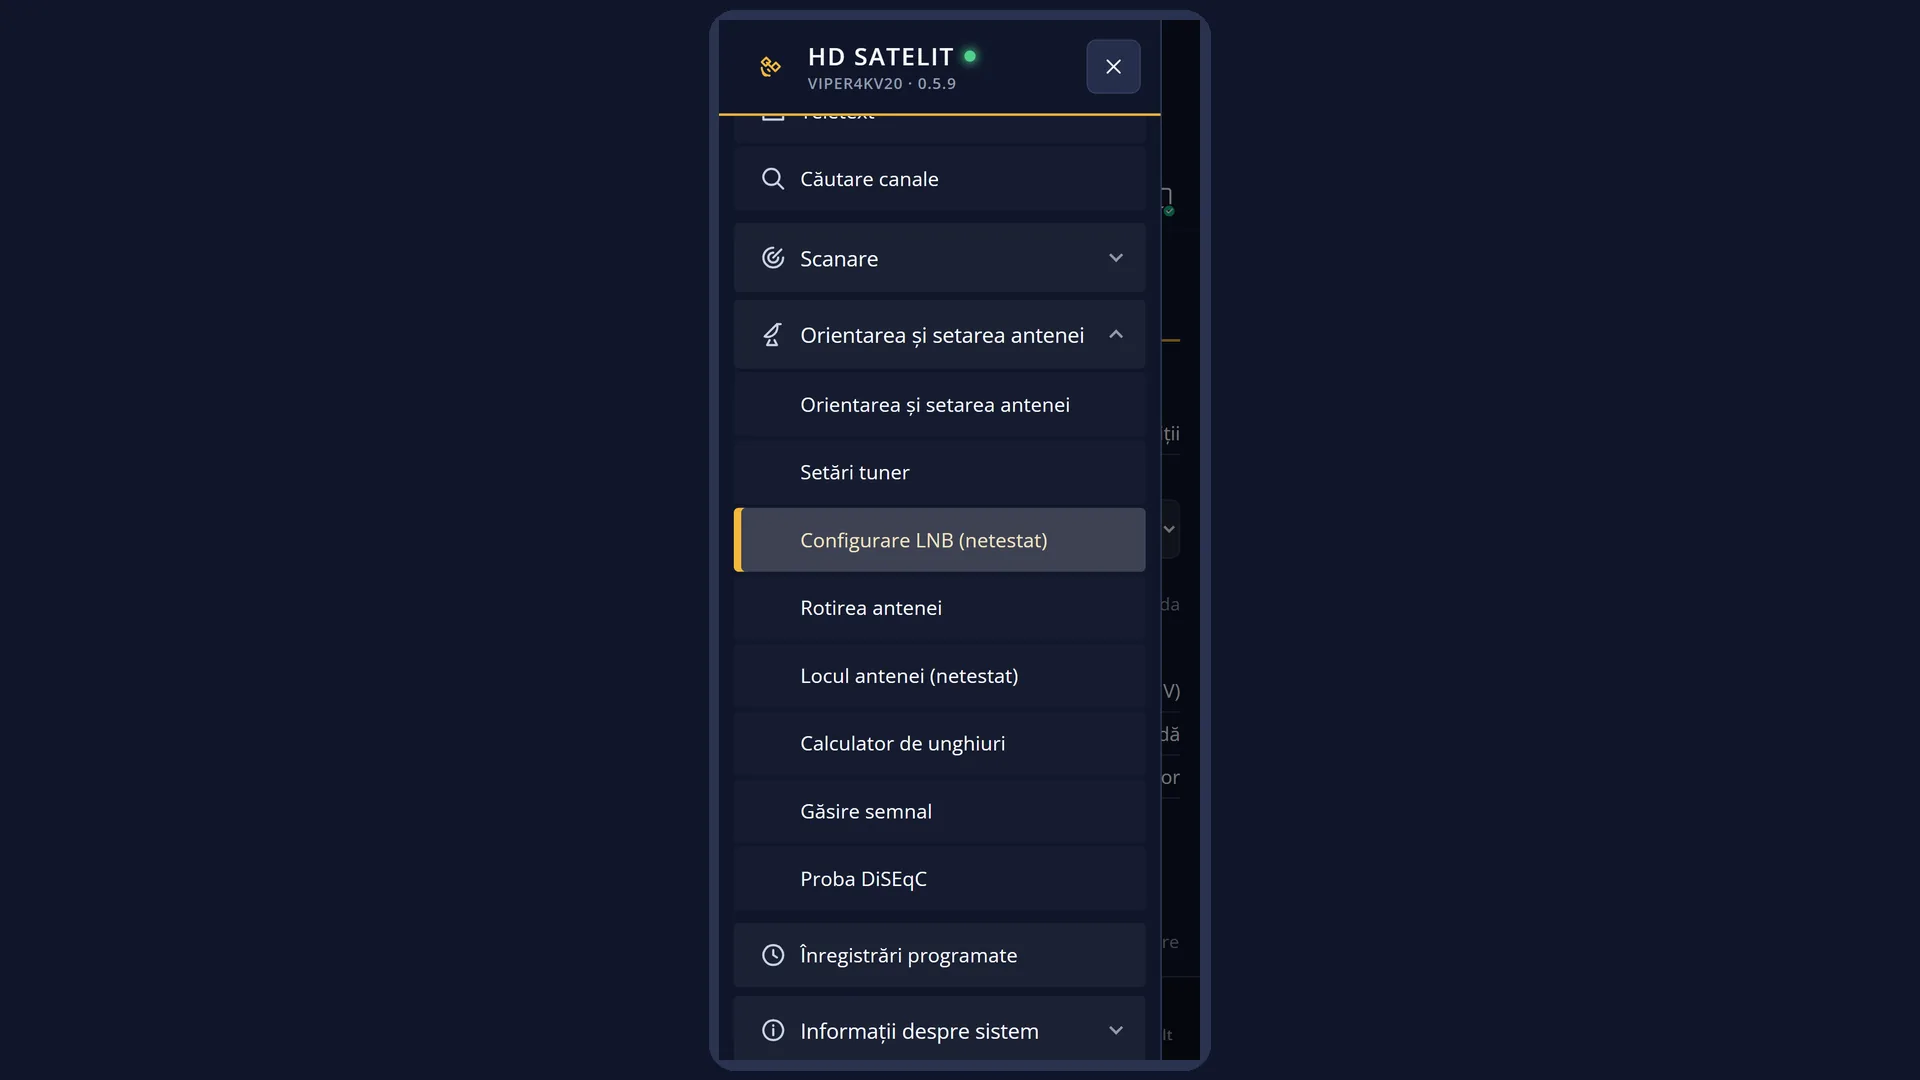
Path: Main menu > Dish alignment and setup > LNB configuration
Keys on the TV: MENU 2 2
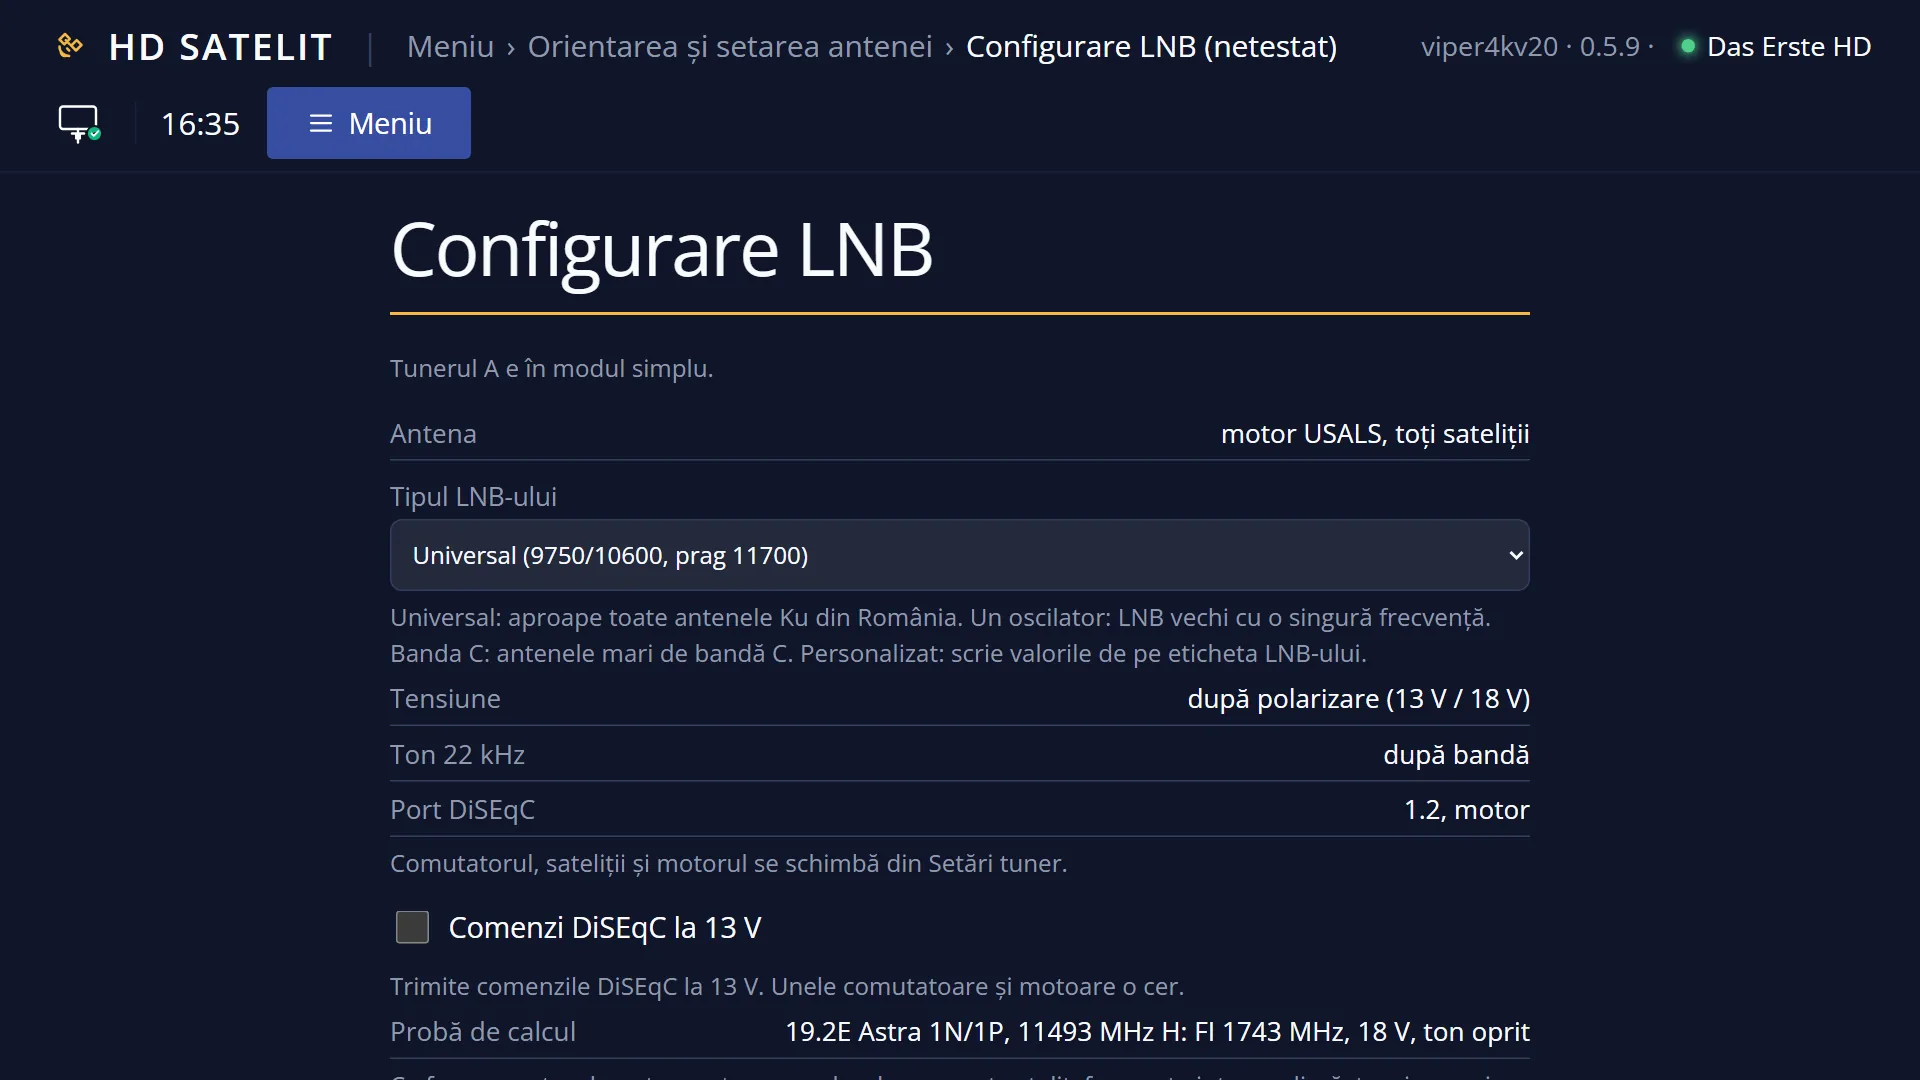
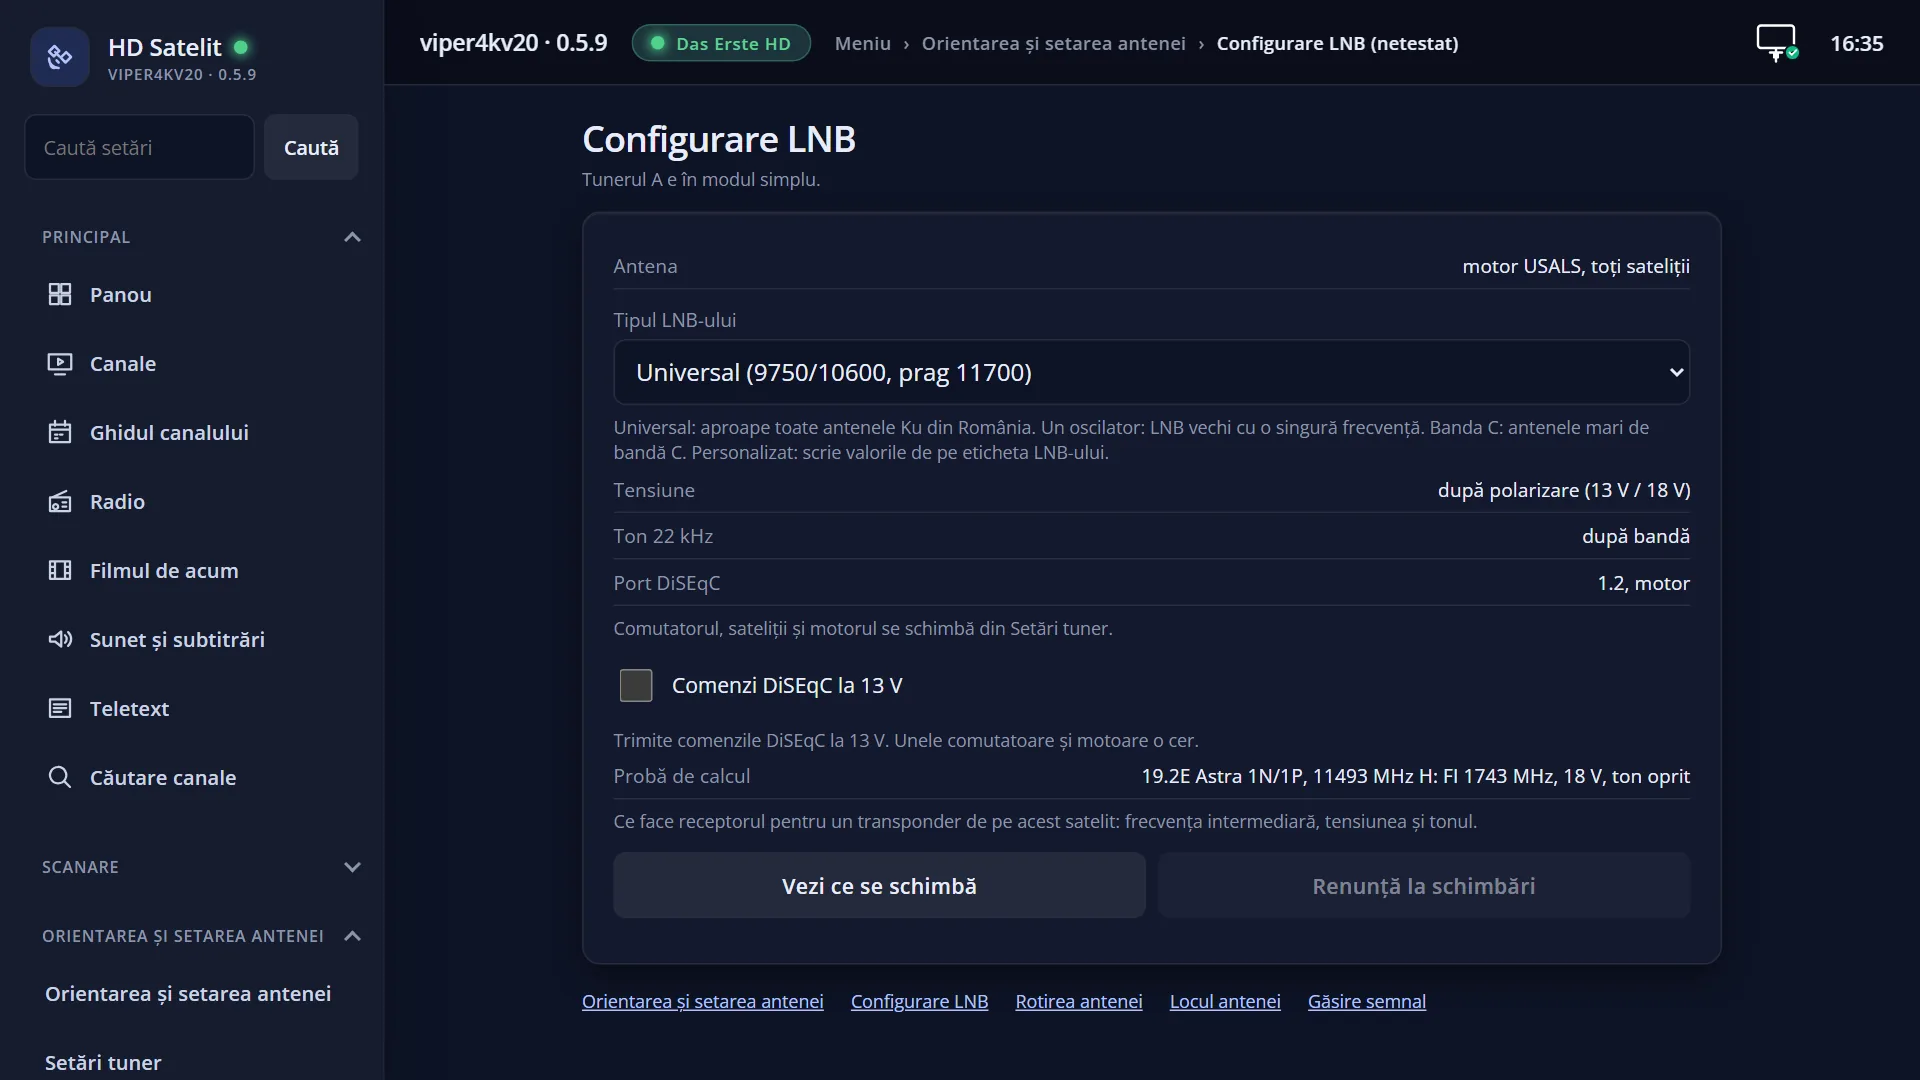
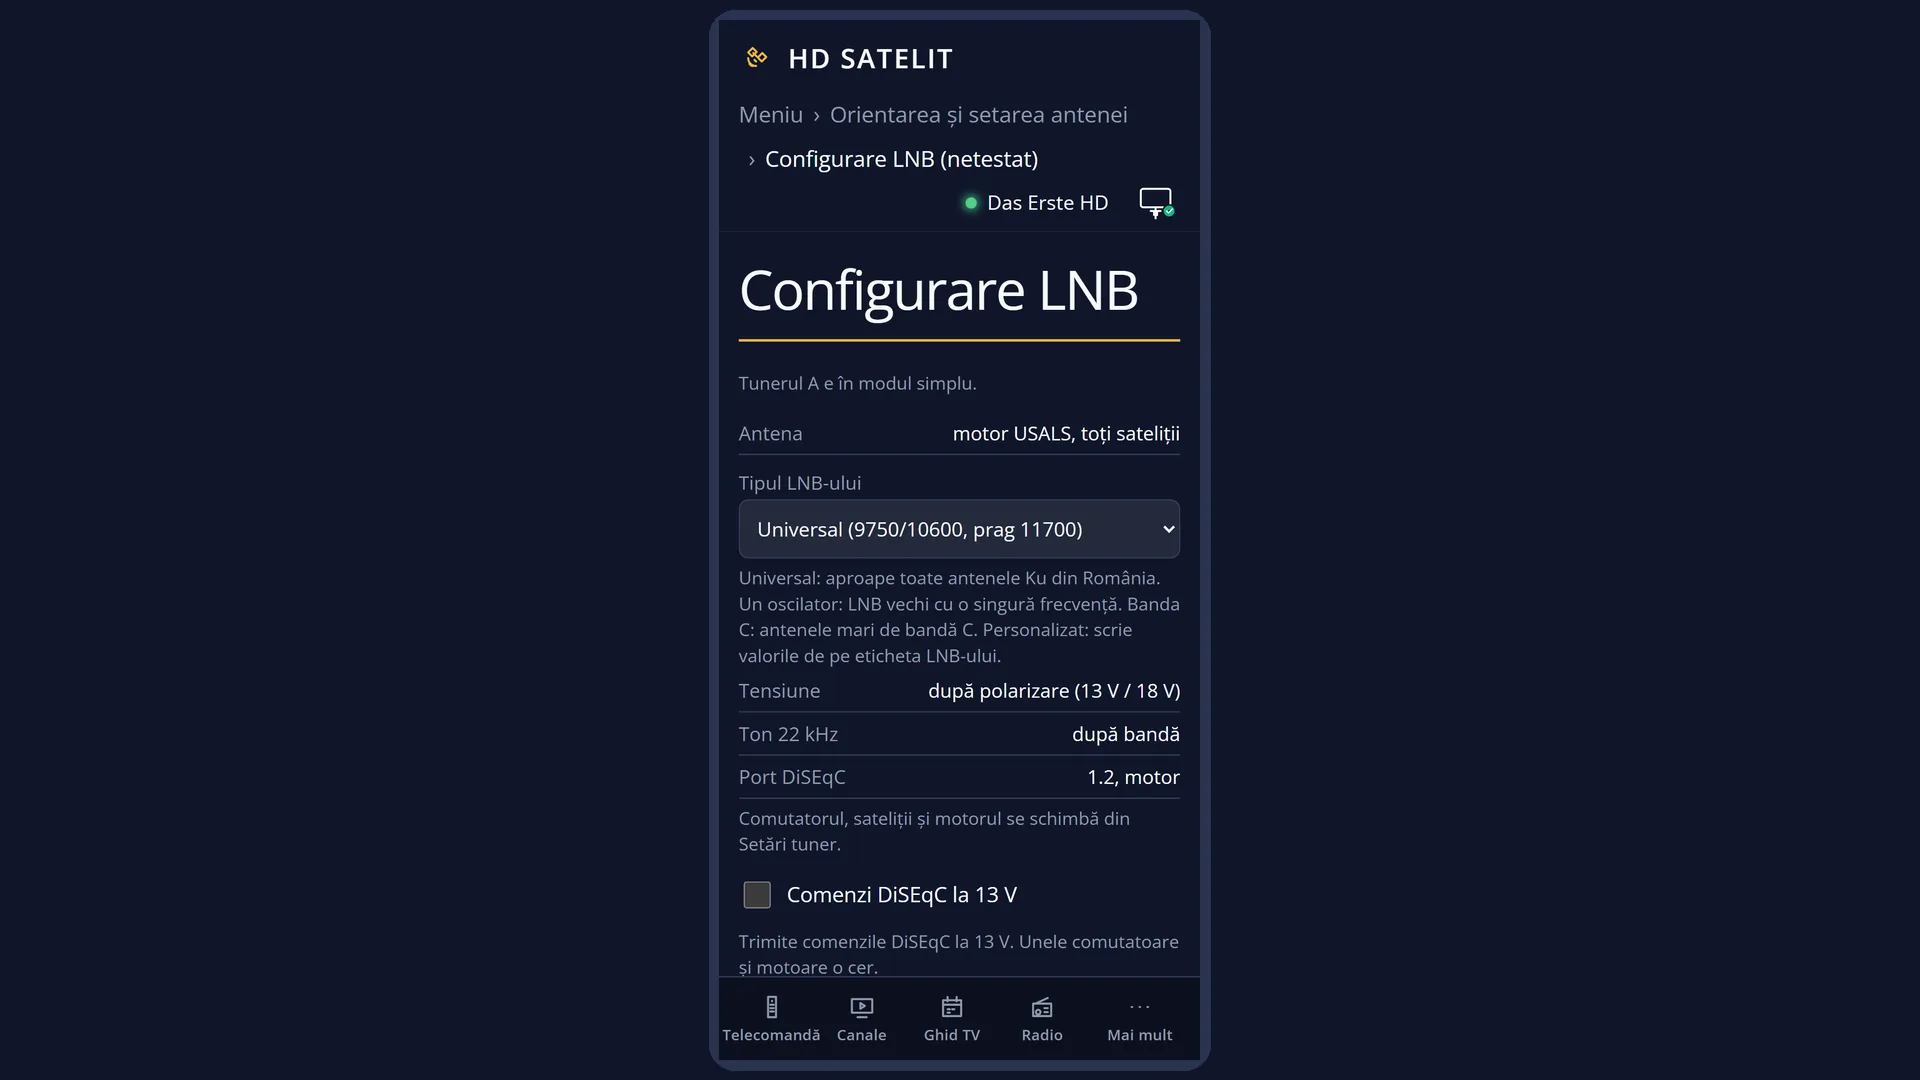
In the web interface: the /antena/lnb page, or the /antena page, the “LNB configuration” card, the “Change the LNB” button.
What you see on the screen
At the top, the title “LNB configuration”, the time and the date. In the Pro theme, there is a blue square with the logo to the left of the title.
The list of rows. In the tuner's simple mode (the factory one): “Tuner”, “Dish”, “LNB type”, “Voltage”, “22 kHz tone”, “DiSEqC port”, “DiSEqC commands at 13 V” and “Test calculation”. “Dish”, “Voltage”, “22 kHz tone” and “DiSEqC port” are read-only in simple mode. In advanced mode you can also change the voltage, the tone and the port, and “Increased voltage (long cable)” appears as well. With several LNBs, the “LNB” row also appears.
With the “Custom” type, “Low oscillator (MHz)”, “High oscillator (MHz)” and “Band threshold (MHz)” appear below it.
Below the list, the explanation of the selected row, for example for the type: “Universal: almost all Ku dishes in Romania. Single oscillator: old LNB with one frequency. C band: large C-band dishes. Custom: type the values from the LNB label.”.
Underneath, in yellow, the status line: messages such as “You have not changed anything.”, “Checking the signal on …” or “I kept the new settings.”.
At the bottom, the keys: RED “Close”, GREEN “Save” (only when the tuner can be changed from here), YELLOW “What it was before” (only when the receiver has the settings from before the last LNB change).
GREEN opens the “What changes” window: each change described in plain words (“… instead of …”), the warnings (for example that a channel can no longer be tuned) and, under “Details”, each technical value with what it was and what it will be. At the bottom: RED “Back”, GREEN “Apply”.
After “Apply”, the status line says “Checking the signal on …”, then a question appears with the test result and “Keep the new settings?”, with the choices “Yes, keep the new settings” and “No, go back to what it was (… s)”. You can watch the seconds count down.
Rows and settings
| Row | Values | Default | What it does |
|---|---|---|---|
| Tuner | the receiver's satellite tuners, for example “A: DVB-S2 NIM (simple mode)” | the first satellite tuner | The tuner whose settings you see. Next to the name, its mode is shown: simple or advanced. With a single satellite tuner, the row only shows it. When the receiver has several satellite tuners. |
| Dish | USALS motor, all satellites, a single LNB, without DiSEqC, a single LNB, with DiSEqC on port A, toneburst A/B, DiSEqC A/B switch, DiSEqC A/B/C/D switch, LNBs: … (advanced mode) | Read-only: how the dish is connected, according to “Tuner settings”. It is changed in “Tuner settings” (MENU 2 1). | |
| LNB | “Port A: …”, “Port B: …” (switch), “LNB 1: …”, “Motor: all satellites” (advanced mode) | the first LNB | Appears only when the dish has several LNBs: you choose the LNB whose rows you see below. When you want to change another LNB. |
| LNB type | Universal (9750/10600, threshold 11700), Single oscillator 10750 (Ku), C band (5150), Custom, Unicable (changed in Tuner settings), read-only | Universal (9750/10600, threshold 11700) | Which LNB you have on the dish. Universal: almost all Ku dishes. Single oscillator: old LNB with a single frequency. C band: large C band dishes. Custom: you enter the values from the LNB label. In simple mode, the receiver works only with a universal LNB: another type switches the tuner to advanced mode, with the same satellites and the same motor, and the “What changes” window tells you so. Only when the LNB label says something other than 9750/10600. |
| Low oscillator (MHz) / High oscillator (MHz) | a number, from the LNB label | the values of the previous type (9750 and 10600 for universal) | Only with the Custom type. The local oscillator frequencies, written on the LNB. The low oscillator cannot be 0, and the high one cannot be lower than the low one. When the LNB has oscillators other than the known ones. |
| Band threshold (MHz) | a number, for example 11700 | 11700 for universal | Only with the Custom type. Above this frequency, the receiver uses the high oscillator and turns on the 22 kHz tone. When the LNB has a different threshold. |
| Voltage | by polarization (13 V / 18 V), always 13 V, always 18 V, differs per satellite (left as they are) | by polarization (13 V / 18 V) | The voltage sent to the LNB: 13 V selects vertical polarisation, 18 V horizontal. Leave it on “by polarization”, unless a switch needs something else. In simple mode it is read-only. Rarely, for switches that need a fixed voltage. |
| 22 kHz tone | by band, always on, always off, differs per satellite (left as they are) | by band | The 22 kHz tone selects the high band on a universal LNB or the output of a 22 kHz switch. In simple mode it is read-only. When you use a 22 kHz switch. |
| Increased voltage (long cable) | yes, no | no | Only in advanced mode. Raises the voltage to the LNB slightly, for long cables. The tuner board decides by how much. When the cable to the dish is very long and the signal drops. |
| DiSEqC port | none, A, B, C, D, Input 1 … Input 16, 1.2, motor (read-only), toneburst A or B (read-only) | according to “Tuner settings” | The DiSEqC switch port this LNB is connected to. It can be changed here only in advanced mode, for LNBs with DiSEqC 1.0 or 1.1; otherwise it is read-only. When you have moved the LNB to another input of the switch. |
| DiSEqC commands at 13 V | yes, no | no | Sends the DiSEqC commands at 13 V. Some switches and motors need this. When a switch or a motor does not respond to commands. |
| Test calculation | “satellite, frequency and polarisation: IF … MHz, … V, tone on/off”, “…: cannot be tuned (IF outside 900-2200 MHz)” | Read-only. What the receiver does for a transponder on this satellite (the channel that is playing, if it is on this LNB): the intermediate frequency that goes down the cable, the voltage and the tone. An intermediate frequency outside 900-2200 MHz means the chosen type does not fit. |
Keys
| UP / DOWN | Moves the cursor to the row above or below; the explanation under the list changes. |
| LEFT / RIGHT | Changes the value of the selected row. On “Tuner”, selects the tuner. |
| 0 ... 9 | On the number rows (the oscillators, the threshold), they enter the digits. |
| OK or GREEN | “Save”: if you have changed something, it opens the “What changes” window. With no changes, it shows “You have not changed anything.”. |
| YELLOW | “What it was before”: prepares the return to the settings from before the last change made here, again through “What changes” and the signal test. |
| RED or EXIT | “Close”. With unsaved changes, it asks “Close without saving?” (set to No by default). During the test or the question, the key says “Go back to what it was” and restores the previous settings. |
| In “What changes”: UP / DOWN / LEFT / RIGHT | Scrolls the text one page at a time. |
| In “What changes”: GREEN or OK | “Apply”: puts the new settings in place and starts the signal test. |
| In “What changes”: RED or EXIT | “Back”: takes you back to the screen without any change. |
| At the question “Keep the new settings?” | Choose with the arrow keys and OK: “Yes, keep the new settings” or “No, go back to what it was”. The cursor is on Yes only if the test received a signal. If there is no answer within 60 seconds, the receiver goes back by itself. |
Step by step
Changing the LNB type
- Press MENU 2 2. The cursor is on “LNB type”.
- Choose the type with LEFT or RIGHT and look at “Test calculation”: the intermediate frequency must be between 900 and 2200 MHz.
- Press GREEN and read everything that changes in “What changes”, then press GREEN (“Apply”).
- Wait for the signal test. If the picture has come back, answer “Yes, keep the new settings”; if not, “No, go back to what it was”.
Setting up an LNB with its own values
- On “LNB type”, choose “Custom”.
- Go down to “Low oscillator (MHz)”, “High oscillator (MHz)” and “Band threshold (MHz)” and enter the values from the LNB label with the digit keys.
- Save with GREEN, apply and confirm after the test.
Going back to the previous settings
- Press YELLOW (“What it was before”).
- Read what is being undone and press GREEN (“Apply”).
- Confirm after the test.
Changing the LNB from your phone
- Open the receiver's web interface and go to /antena/lnb.
- Choose the type and the other values; “Test calculation” changes here too.
- Press “See what changes”, read the list (with “Details” for the technical values) and press “Apply”.
- In the “Signal check” card, answer “Yes, keep the new settings” or press “Go back to what it was”. The test is done on the channel playing on the TV.
Problems and solutions
There is no GREEN key and the status line says “Tuner … is not configured. Configure it in Tuner settings first.”
The tuner is set to “nothing connected” or has no settings. Open Tuner settings (MENU 2 1), set how the dish is connected, then come back.
The status line says “No satellite is connected to tuner …. Choose the satellites in Tuner settings.”
The tuner has no satellites. Choose them in Tuner settings (MENU 2 1).
The status line says “Tuner … uses the settings of tuner ….”
The tuner is connected through another tuner. Change the LNB on the tuner named in the message.
When saving, “The low oscillator cannot be 0.” or “The high oscillator cannot be lower than the low one.” appears
Enter the values from the LNB label again.
When saving, “The “…” screen is open on the TV. Close it, then try again.” or “A recording is in progress. …” appears
Another screen or a recording is using the tuner. Close the screen named or wait for the recording to end, then save again.
The test says “No signal on … with the new settings.”
The chosen type does not match your LNB. Answer “No, go back to what it was” (or wait 60 seconds) and choose another type.
The test says “I could not check the signal: no satellite channel was running on this tuner.”
First start a satellite channel from this LNB, then make the change again. Without a test, you decide yourself whether to keep the settings.
The status line says “Save or discard the changes on tuner … first.”
You have unsaved changes on the current tuner. Save them with GREEN or exit without saving, then switch to another tuner.
I cannot change the voltage, the tone or the port.
In the tuner's simple mode they are read-only. They can be changed in Tuner settings or, from here, once the tuner has switched to advanced mode.
Related topics
- Dish alignment and setup
- Tuner settings (the switch, the satellites, the motor)
- Signal finder
- DiSEqC test
- Matching web page: /antena/lnb.
Differences between receivers
On the Amiko Viper 4K V20, the receiver has a single satellite tuner (A), so the “Tuner” row only shows it.