

Scheduled recordings
Screenshots are being added: so far 2 from the receiver and 7 from the web interface; the aim is at least 5 of each, with arrows and frames, and, where a setting changes what you see, a before and after comparison.
English screenshots coming: some of the pictures below still show the receiver and the web interface in Romanian. The rows, keys and steps described on this page are the English ones.
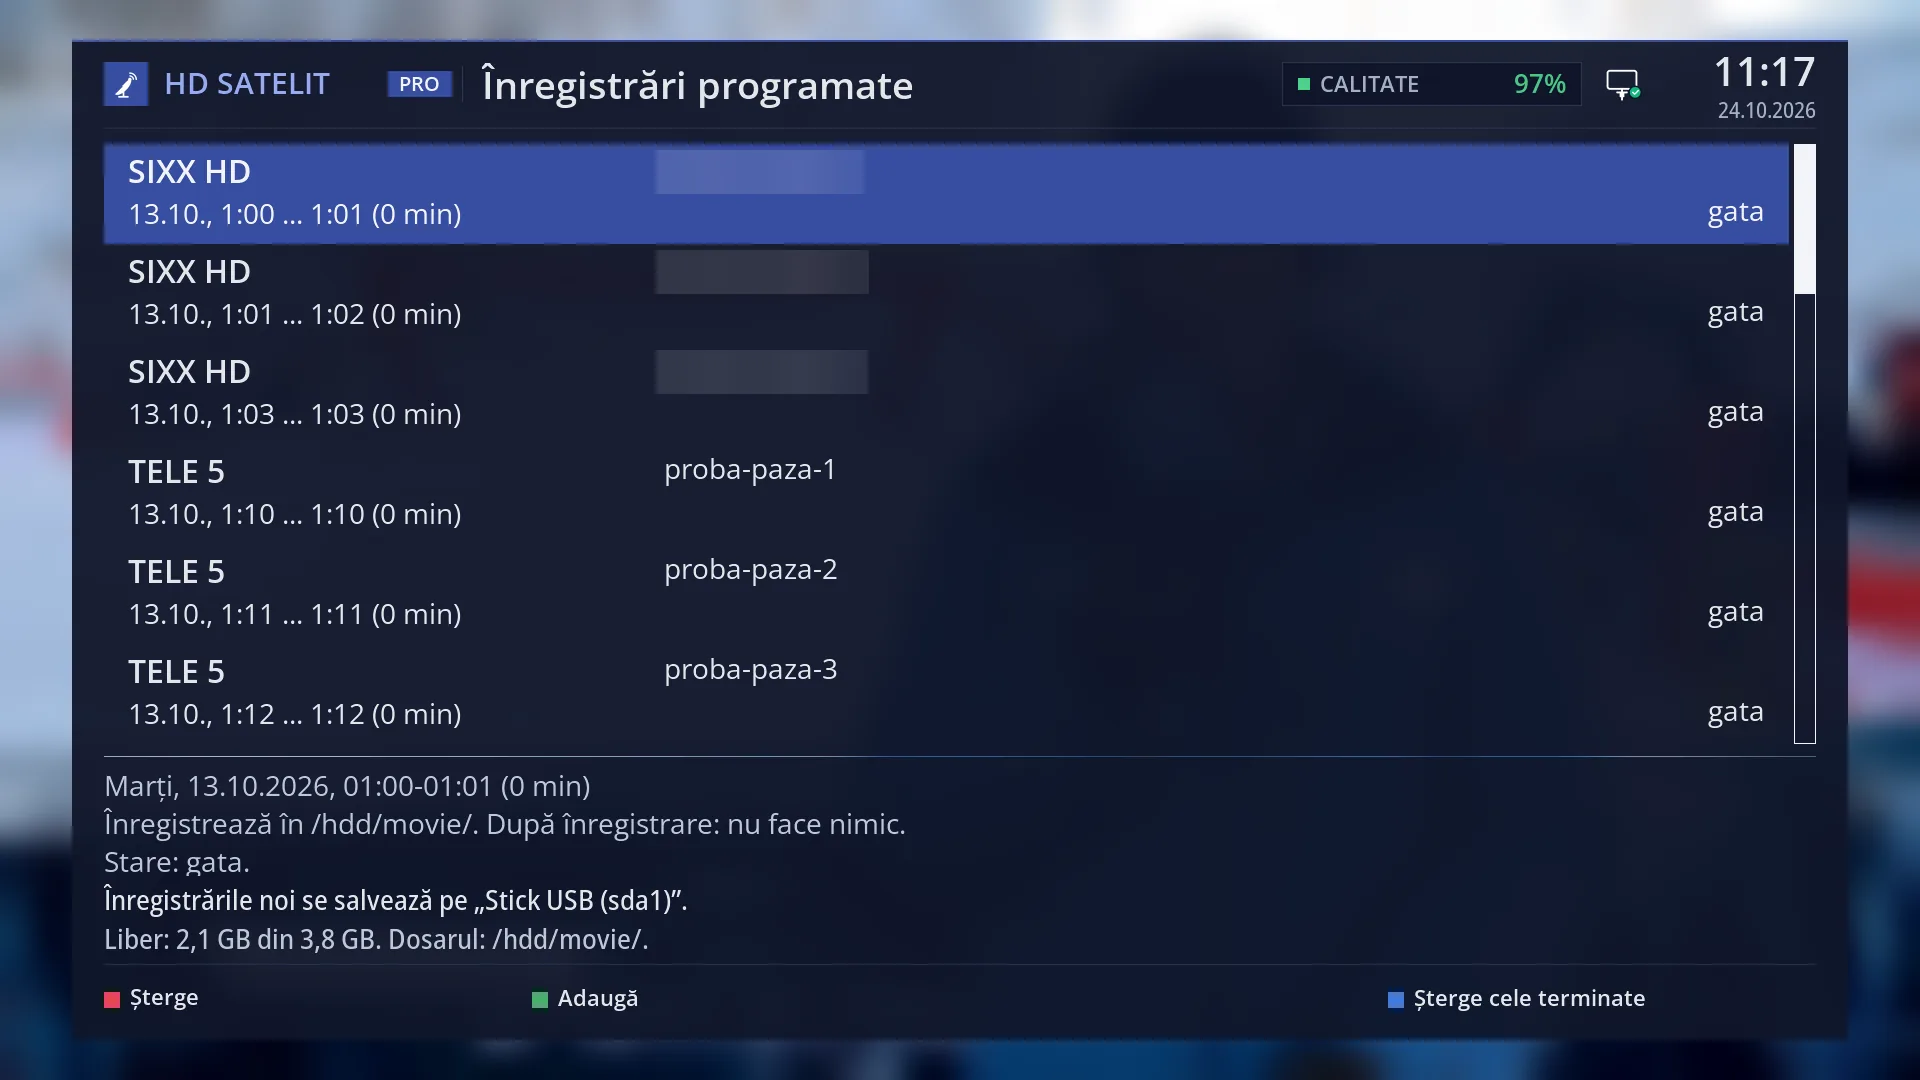
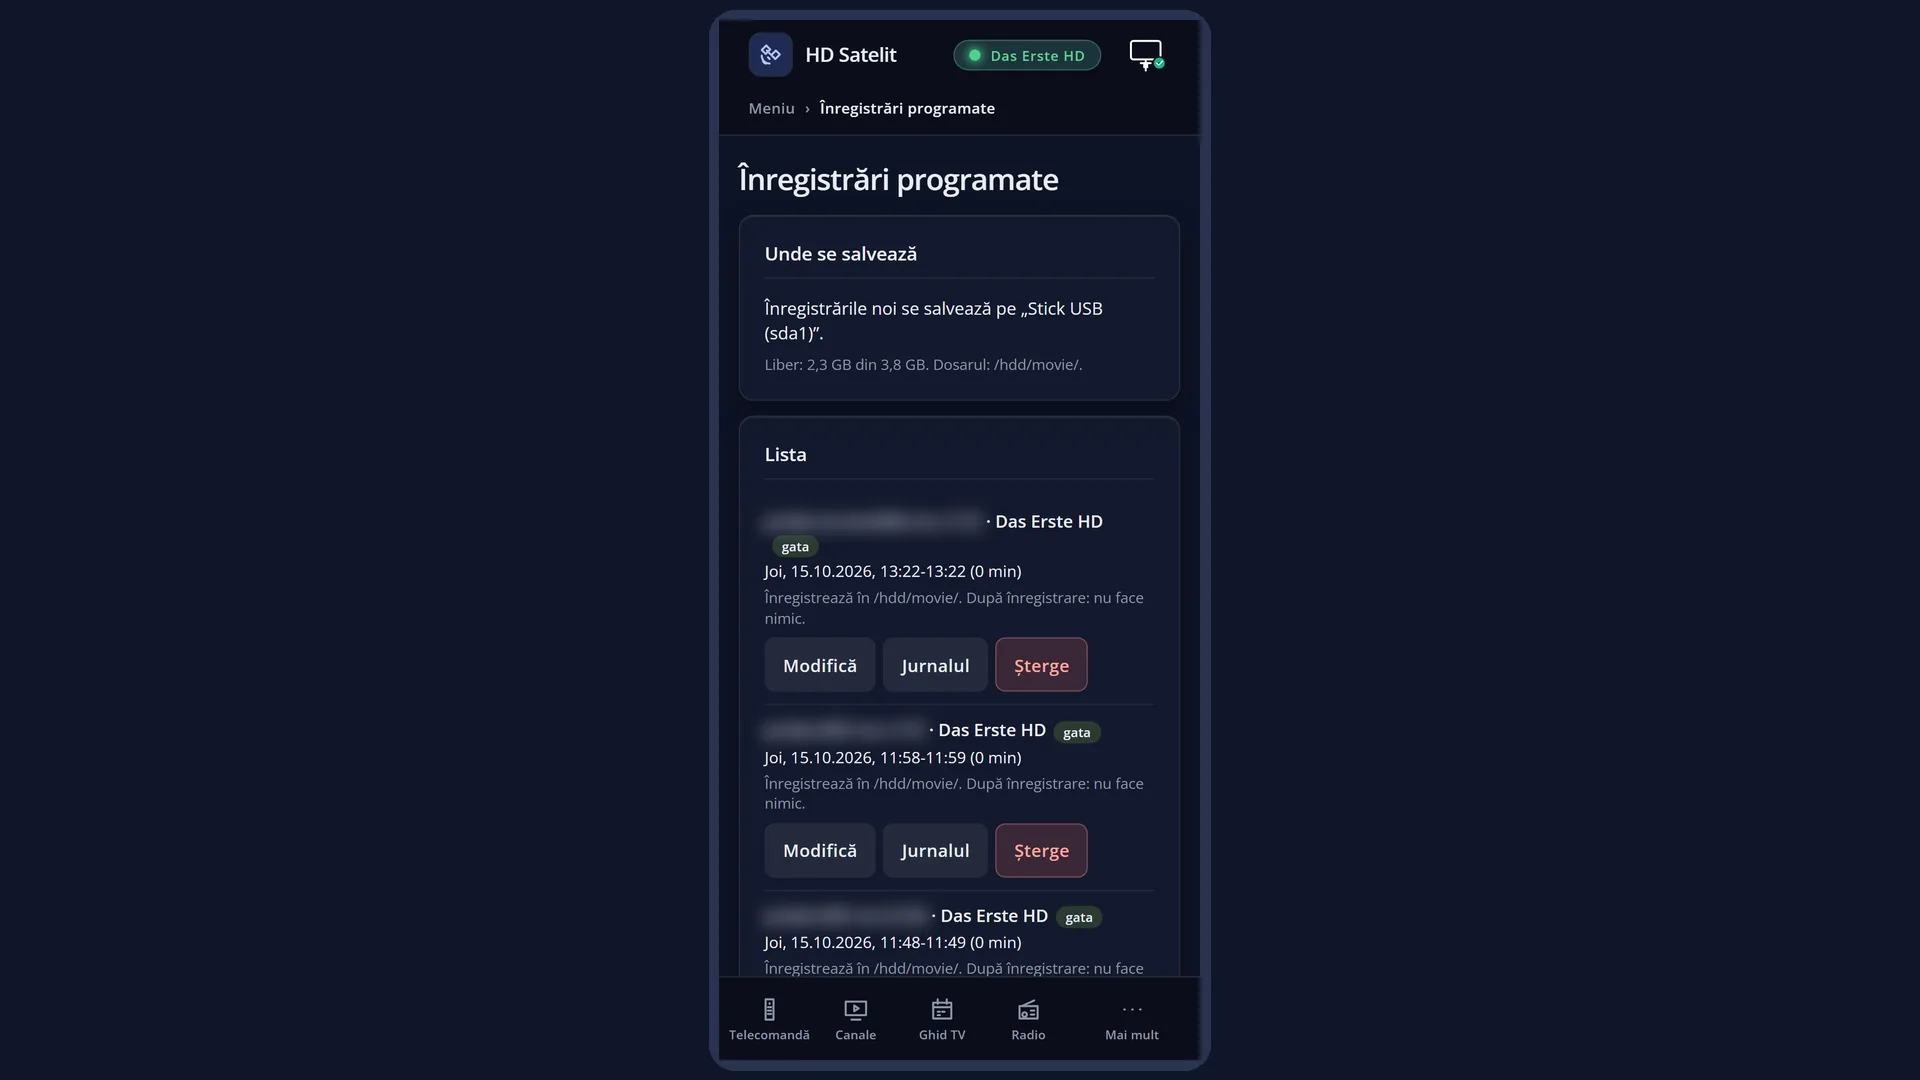
- 1 The recordings: the channel and name, then the day and times; the status on the right.
- 2 Details of the selected one: when, what it does and where it saves, the status.
- 3 Where new recordings are saved and how much free space is left.
- 4 RED deletes, GREEN adds, YELLOW stops or starts, BLUE deletes finished ones.
What it is for
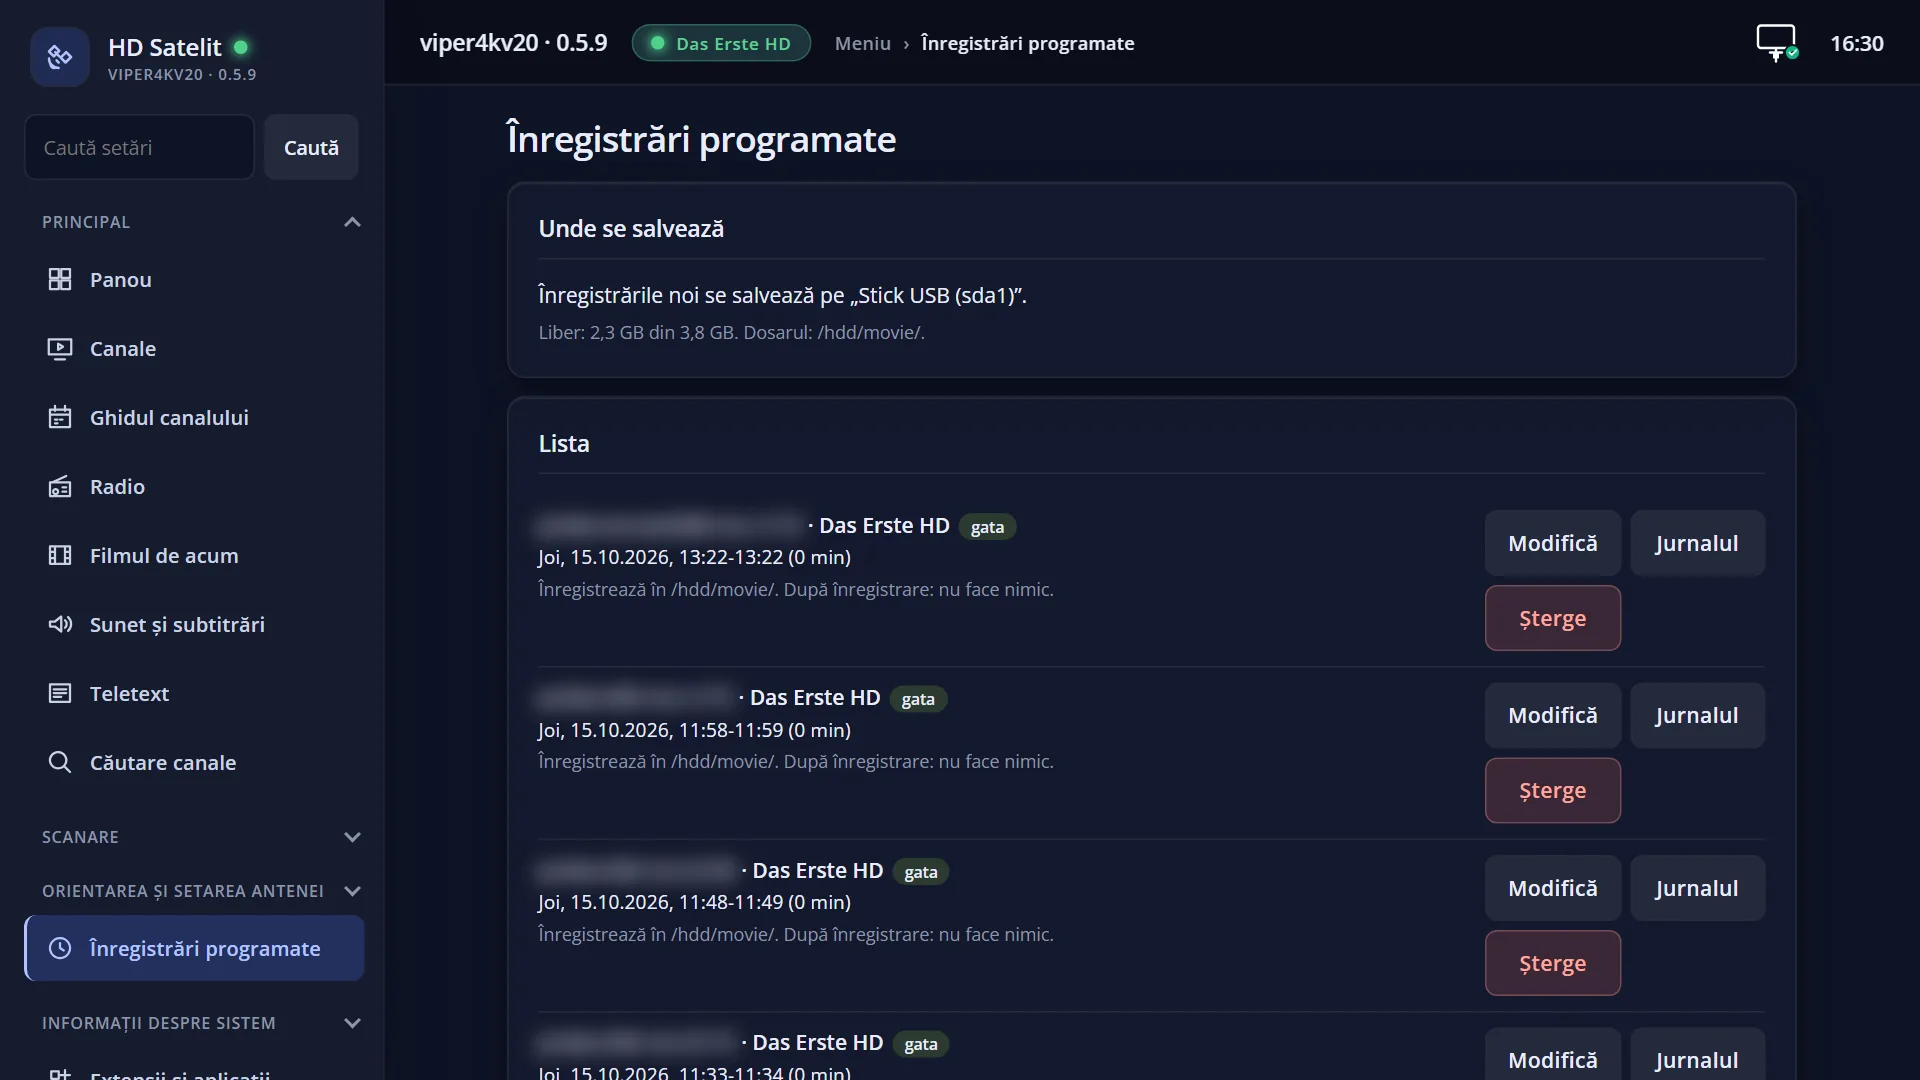
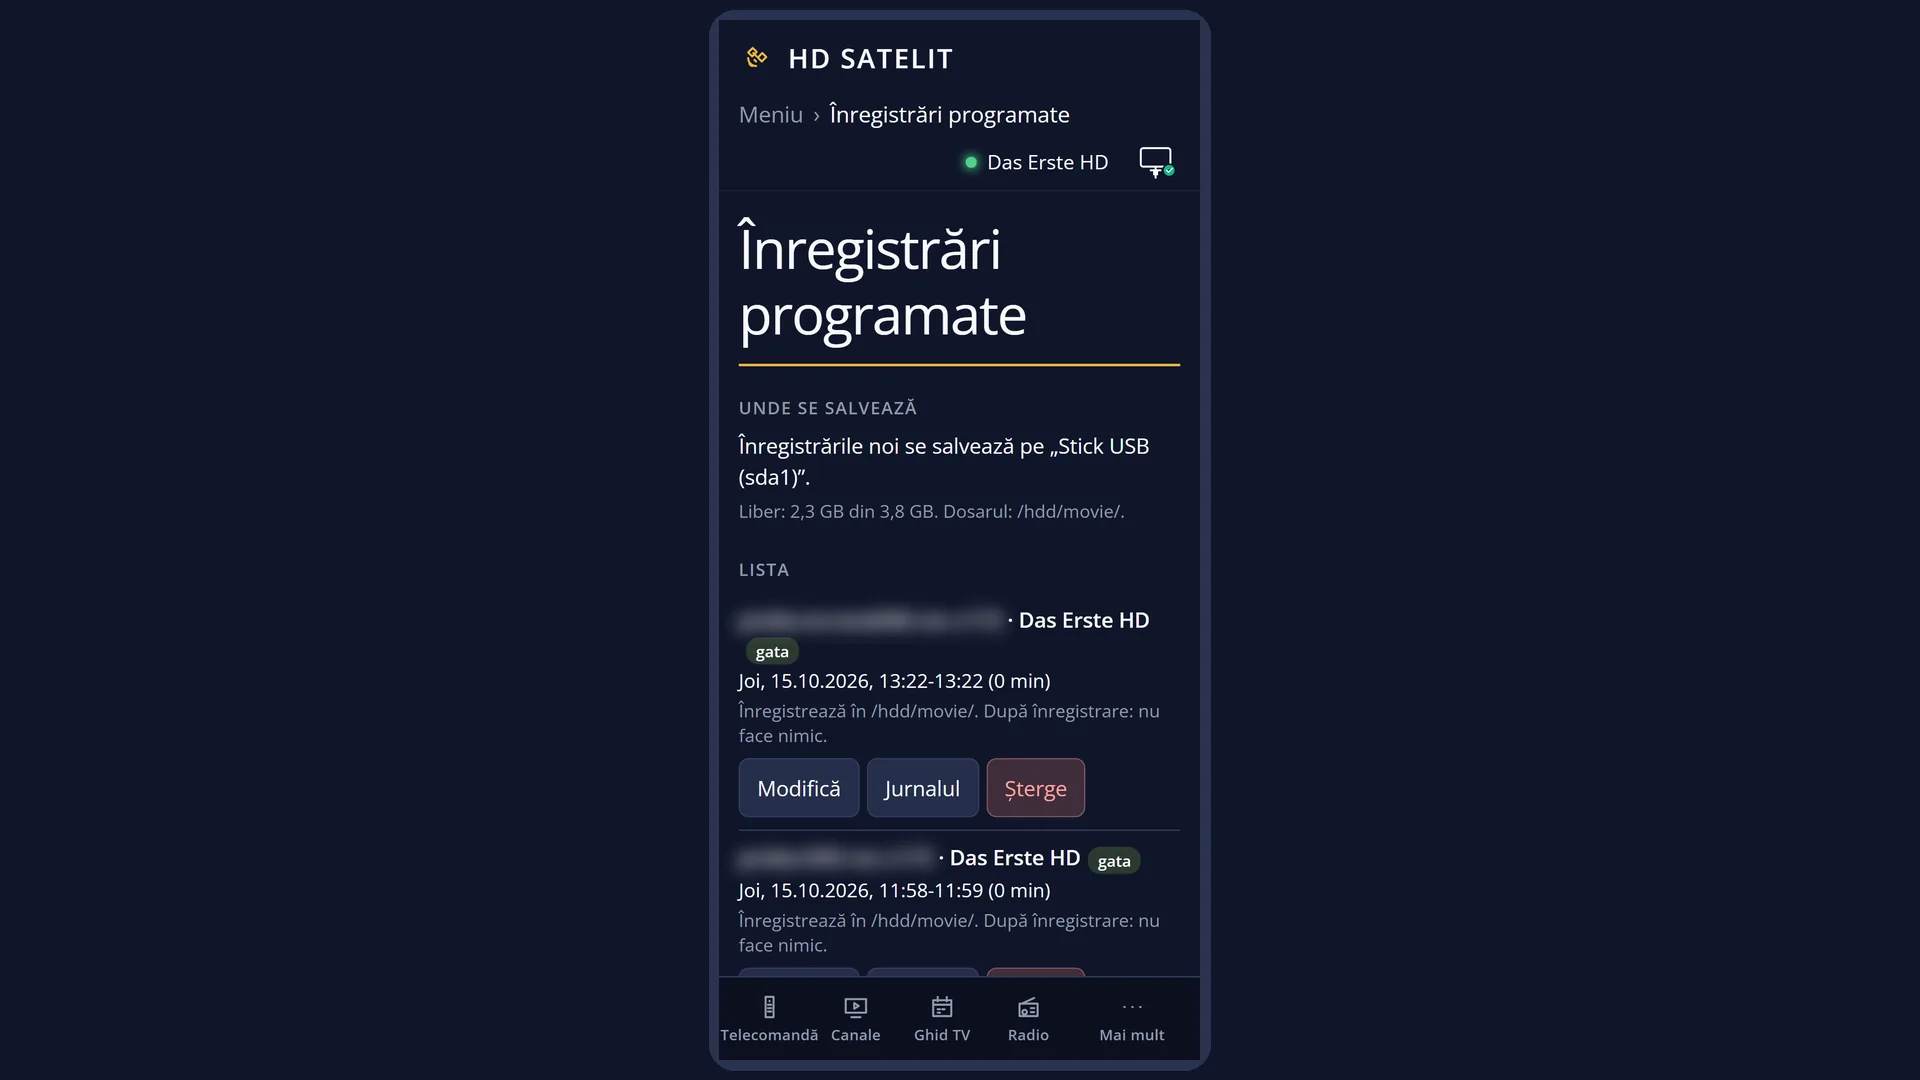
This screen lists all your scheduled recordings: what will be recorded (or which channel the receiver switches to by itself), on which channel, when, and the status of each one. From here you add a new one, change one, stop one for a while or delete it.
Below the list you see the details of the selected one and where new recordings are saved, with the free space. This way you find out in good time if the USB stick or hard disk is missing or full.
A scheduled recording starts by itself at its set time, even with the receiver in standby. Afterwards, the receiver does what you chose under “After recording”.
You can also set scheduled recordings from the programme guide (you choose the programme), from the second bar and from the web interface. They all end up in this list.
You do everything with just the arrow keys and OK: OK on a recording opens the short list of everything you can do with it.
How to get here
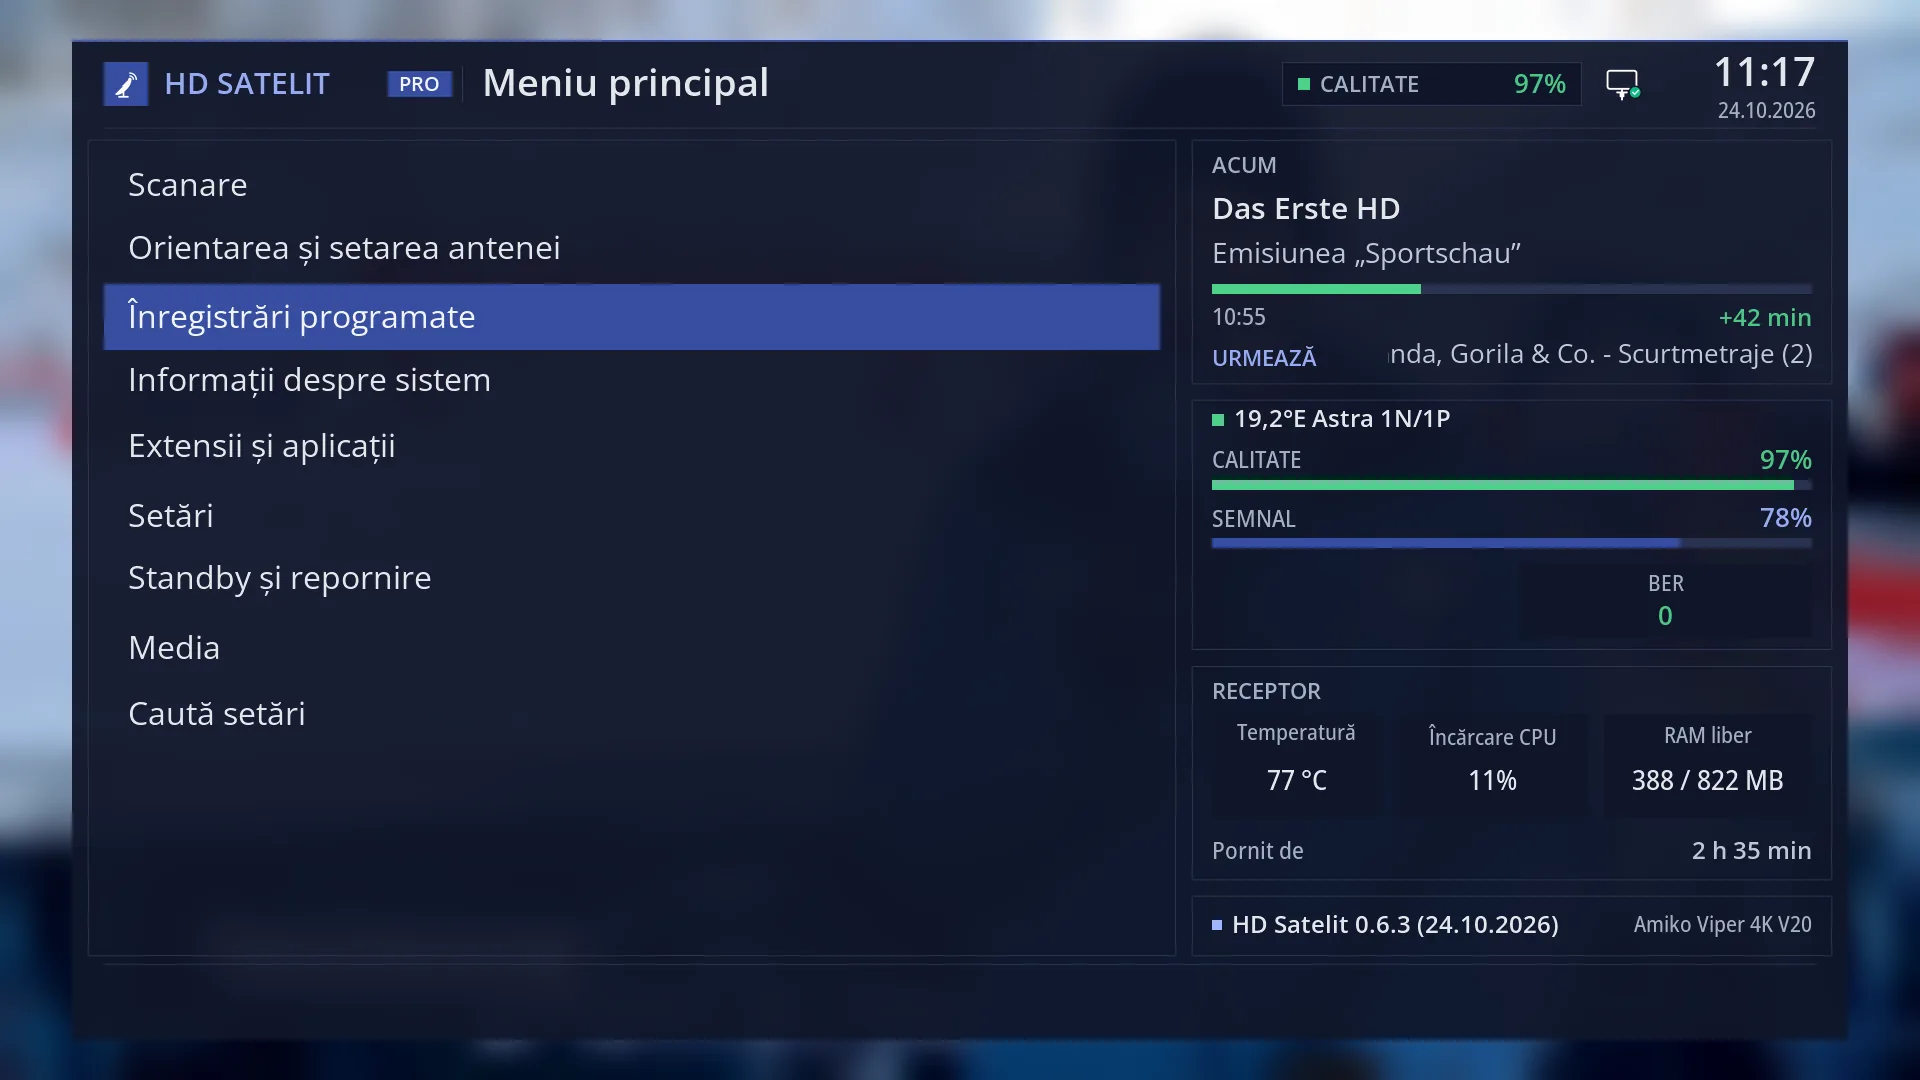
Path: Main menu > Timers & Recordings.
Keys while watching: MENU 3, or the TIMER key directly (on live TV or radio).
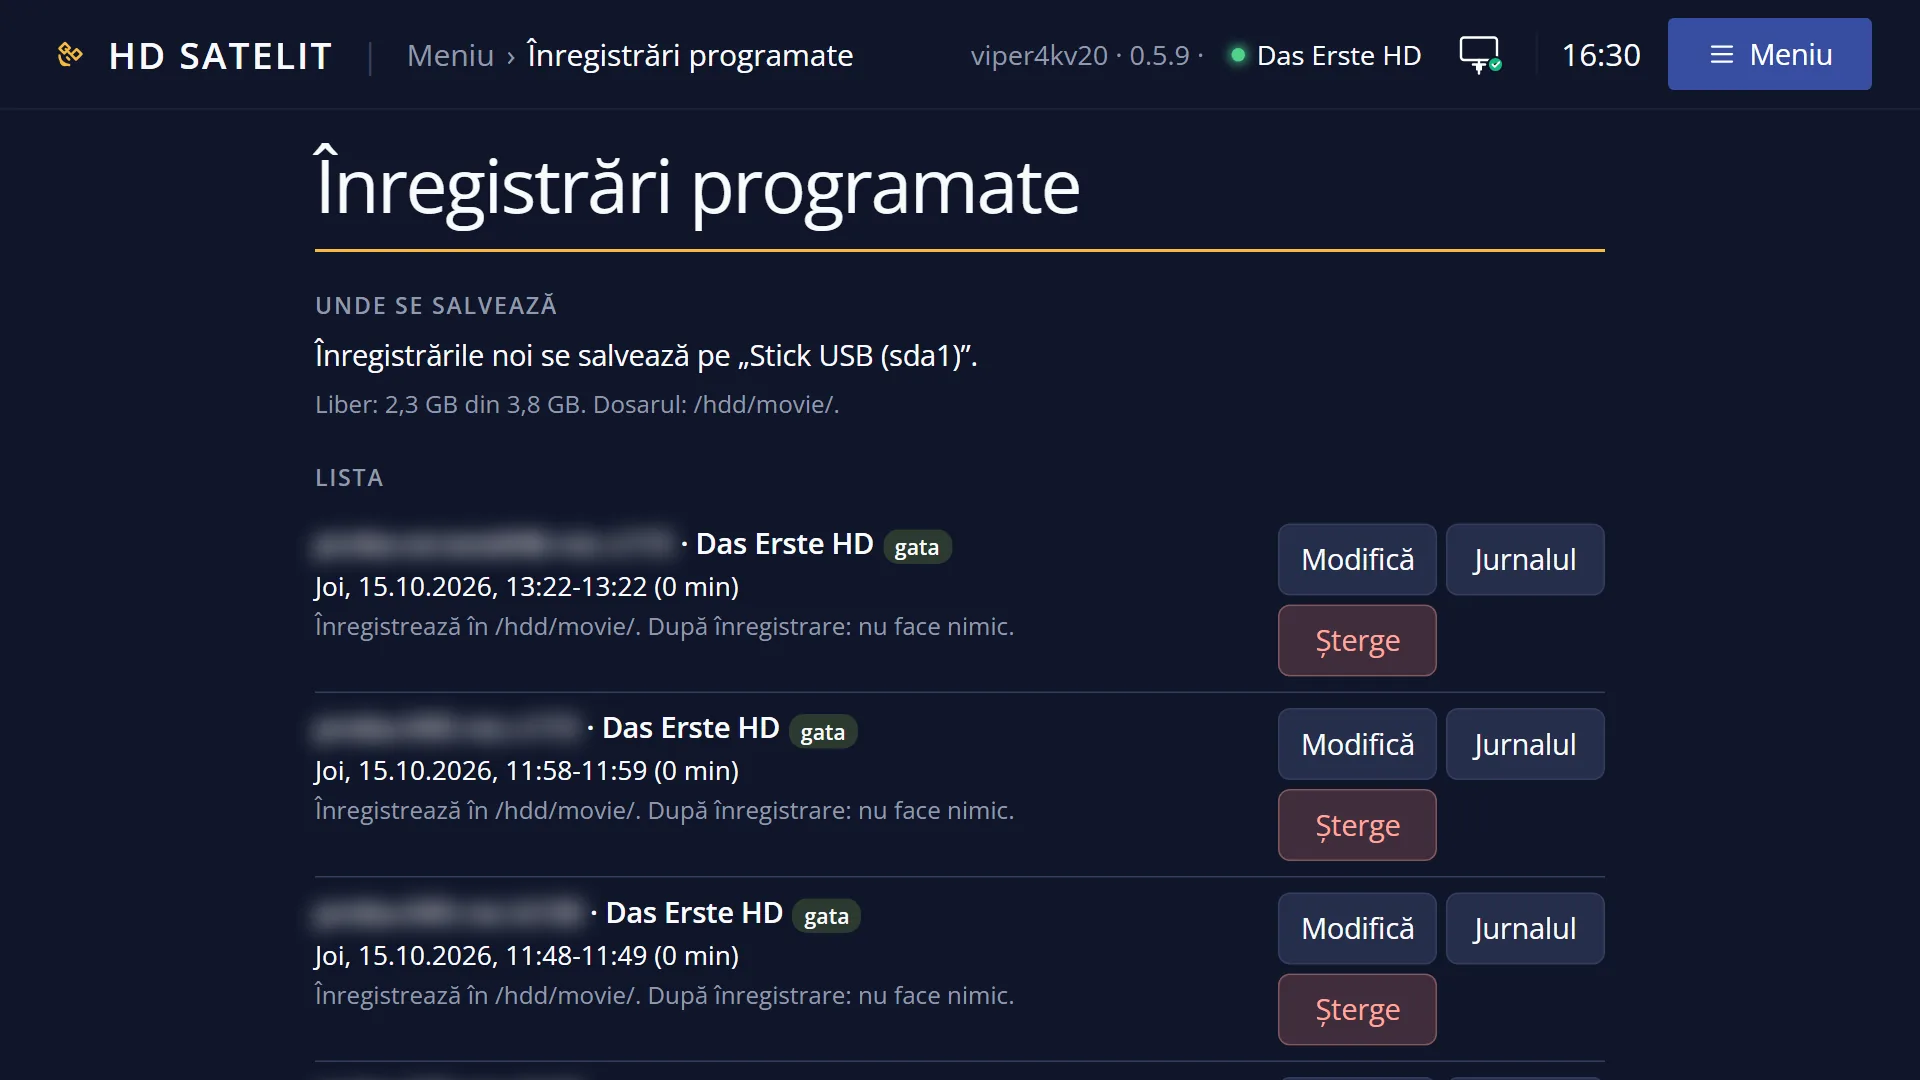
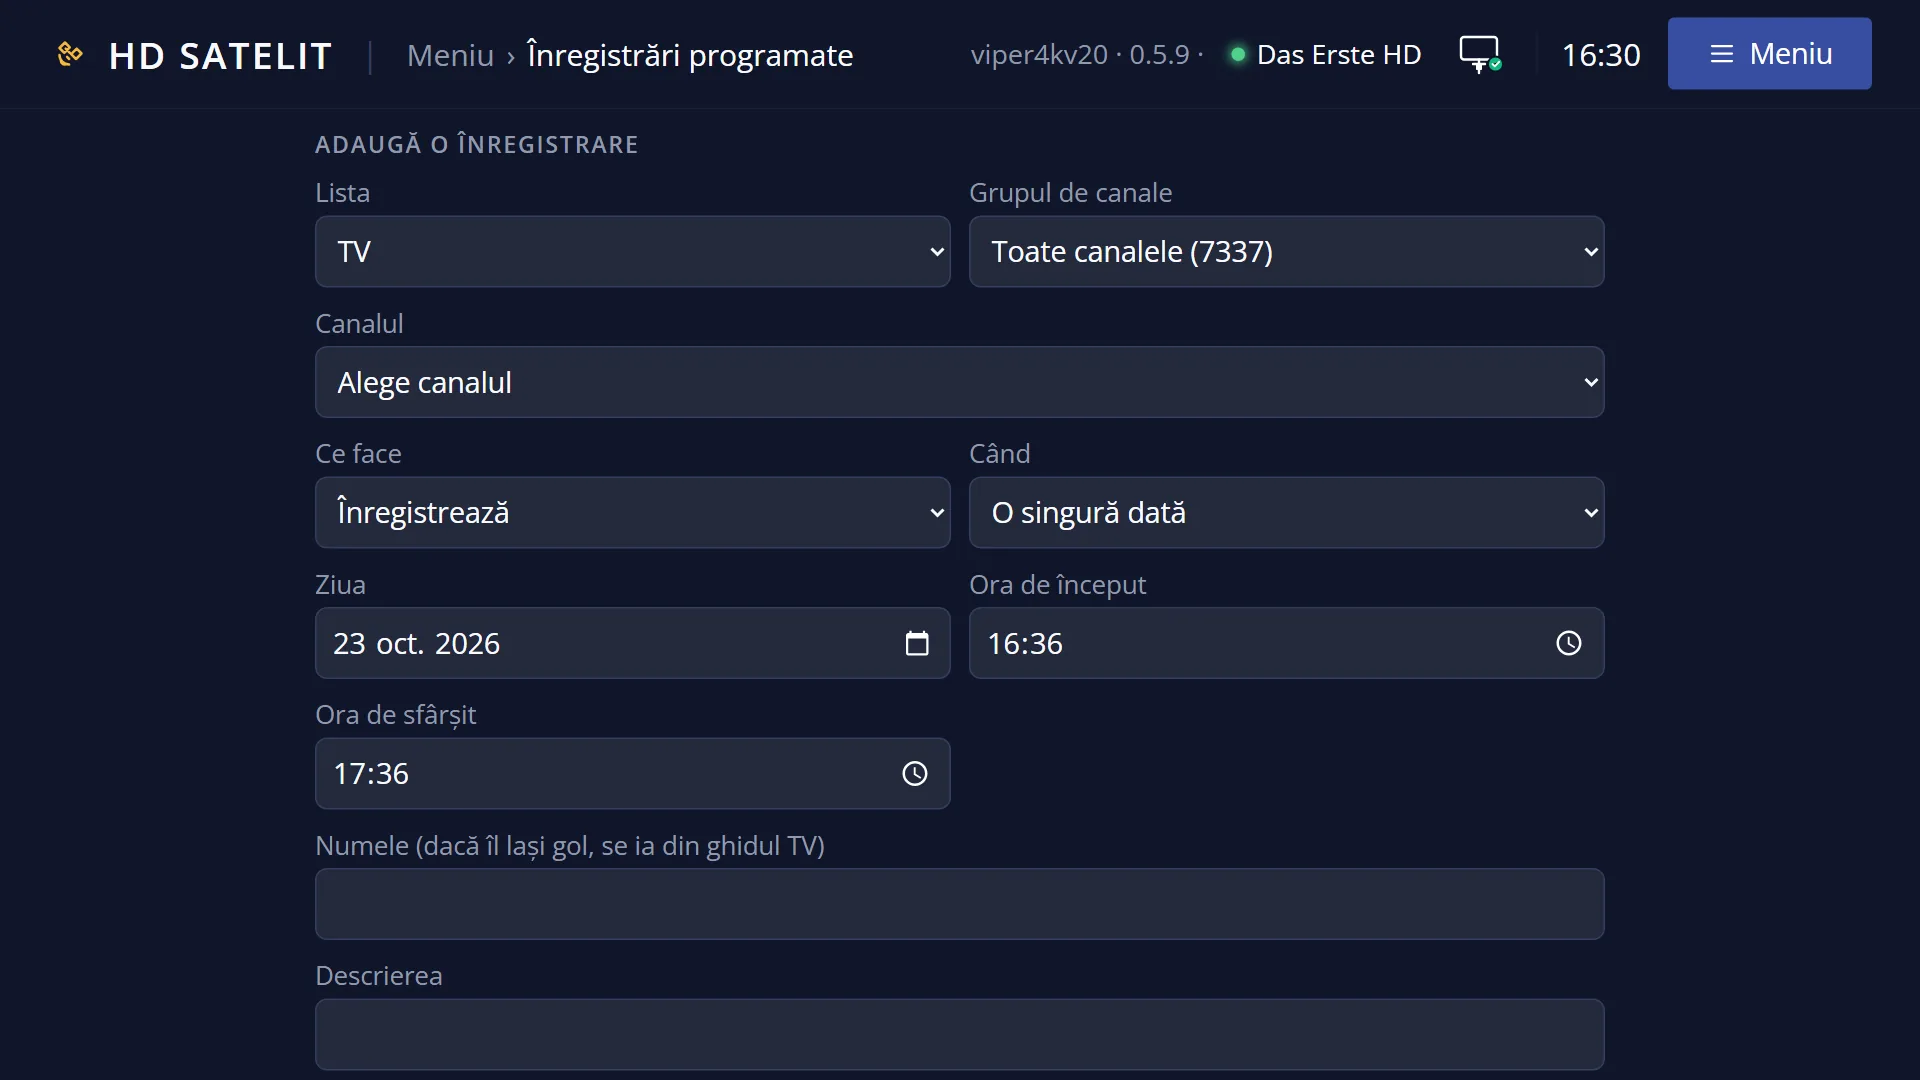
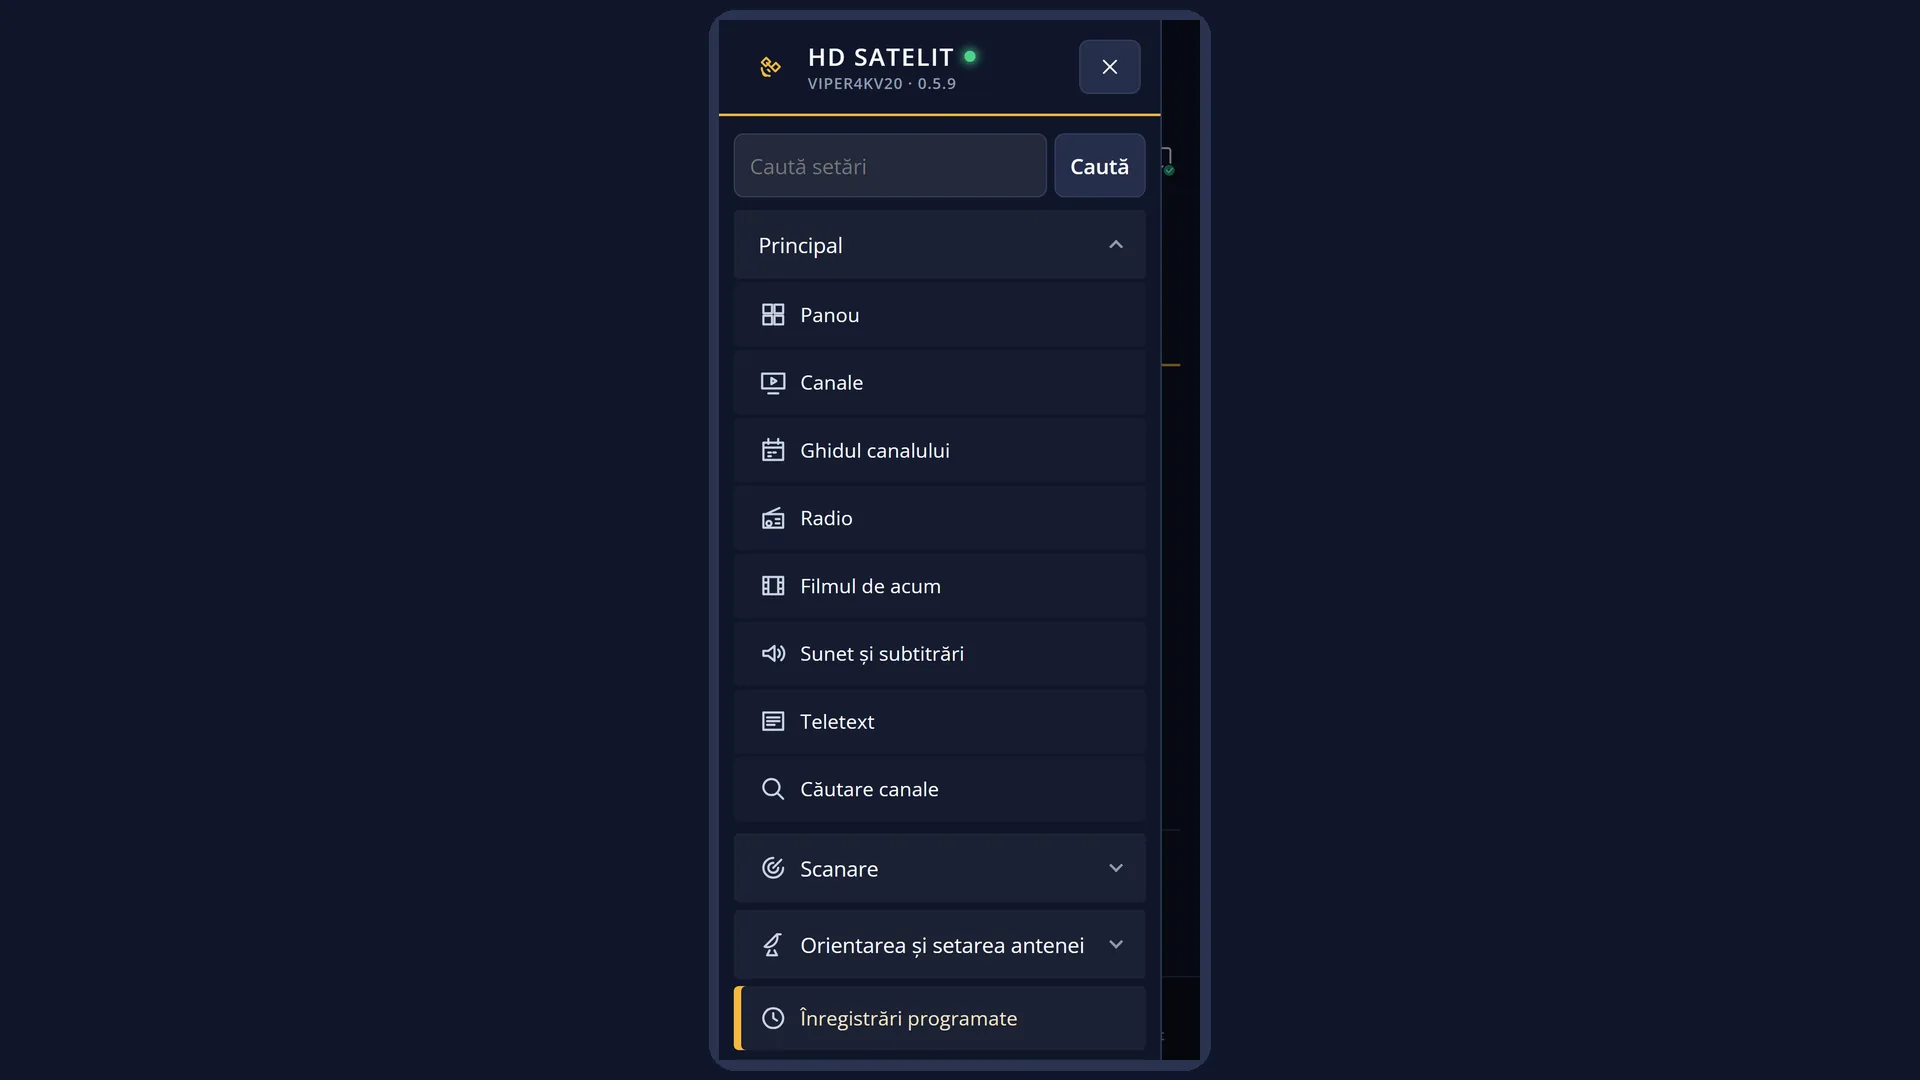
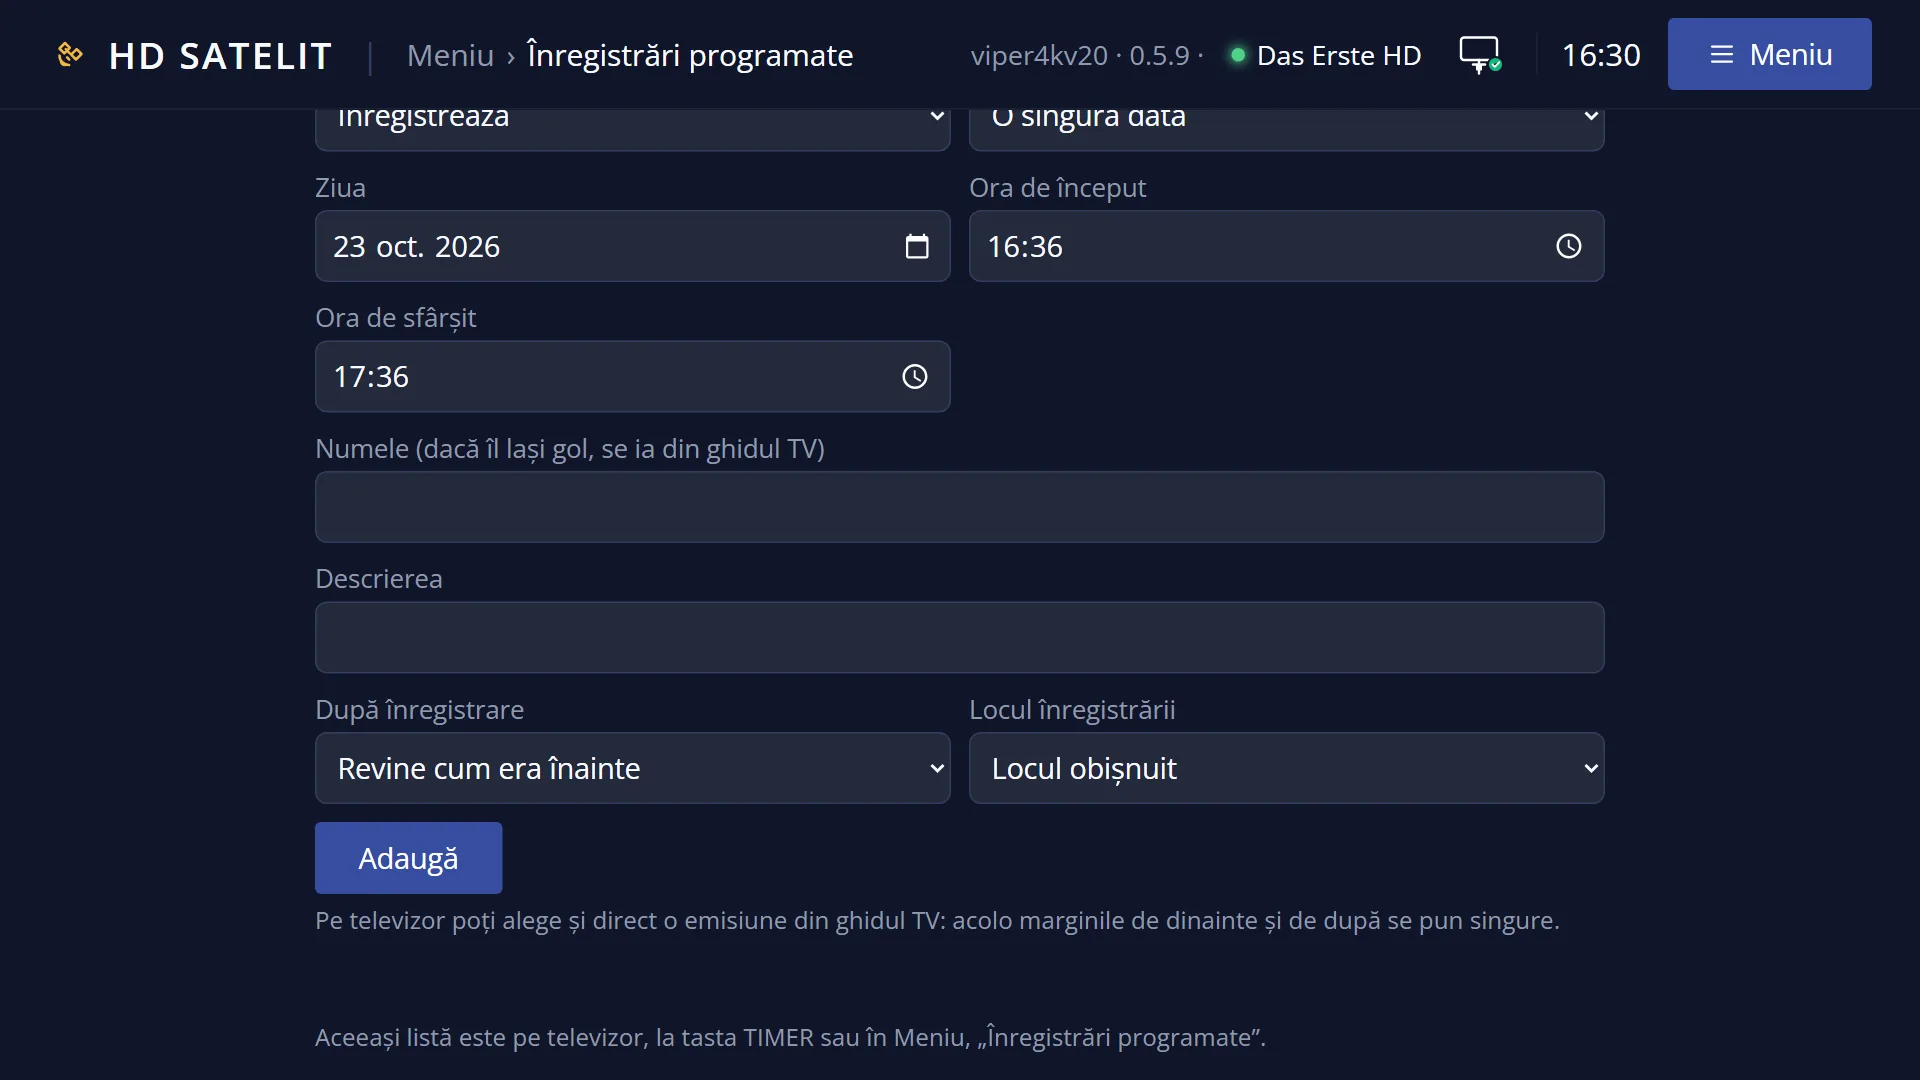
In the web interface: the /temporizatoare page (the same list, with adding, editing, stopping, deleting and the log).
What you see on the screen
At the top: the title “Scheduled recordings”, the clock and the date.
The list, with each recording on two lines. Top line: the channel and, to its right, the name of the recording (usually the programme title). Bottom line: the day and times, for example “Today, 21:00 ... 22:30 (90 min)”, “Mon, 20:00 ... 21:00 (60 min)” in the coming week or “13.10., 1:00 ... 1:30 (30 min)” later on. For a repeating one, the days come first (for example “Mon, Wed, Fri”). For one that does not record, it says “only switches the channel”. The selected line is blue.
To the right of each recording is its status: “waiting”, “about to start”, “Recording...”, “zapped” (it switched to the channel without recording), “done”, “disabled” (with a red X, stopped by you) or “does not start” (the time has passed and the attempt failed).
The list is sorted by start time. Finished ones are at the beginning or at the end, depending on the setting “Position of finished Timers in Timerlist”.
Below the list, on three lines, are the details of the selected one: the day and times (for example “Tuesday, 13.10.2026, 21:00-22:30 (90 min)” or “Repeats: Monday to Friday, 21:00-22:30 (90 min)”), what it does (“Records to <folder>. After recording: goes back to what it was before.” or “Only switches the channel, does not record.”) and the status, with the beginning of the programme description (“Status: waiting. …”). For one that does not start, it says why, for example “Does not start: I have nowhere to record. I will try again.”.
Underneath is where new recordings are saved: for example “New recordings are saved on ‘USB stick (sda1)’.” and “Free: 2.3 GB of 3.8 GB.”. When there is no USB stick or hard disk, the line is yellow: “There is nowhere to record to. Connect a USB stick or a hard disk.”, then “OK opens the menu, with ‘Recordings location’.”. With several disks: “Several disks were found. At the first recording you will be asked which one to save on.”.
An empty list says in the middle: “You have no scheduled recordings. Press GREEN to add one, or choose a programme in the TV guide.”.
At the bottom are the keys, only those that make sense on the selected line: RED “Delete”, GREEN “Add”, YELLOW “Stop” or “Start”, BLUE “Delete finished”.
Rows and settings
| Row | Values | Default | What it does |
|---|---|---|---|
| Name (in the window of a recording) | free text | the programme title from the guide, when you choose it from there | The name it appears under in the list and in the film list. OK opens the on-screen keyboard. When you want to find the recording easily later. |
| Description | free text | empty | A note about the programme. OK opens the keyboard. If you want a note of your own. |
| What it does | Record, Only switch channel | Record | Record: the programme is saved to the USB stick or hard disk. Only switch channel: at the chosen time the receiver switches to the channel without recording (useful so you do not miss the start of a programme). The lines below change depending on your choice. When you only want the channel put on for you at the right time. |
| When | Once, Repeats | Once | Once, on the chosen day, or repeatedly. With “Repeats”, the lines “Days” and “Starting from” appear. For a series or the news at the same time. |
| Days (only with “Repeats”) | Every day, Once a week, Monday to Friday, On chosen days | Every day | Which days it repeats on. With “Once a week”, the line “Weekday” appears. With “On chosen days”, one line per day appears (Monday ... Sunday), each with yes or no. When the programme is not on every day. |
| Starting from (only with “Repeats”) | a day, for example “Saturday, 24.10.2026” | the day of the programme | The first day the repetition starts from. LEFT and RIGHT change the day. When you want the repetition to start later. |
| Day (only with “Once”) | a day, for example “Tuesday, 13.10.2026” | the day of the programme (or today) | The day it starts. LEFT and RIGHT change it one day at a time. For a programme on another day. |
| Start time | hour and minute | the start of the programme; without a guide, in 5 minutes | The time it starts. LEFT and RIGHT change it one minute at a time, and with the digits you type the time directly. VOL+ / VOL- also move the start time by one minute, from any line. To catch the start of the programme too, if it begins earlier. |
| Has an end time (only with “Only switch channel”) | yes, no | yes for a new recording; no for a channel switch set without an end time | Yes: the time the programme ends is also stored; the receiver stays on the channel afterwards too. No: only the time it switches channel is stored. When you want to see in the list how long the programme lasts. |
| End time | hour and minute | the end of the programme; without a guide, one hour after the start | The time the recording stops. A time earlier than the start time means the next day. LEFT and RIGHT change it one minute at a time, and CH+ / CH- move the end time from any line. So you do not miss the end, if the programme may run over. |
| Channel | a channel from the list | the channel you are watching | The channel to record from. OK (or LEFT / RIGHT) opens the channel list so you can choose another. If no channel is playing, the line says “Press OK and choose the channel”. When you schedule a programme other than the one on the current channel. |
| Recording location (only with “Record”) | the recording folders the receiver knows about | the usual recordings location | The folder the recording is saved to. OK opens the folder selection (it needs at least 100 MB free). The location and the free space are shown below the list. When you want the recording on another disk or in another folder. |
| After recording (only with “Record”) | Goes back to what it was before, Does nothing, Go to standby, Turns off completely | Goes back to what it was before | What the receiver does after recording. “Goes back to what it was before”: if it was off and only started for the recording, it turns off again. “Go to standby”: it goes into standby. “Turns off completely”: it shuts down completely. At night, so the receiver does not stay on after the recording. |
| Margin before record (minutes) / Margin after record (in OSD Preferences, MENU 6 6 5) | a number of minutes | 0 | How many minutes are added automatically before and after the programme chosen from the guide (or the current programme, with GREEN), so you do not miss the start or the end. When programmes often start earlier or finish later than in the guide. |
| Position of finished Timers in Timerlist (in OSD Preferences) | at beginning, at end | at beginning | Where finished ones sit in the list: mixed in by start time (at beginning) or all at the bottom. When you have many finished ones and want the upcoming ones at the top. |
Keys
| UP / DOWN | The recording above or below; hold them down to keep moving. The details at the bottom change. |
| LEFT / RIGHT | The page above or below. |
| OK | The short list of what you can do with the selected recording: “Edit”, “Stop” or “Start”, “Delete”, “Recording log”, “Add a recording”, “Delete finished” (when there are any) and “Recordings location”. On an empty list, with a valid location, it opens a new recording directly. |
| MENU | The same short list as OK. |
| GREEN | “Add”: the “New scheduled recording” window, on the current channel, with the current programme from the guide; without a guide, starting in 5 minutes, for one hour. |
| RED | “Delete”: asks “Delete the scheduled recording ‘…’?”; the default answer is No. |
| YELLOW | “Stop” a waiting recording (it stays in the list as “disabled”) or “Start” a stopped one again. For a repeating one that is running right now, it asks: “Stop now, but start next time”, “Stop now and do not start again” or “Let it run now, but do not start next time”. |
| BLUE | “Delete finished”, after the question “Remove the finished recordings from the list?”. The recorded files stay on the disk. |
| INFO | The “Recording log” of the selected one: what the receiver did with it, step by step. |
| HELP | A list of all the keys on this screen and what each one does. |
| EXIT | Closes the list. |
| In the window of a recording: GREEN / RED or EXIT | GREEN “Save”; RED “Cancel” or EXIT close without saving. OK on Name or Description opens the keyboard, on Channel the channel list, on Recording location the folder selection; on the other lines it saves. |
| In the window of a recording: VOL+ / VOL- and CH+ / CH- | VOL+ / VOL- move the start time, CH+ / CH- the end time, one minute at a time. |
| In the log: RED / BLUE / OK | RED “Delete the line”, BLUE “Clear the log”, OK the short list (Delete the line, Clear the log, Close). EXIT closes and keeps what you deleted. |
Step by step
Scheduling a recording manually
- Switch to the channel you want to record from, then press TIMER (or MENU 3).
- Press GREEN. “New scheduled recording” opens, with the current programme or with a start time in 5 minutes.
- Go down to “Day”, “Start time” and “End time” and adjust them with LEFT / RIGHT or with the digits.
- Check the bottom line: where it is saved and how much free space there is. Press GREEN to save.
Recording a series every weekday
- In the recording window, on “When”, press RIGHT: “Repeats”.
- On “Days”, choose “Monday to Friday” with RIGHT.
- Adjust the times and press GREEN. In the list, the recording shows the days first.
Finding out why a recording did not start
- Press TIMER and go to the recording with the status “does not start”. The cause is shown below the list (for example “I have nowhere to record”).
- Press INFO: the log shows every step, with the time, in plain language.
- If the disk is missing, connect the USB stick or hard disk; the receiver tries again by itself.
Problems and solutions
The bottom line is yellow: “There is nowhere to record to. Connect a USB stick or a hard disk.”
No USB stick or hard disk suitable for recordings is connected. Connect one, then press OK > “Recordings location” to select it. The receiver's internal memory is not used for recordings.
A recording shows “does not start”.
The details below the list give the cause: “I have nowhere to record” (the disk is missing), “no tuner can receive the channel” (a dish problem or the tuner is busy), “the recording could not start” or “the receiver could not prepare the recording”. The receiver tries again; INFO shows the log.
When you add a recording, the “Overlapping recordings” window appears.
The receiver cannot record them all at the same time. The new recording is at the top, with the ones it overlaps below. RED edits the new one, YELLOW the one selected below, GREEN and BLUE stop them. EXIT drops the new one and says “The recording ‘…’ was not set: it overlaps with …”.
It says “No tuner can receive this channel at the chosen time.”
The channel cannot be received with the current dish and tuners. Check the dish and the tuner settings, or choose another channel.
When you save, “This channel cannot be recorded.” appears with “Recording DVB-T2 programs from satellite is not possible yet.” (or “… DAB+ stations …”)
DVB-T2 programmes and DAB+ stations from satellite cannot be recorded yet. Press OK and choose another channel from the list.
When you save, “You have not chosen the channel. Choose it from the list.” appears
No channel was playing when you pressed GREEN. Press OK and choose the channel from the list.
At recording time, the receiver switched channel by itself.
The recording needed a tuner for a channel other than the one you were watching. With “Recordings always have priority” set to yes (the default), the receiver switches to the channel and says “In order to record a timer, the TV was switched to the recording service.”; with no, it asks first.
I stopped a repeating recording and it does not start next time either.
You chose “Stop now and do not start again” (or “Let it run now, but do not start next time”). Go to it and press YELLOW (“Start”).
I deleted the finished ones, but the films are still on the disk.
“Delete finished” only removes the lines from the list. You delete the recordings themselves from the film list (EMC key).
“The recording was deleted in the meantime, so the change was not saved.” appears.
Someone else deleted the recording from the web interface or from the guide while you were editing it. The list has been read again; add the recording again if you need it.