

Network Connection Setup
English screenshots coming: some of the pictures below still show the receiver and the web interface in Romanian. The rows, keys and steps described on this page are the English ones.
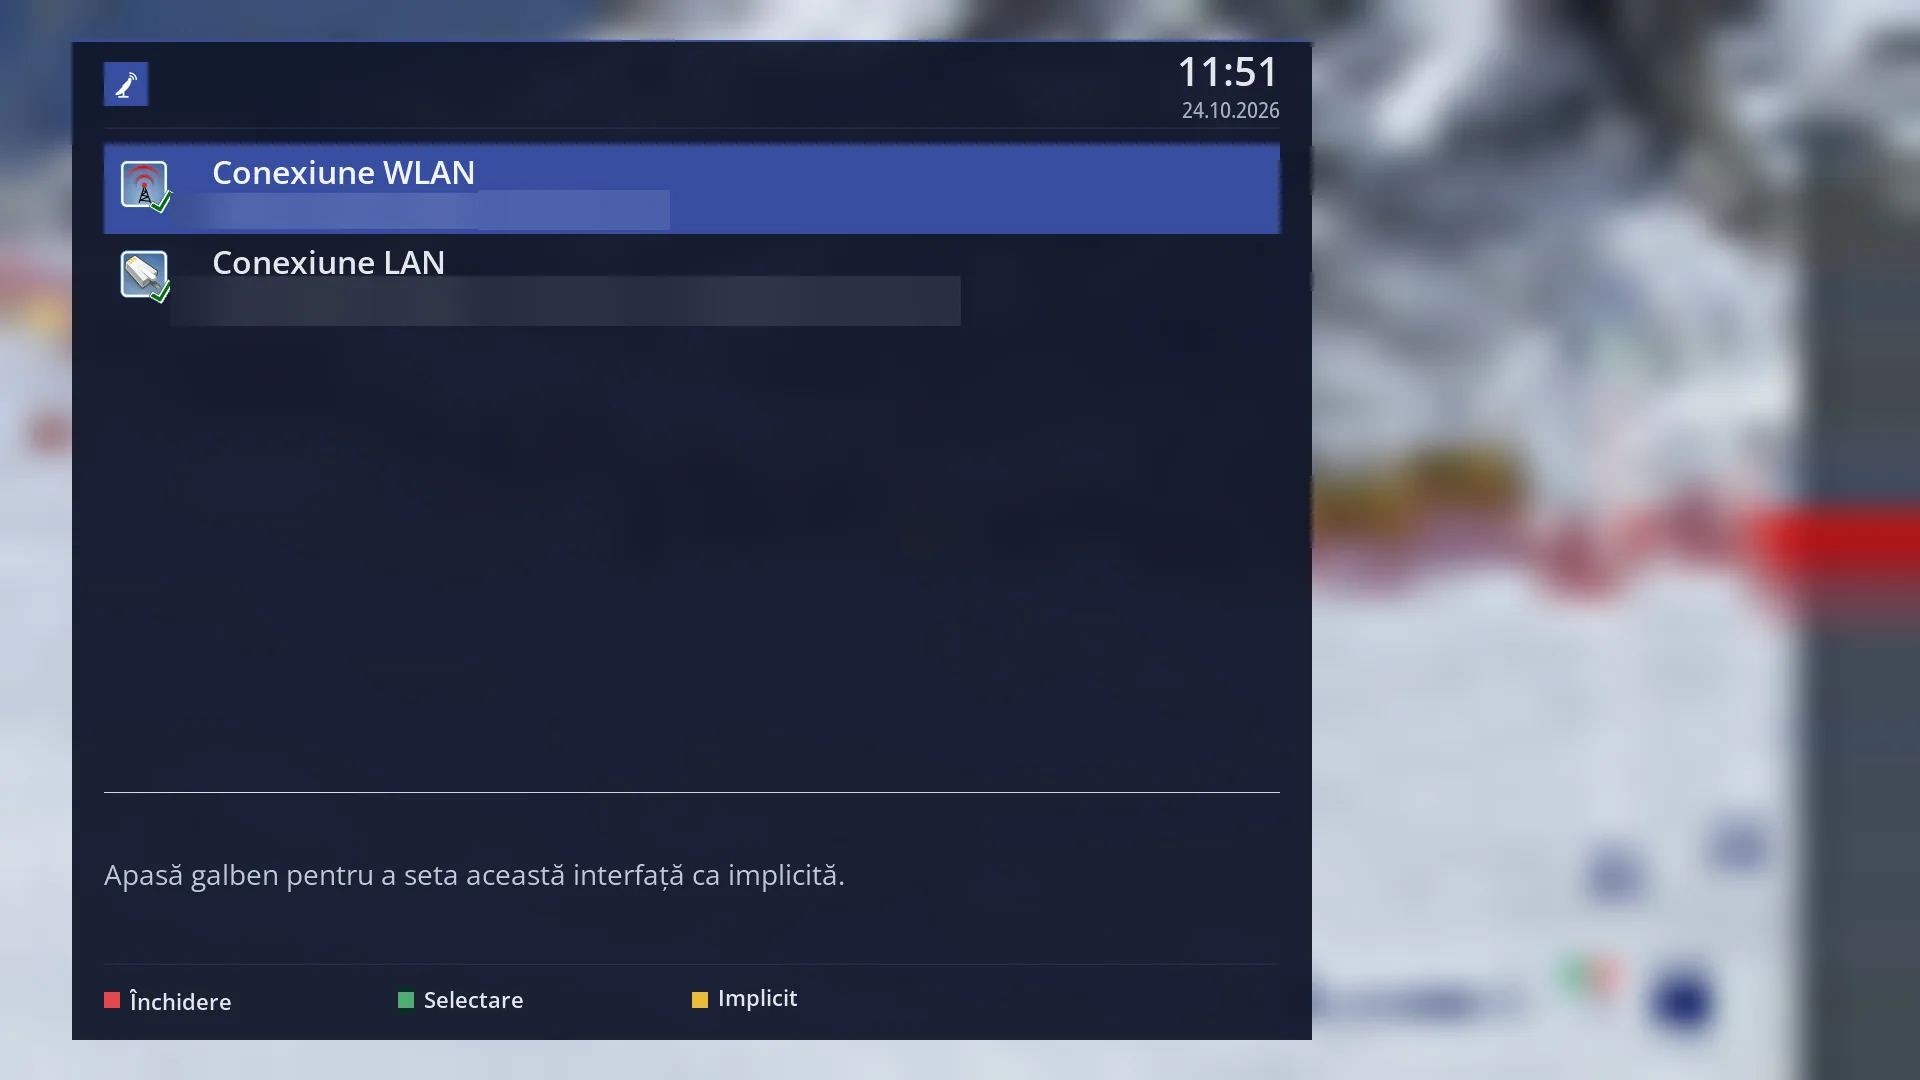
- 1 The Wi-Fi card: its name and, below it, its current status.
- 2 The cable card; “internet goes through here” shows where the internet goes out.
- 3 The card icon: green tick = on, connected and with an address.
- 4 What you can do on the selected row.
- 5 RED closes, GREEN opens the card, YELLOW makes it the default.
What it is for
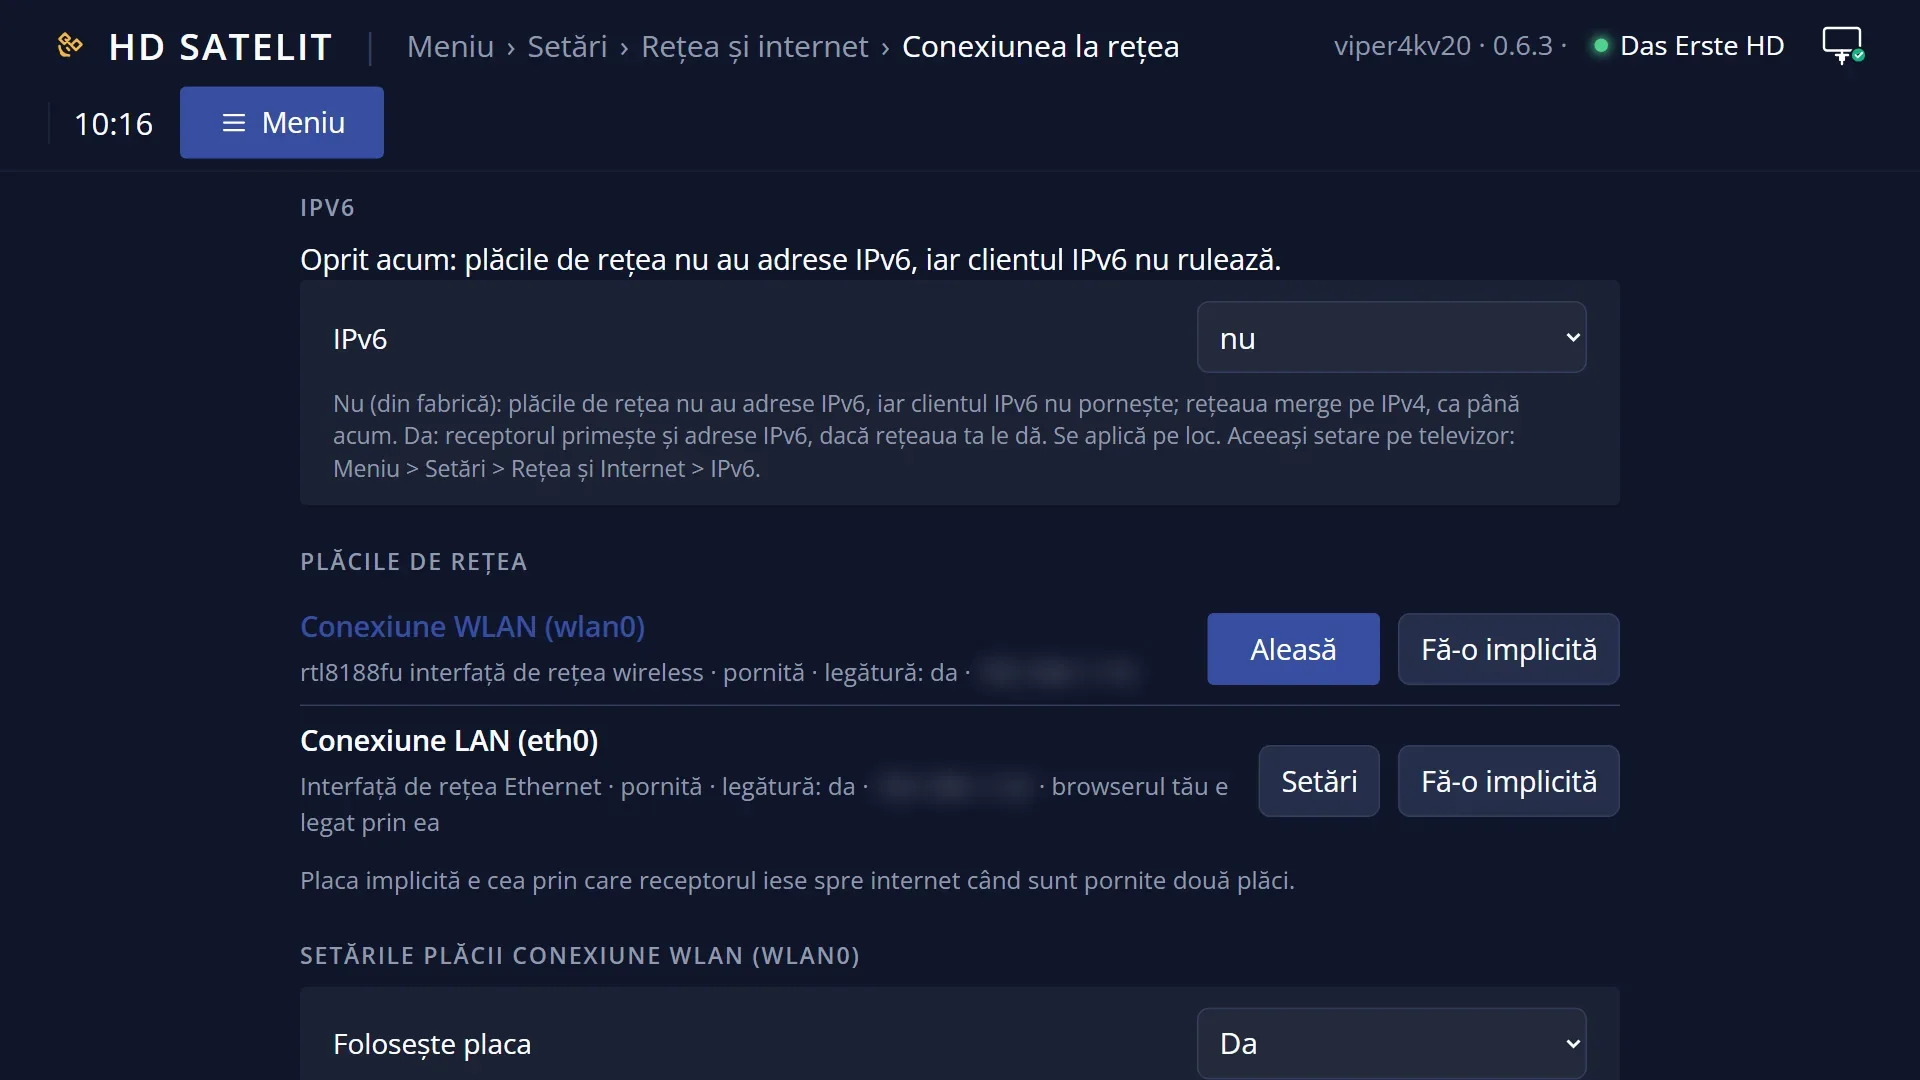
“Network Connection Setup” shows the receiver's network cards (cable and Wi-Fi) and the live status of each one: whether it is on, whether the cable is plugged in or it is connected to a Wi-Fi network, what address it has and which of them the internet goes through.
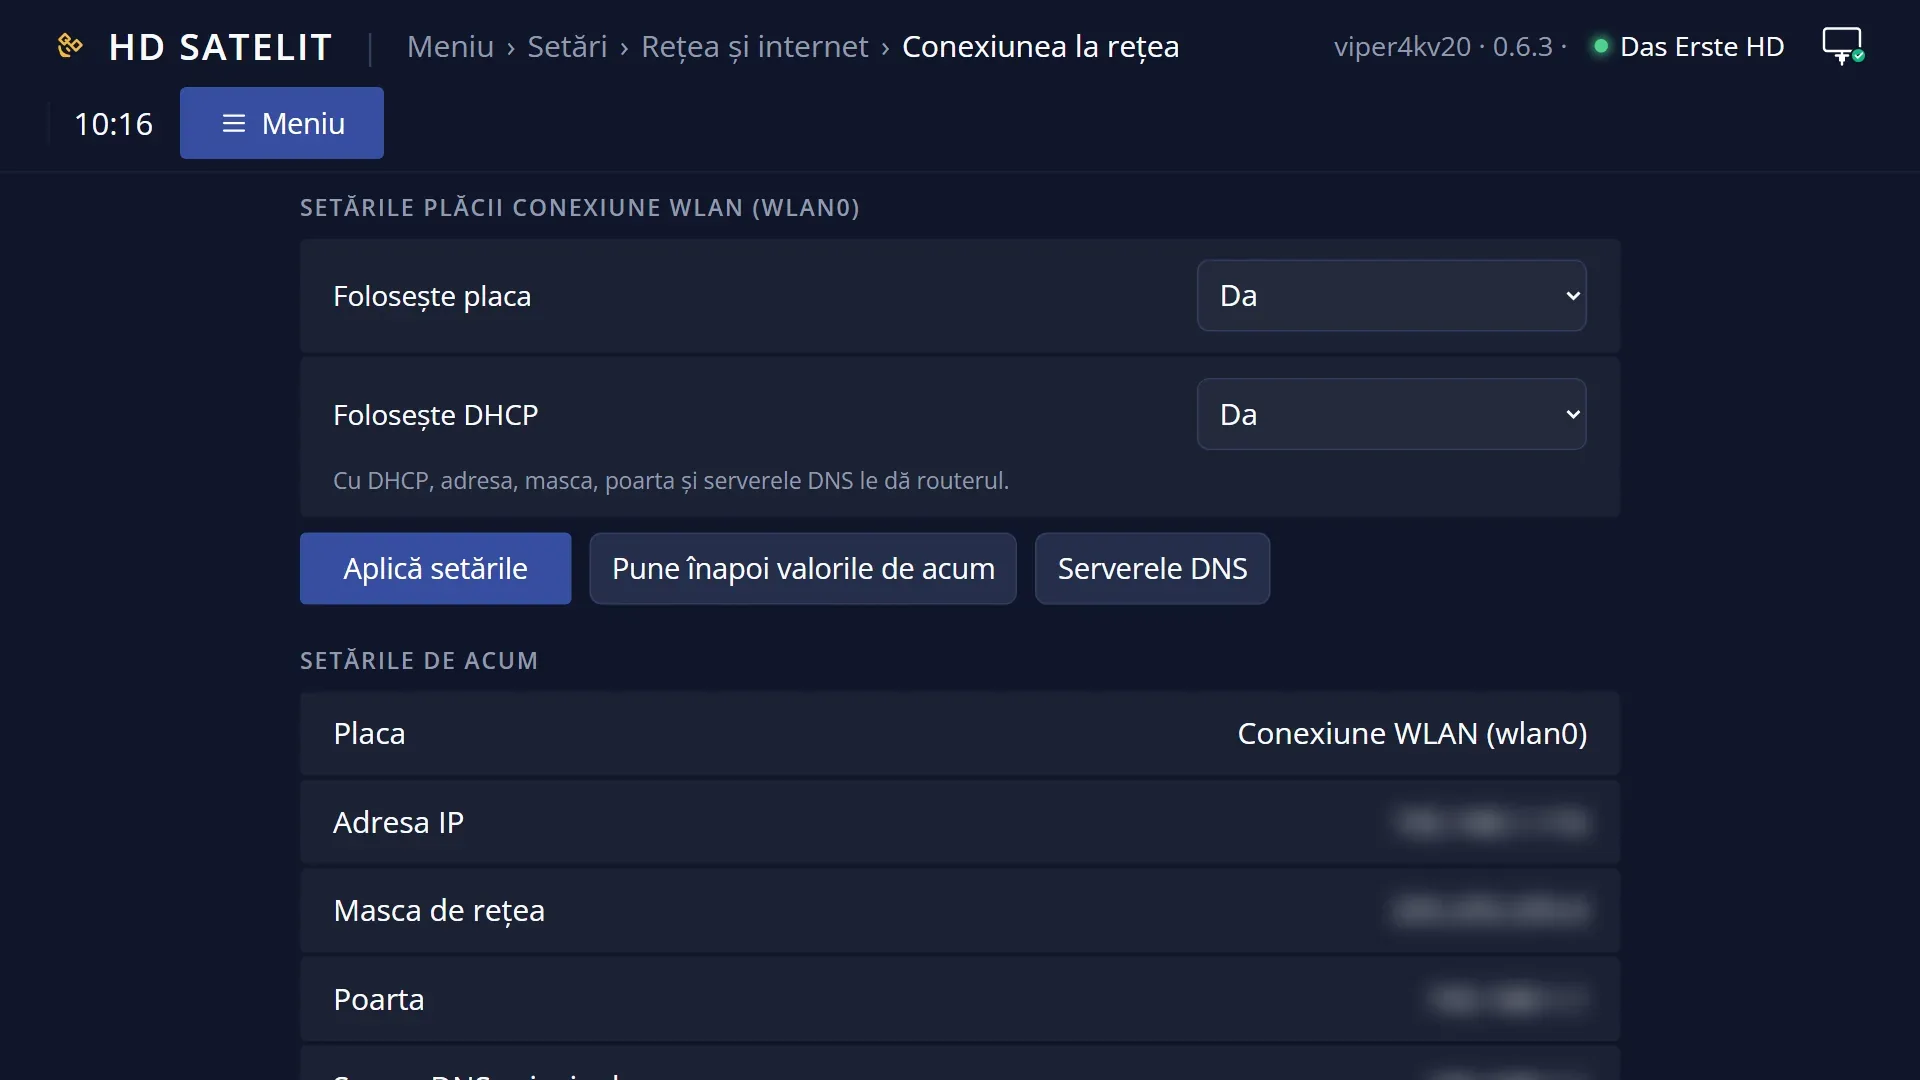
This is where you connect the receiver to the internet. You choose a card, open its menu and change the address (from the router or typed in by hand), search for Wi-Fi networks and connect with the password, check the Wi-Fi status, run the network test and restart the network.
When both cards are on, this is also where you choose the default card, the one the receiver uses to reach the internet.
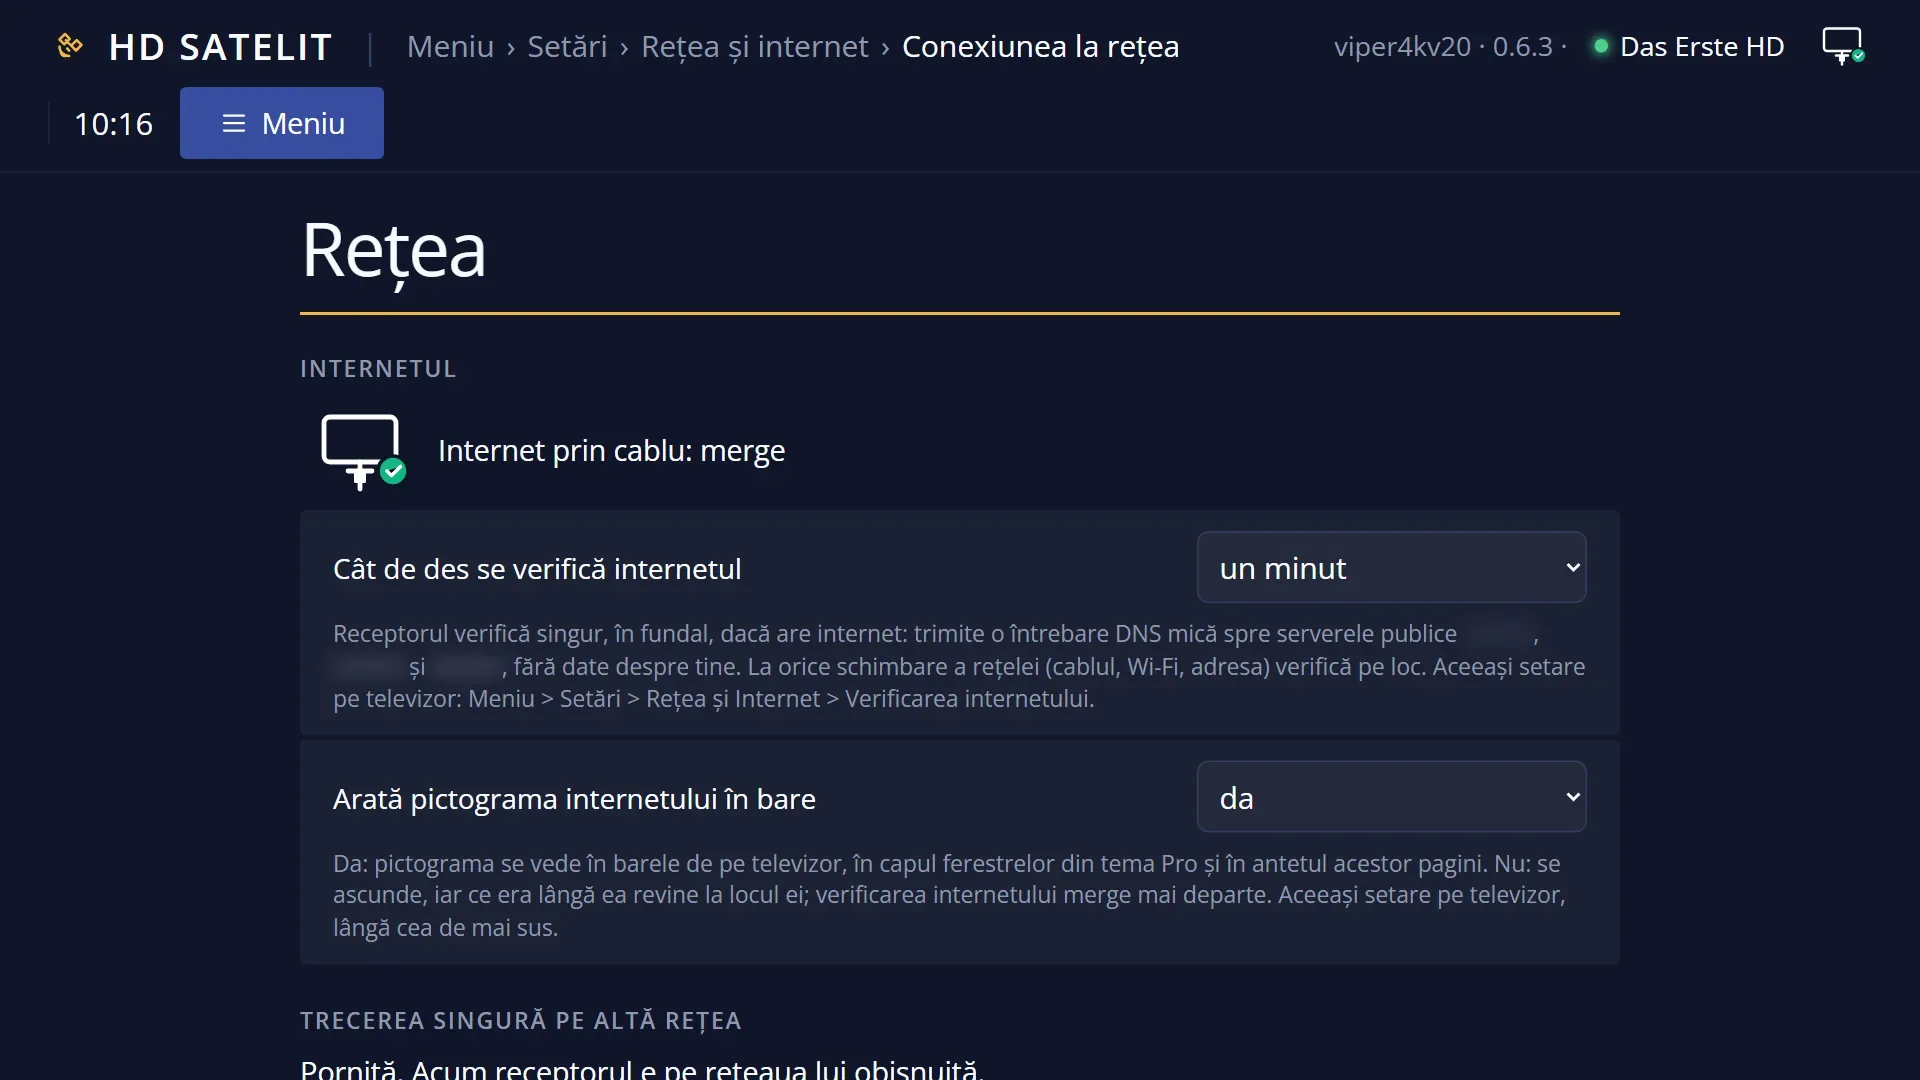
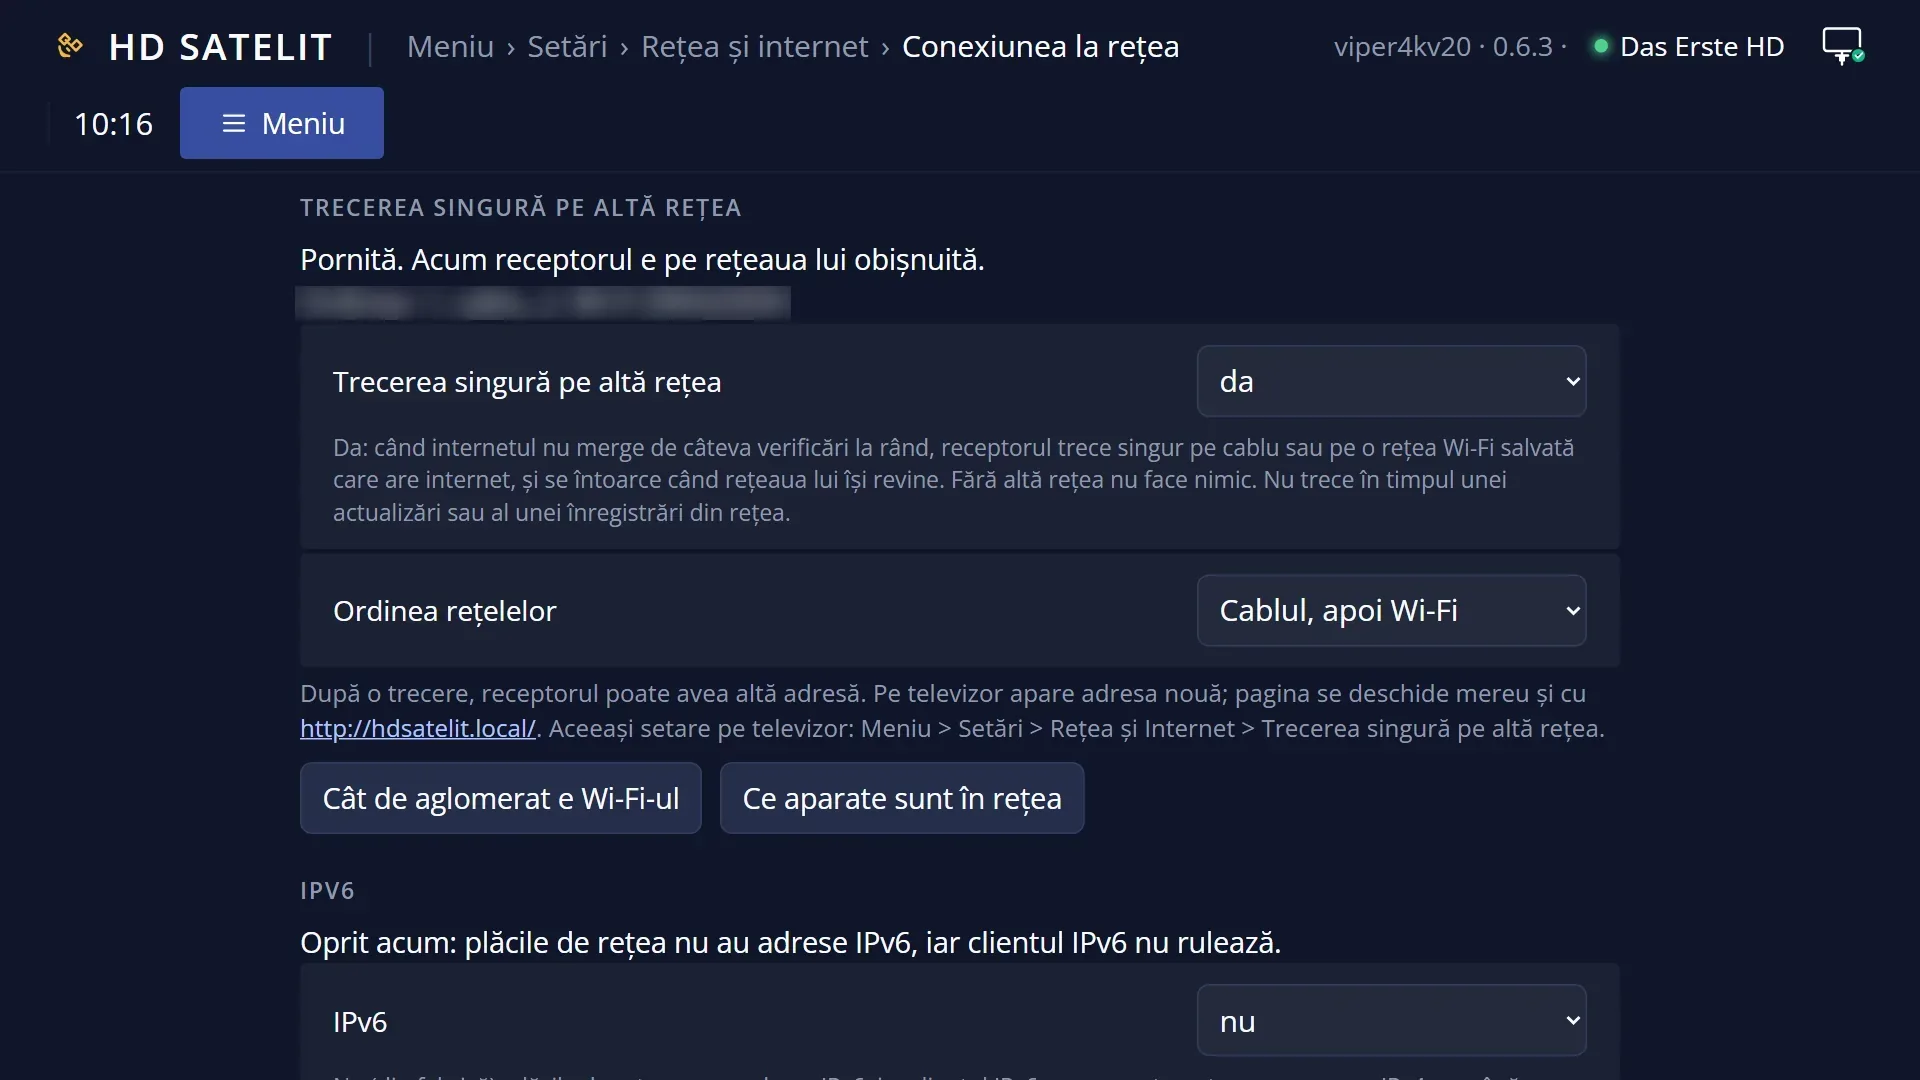
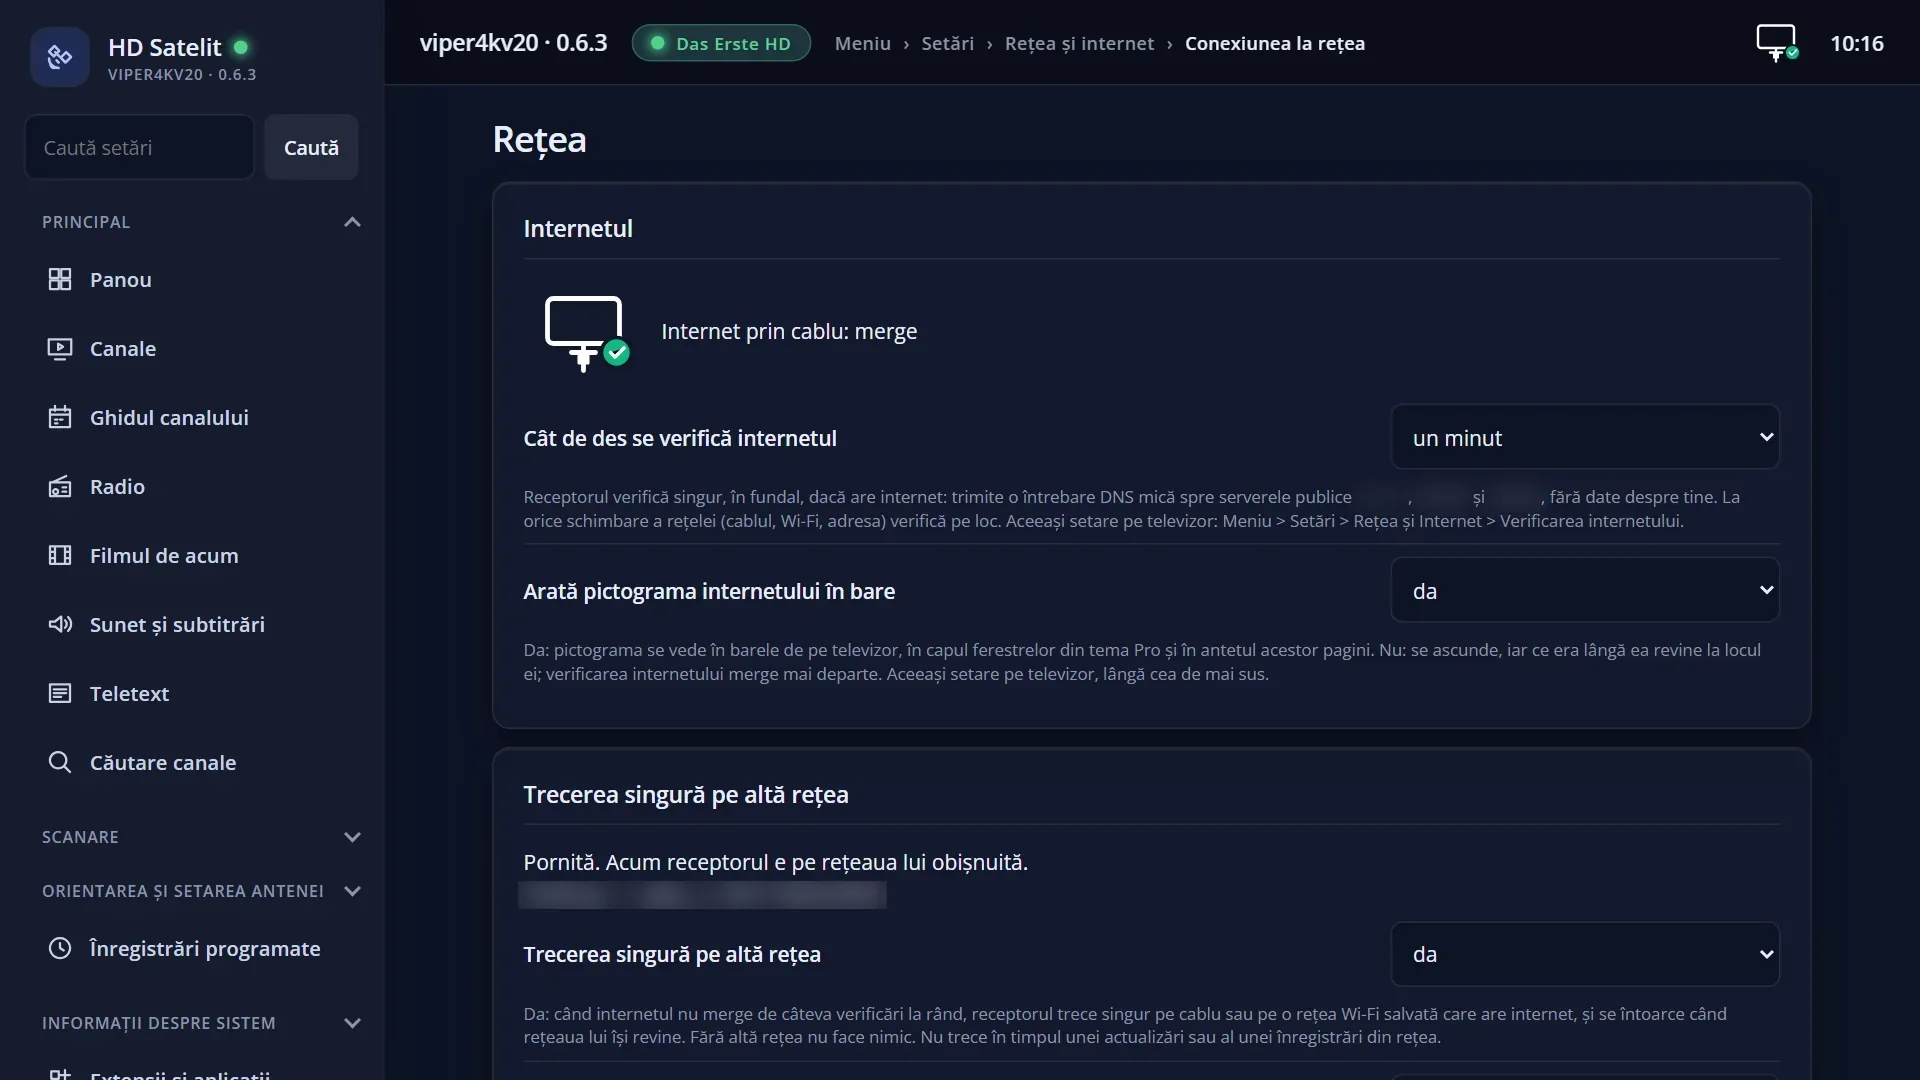
You can do the same things from your phone or computer in the web interface, on the /retea page. There, changes that could cut the browser's connection to the receiver (card settings, default card, network restart, Wi-Fi connection, DNS servers) take two steps: a question with the warnings and the address where the page will be, then the confirmation. They only work from the browser connected to the receiver; “Cancel” changes nothing.
How to get here
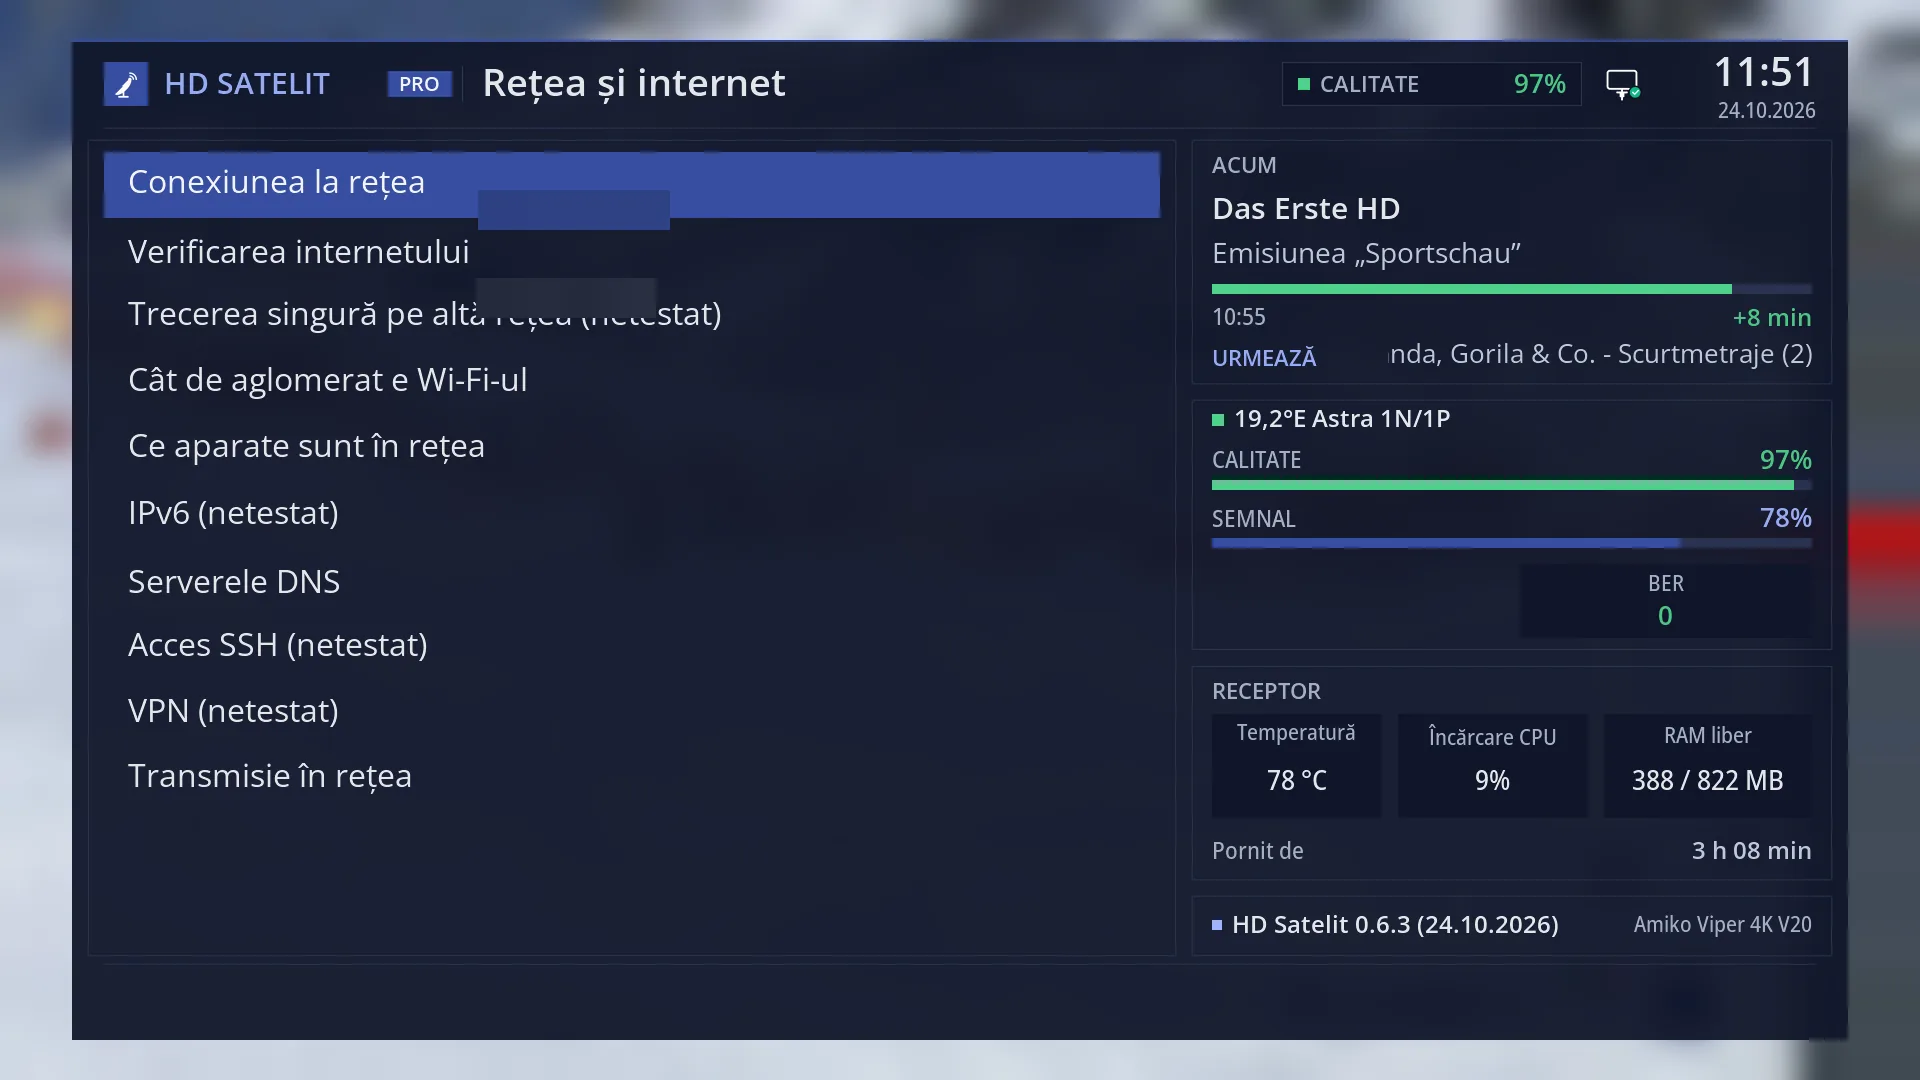
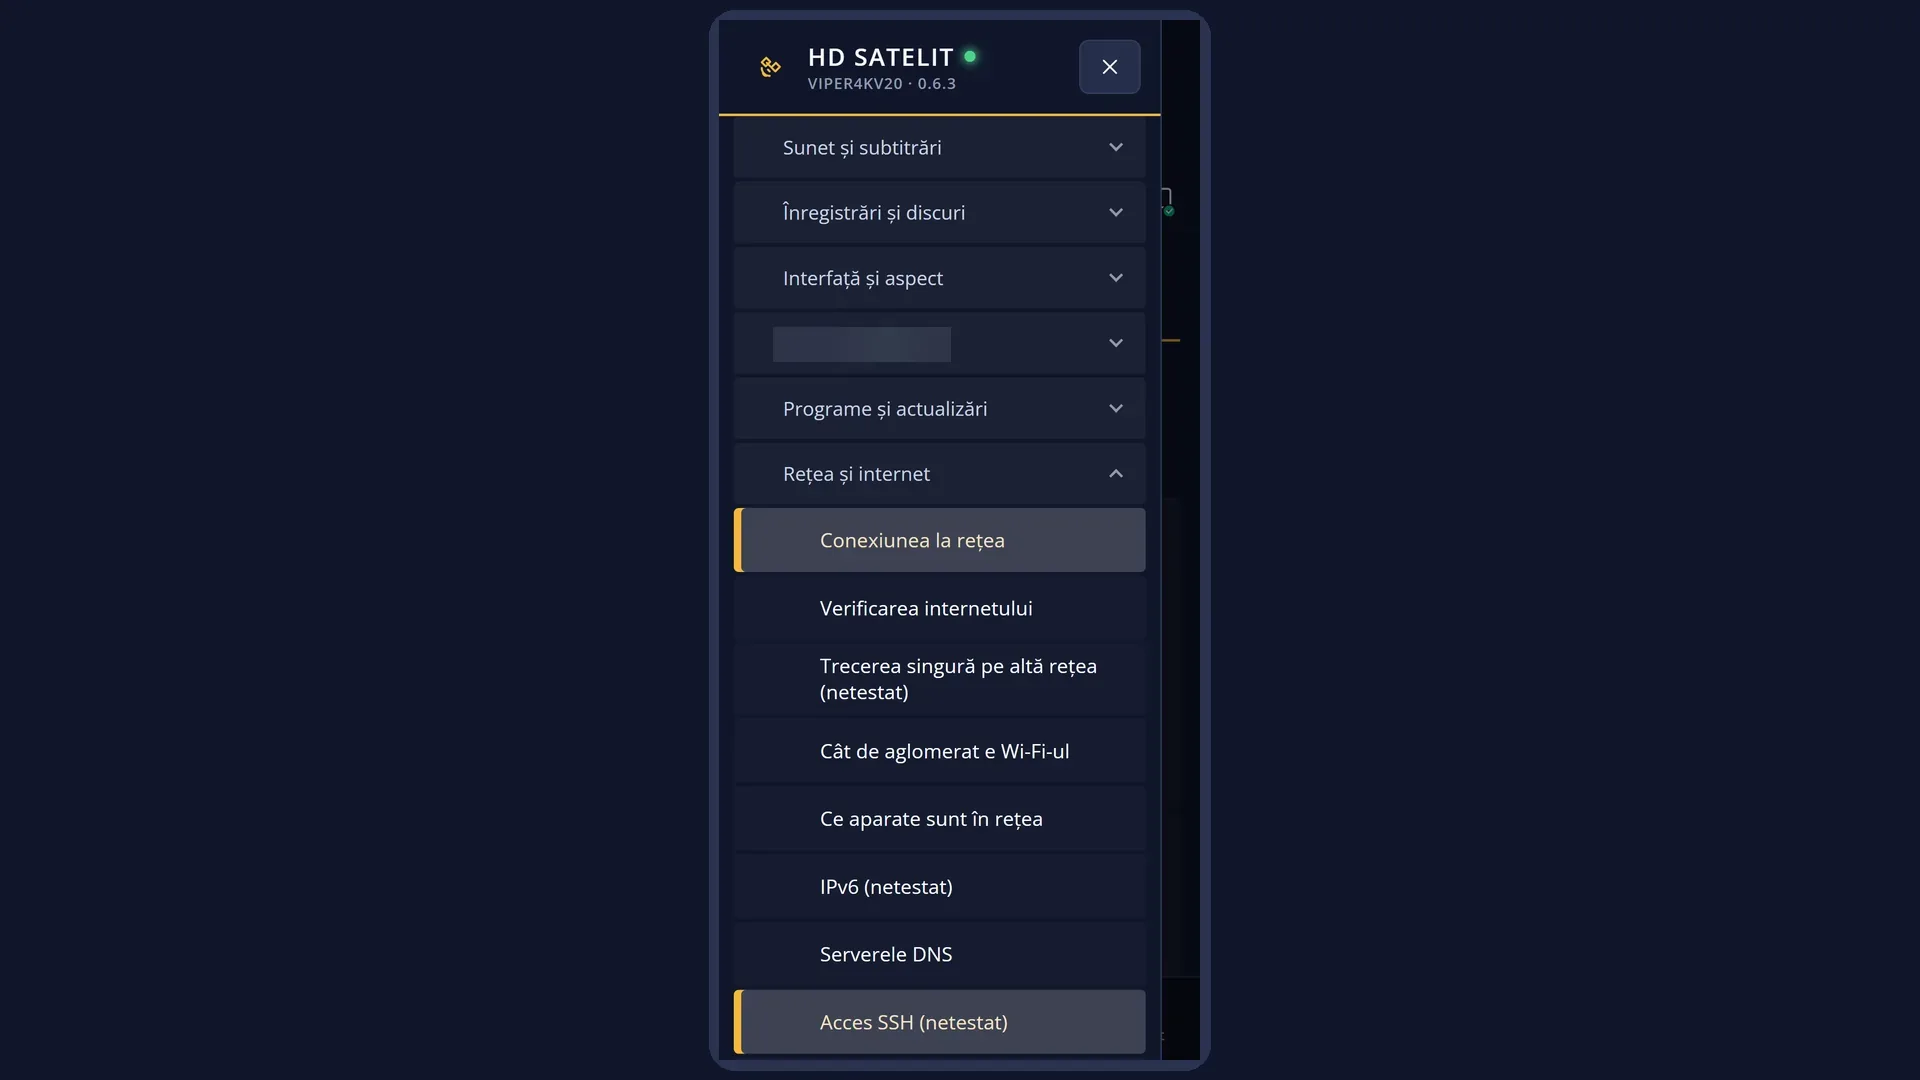
Path: Main menu > Settings > Network & Internet > Network Connection Setup (first row).
Keys on the TV: MENU 6 9 1.
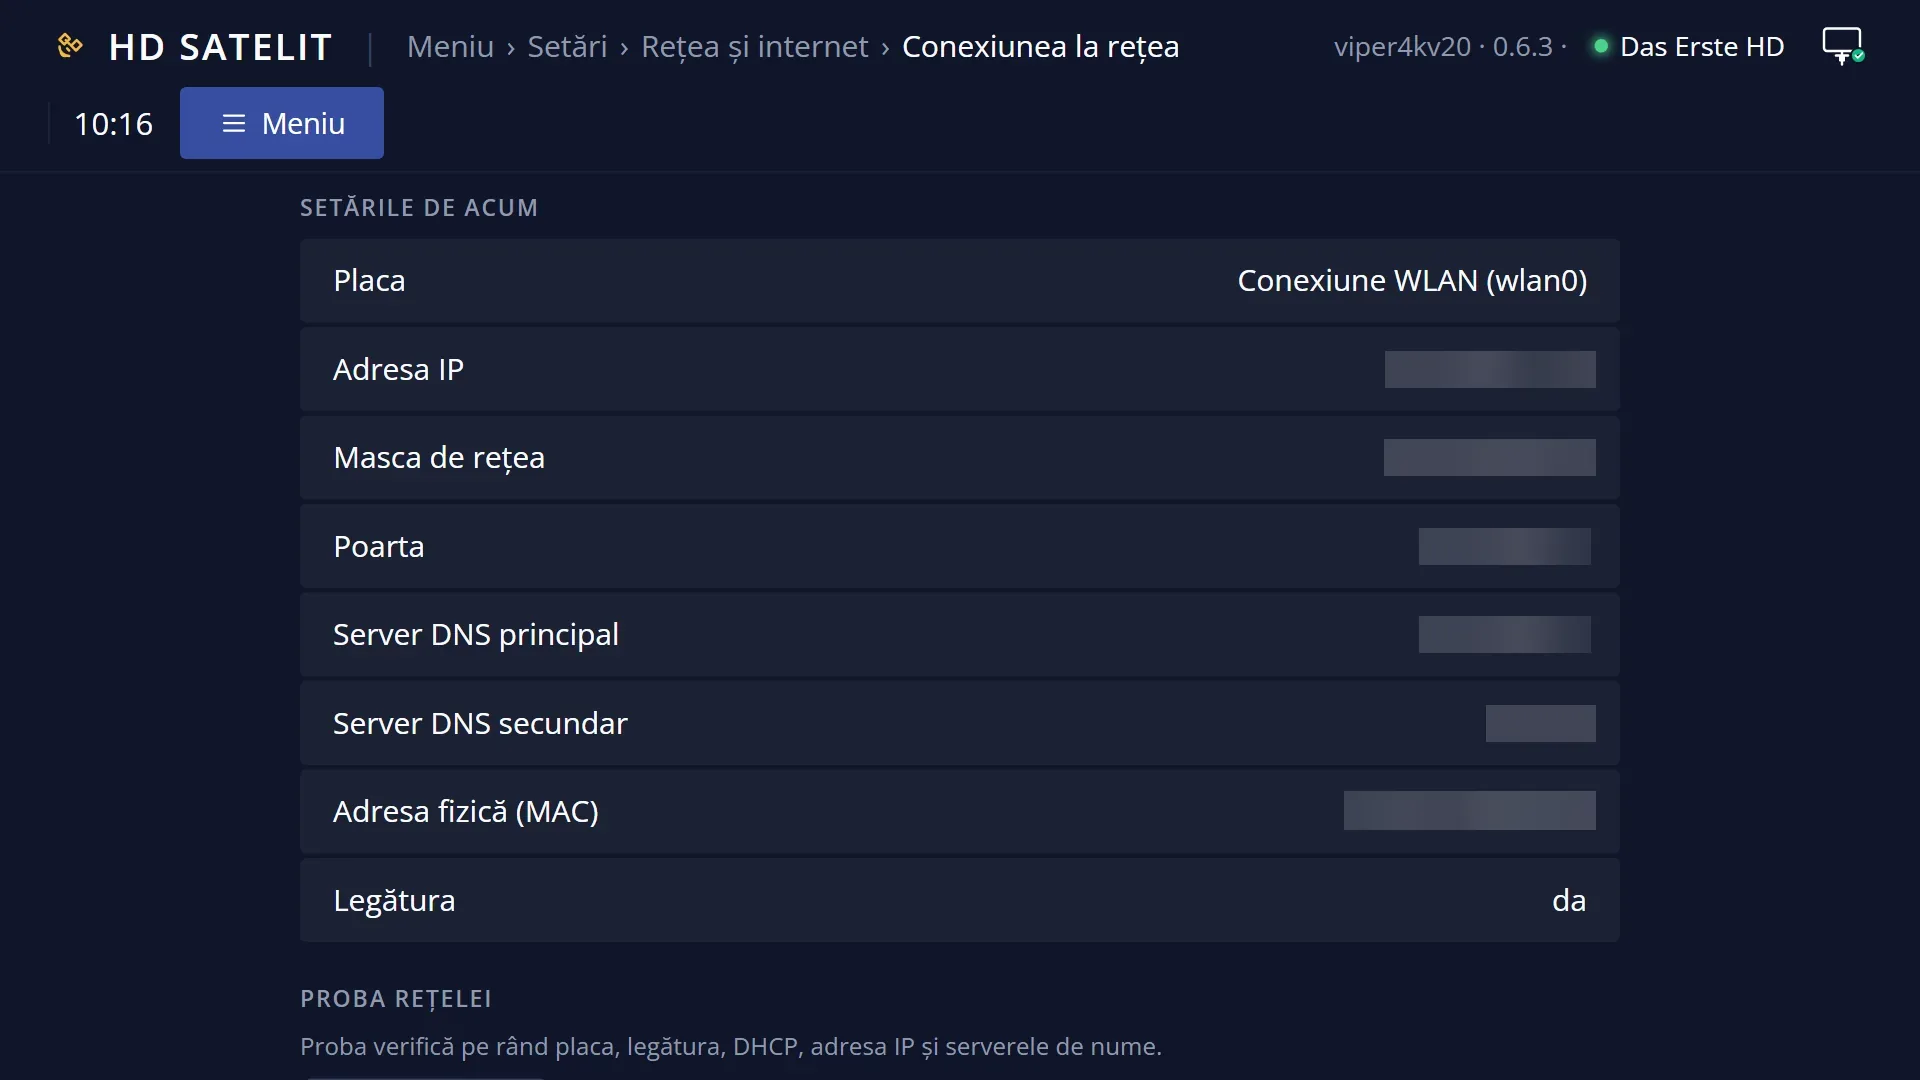
In the web interface: the /retea page (the “The network cards”, “Network card settings”, “The current settings”, “The network test”, “Wi-Fi” and “Network restart” cards).
What you see on the screen
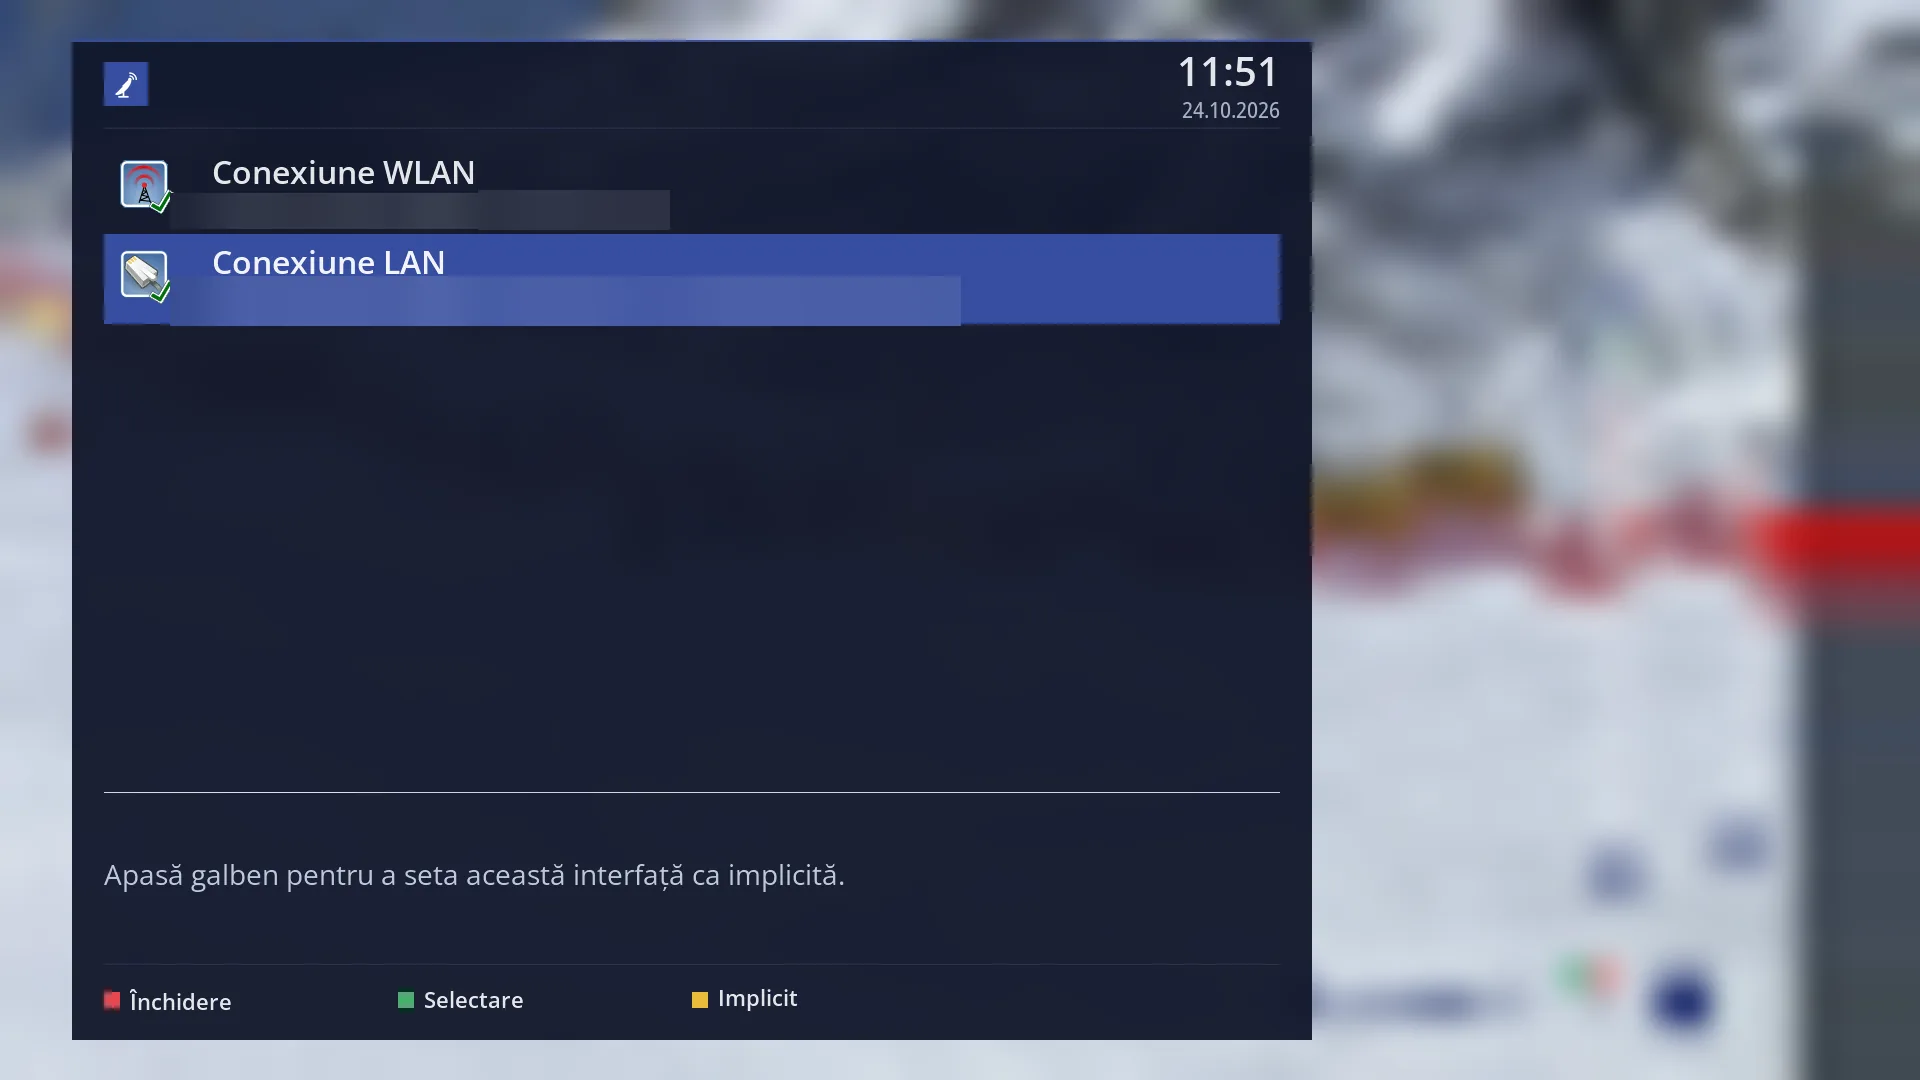
The list of cards, one large row for each: “WLAN connection” (Wi-Fi) and “LAN connection” (cable). The screen has no title above the list.
Below the card name, a short line with its current status, for example “Active · signal 100% · 192.168.1.50” for Wi-Fi or “Active, cable plugged in · 192.168.1.50 · internet goes through here” for the cable. Other statuses: “Off”, “On, but no cable”, “Cable plugged in, no IP address”, “Connected to Wi-Fi, no IP address”, “On, but not connected to any Wi-Fi network”. The list refreshes itself every two seconds, so you see straight away when you plug in or unplug the cable.
“internet goes through here” appears next to the card the internet is currently going out through.
To the left of the name is the card's icon (an antenna for Wi-Fi, a plug for the cable). It has a green tick when the card is on, connected and has an address, a red X when it is off, and no mark when it is on but has no link or no address. When two cards are configured, a small dot also appears next to the icon, lit on the default card.
Below the list, what you can do: “Press OK to edit the settings.” or, with two cards on, “Press yellow to set this interface as default interface.”.
At the bottom, the keys: RED “Close”, GREEN “Select” and, with two cards on, YELLOW “Default”.
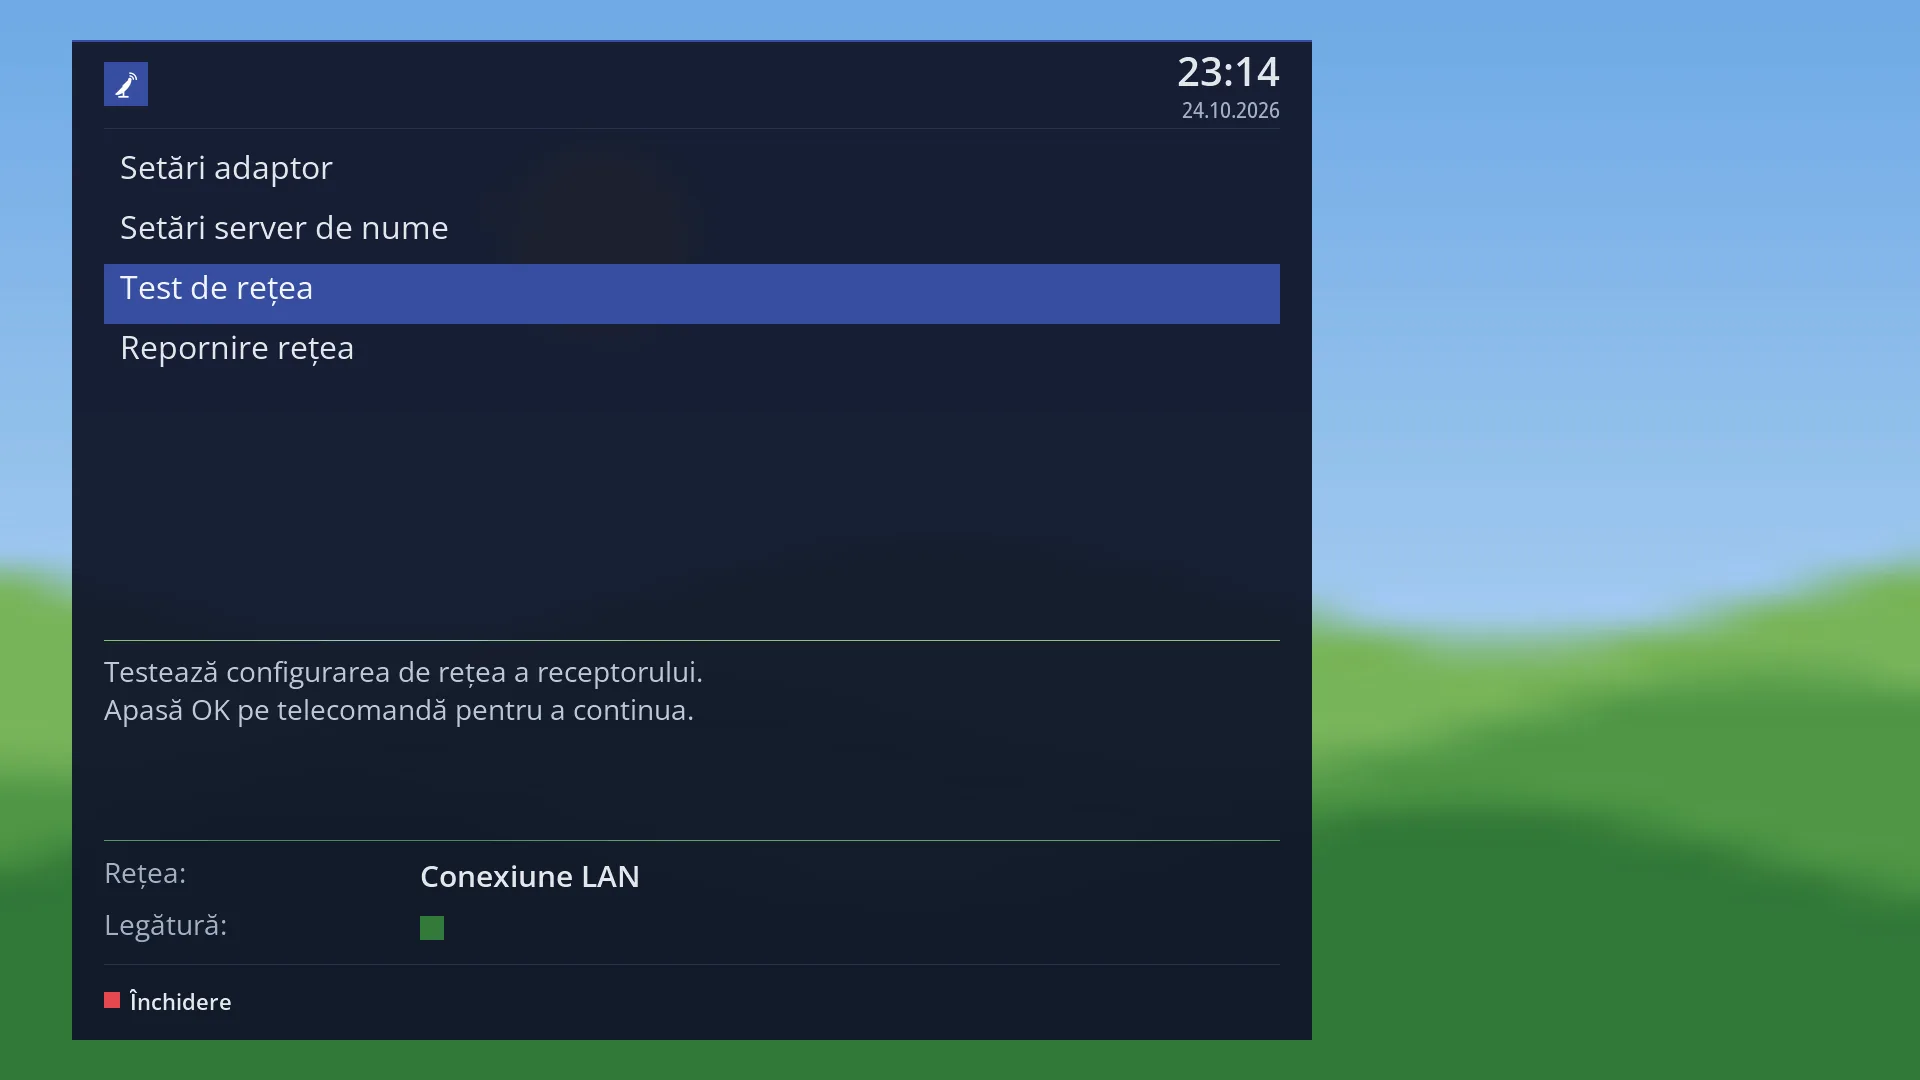
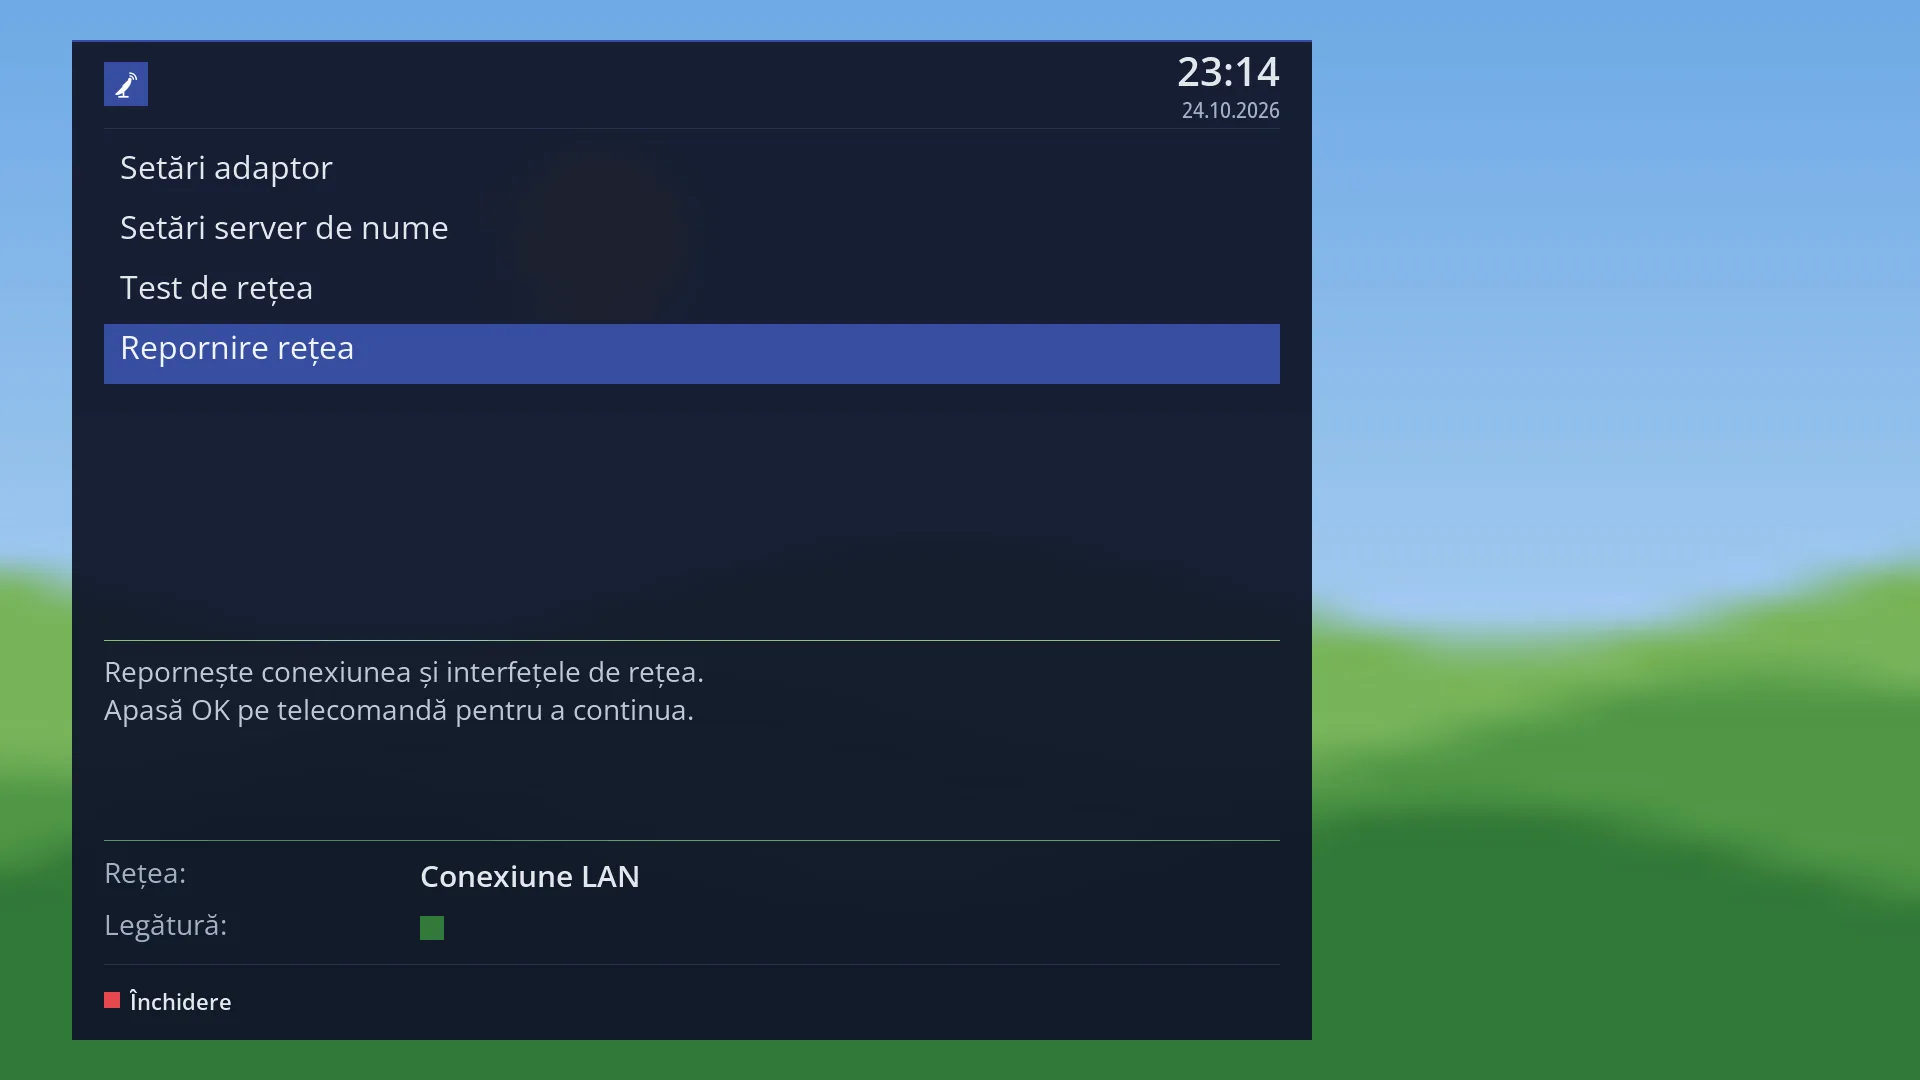
OK on a card opens its menu: “Adapter settings”, “Nameserver settings”, “Network test”, “Restart network” and, for the Wi-Fi card, “WiFi networks”, “WiFi status” (only when the card is on) and “How busy the Wi-Fi is”. Below the menu is the explanation of the selected row; at the bottom, “Network:” with the card name and “Link:” with a green mark (connected) or a red one (not connected).
Rows and settings
| Row | Values | Default | What it does |
|---|---|---|---|
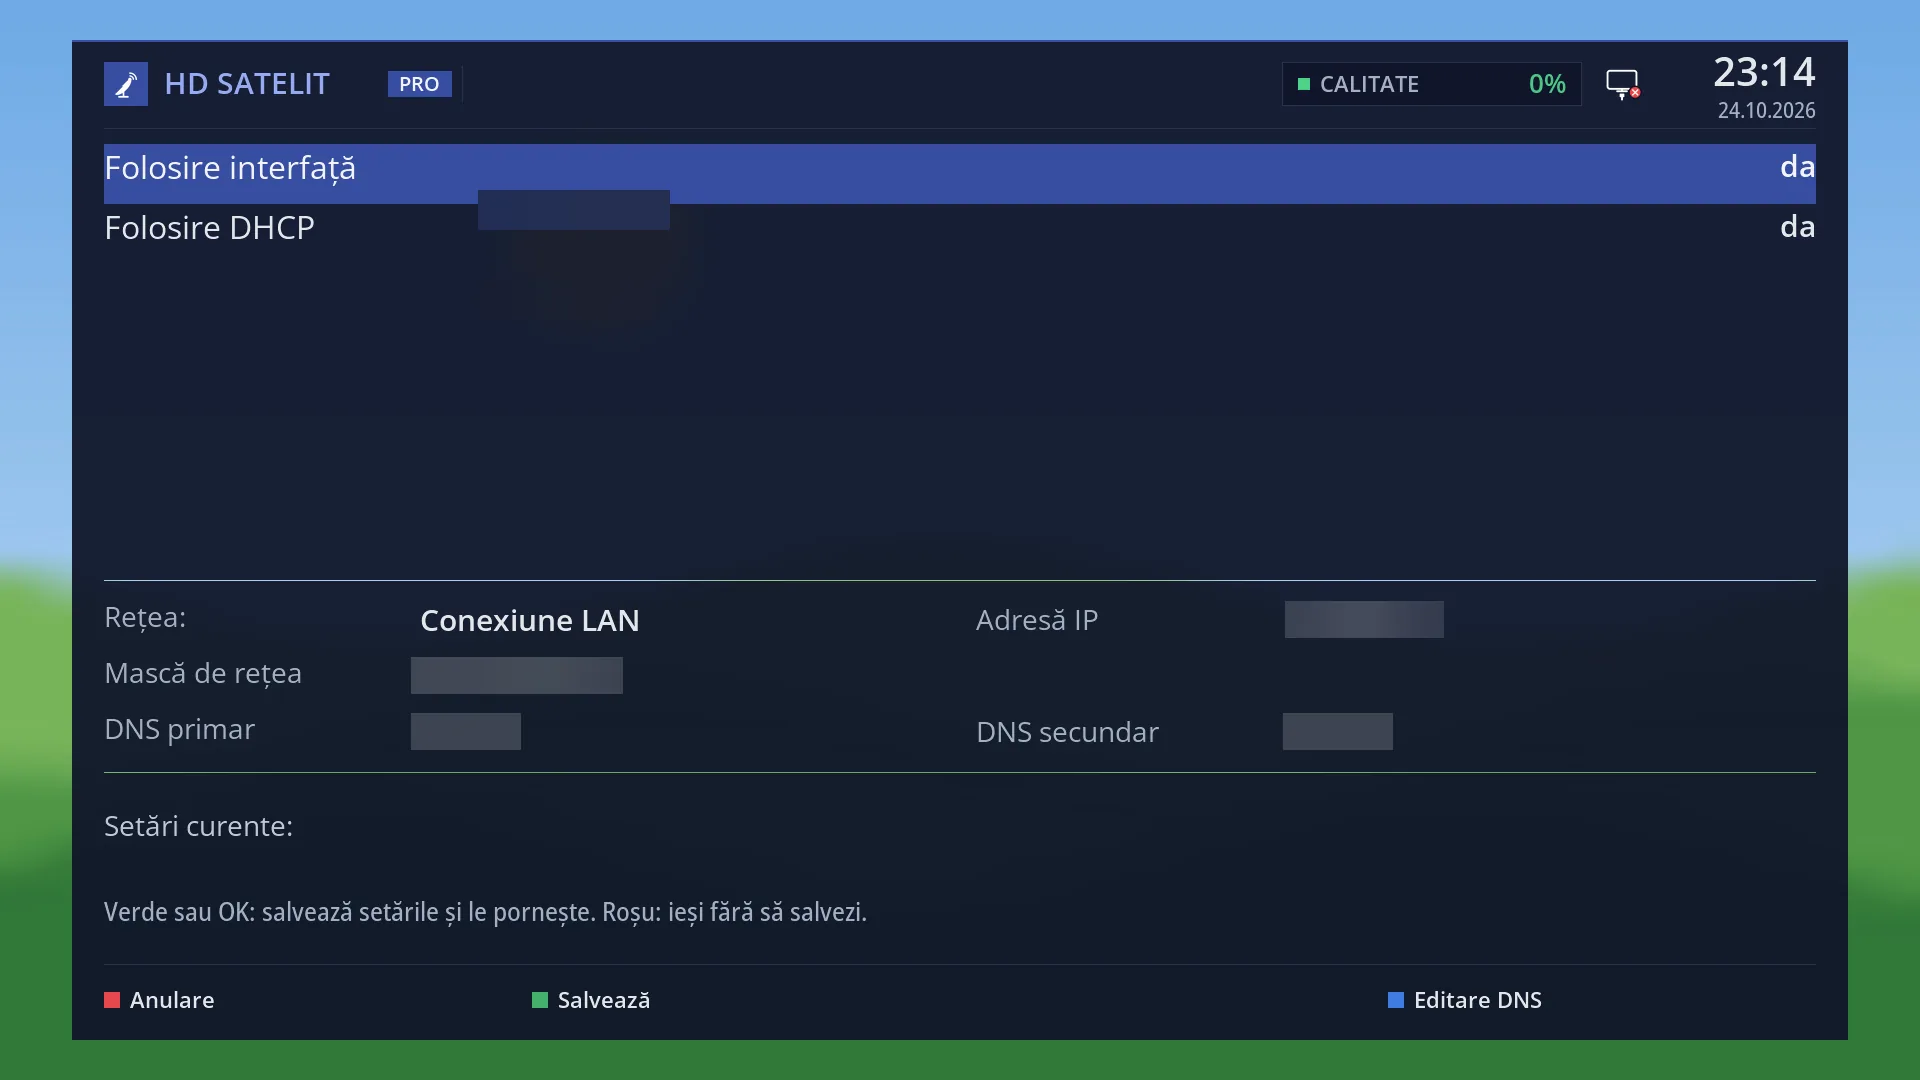
| Adapter settings | Use Interface: yes / no, Use DHCP: yes / no, IP Address, Netmask, Use a gateway: yes / no, Gateway | Use DHCP: yes (the router gives the address) | The card settings. “Use Interface” turns the card on or off. With “Use DHCP” on yes, the router gives the address, netmask, gateway and DNS servers. On no, the rows for an address typed by hand appear: “IP Address” (for example 192.168.1.50), “Netmask” (usually 255.255.255.0), “Use a gateway” and “Gateway” (usually the router's address). Below the rows, “Current settings:” shows the card, address, netmask, gateway, “Primary DNS” and “Secondary DNS” in use now. At the bottom it says “Green or OK: save the settings and turn them on. Red: leave without saving.”. When you want a fixed address for the receiver (for example so you always find it at the same address) or when the router does not give out addresses. |
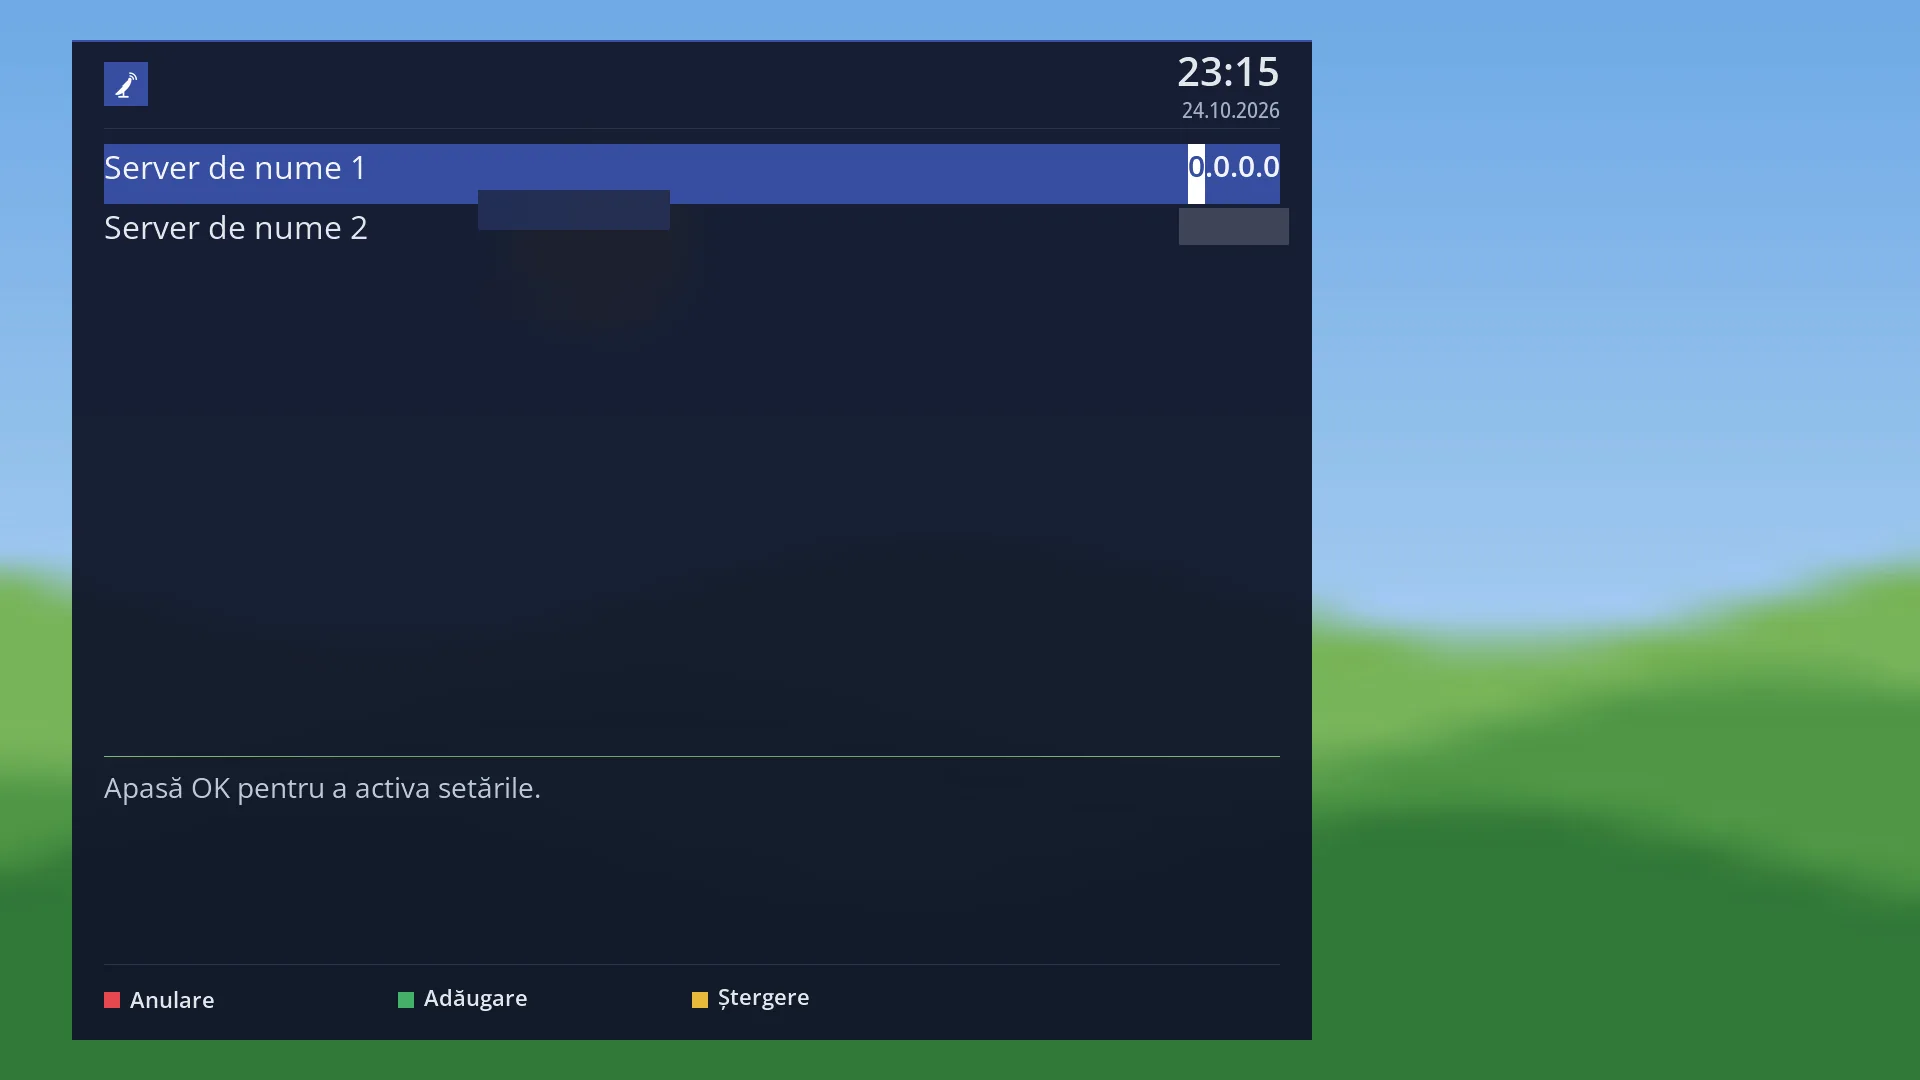
| Nameserver settings | Opens the list of DNS servers, the same as in Network & Internet > DNS Server Settings. From “Adapter settings” you can also reach it with BLUE (“Edit DNS”). See the “DNS Server Settings” page. | ||
| Network test | LAN Adapter, Local Network / Wireless Network: connected / disconnected, DHCP: enabled / disabled, IP Address: confirmed / unconfirmed, Nameserver: confirmed / unconfirmed | The network test, step by step, every three seconds: it finds the card, checks the link (cable plugged in or Wi-Fi connected), whether the address comes via DHCP, whether the receiver reaches the internet with its address and whether the nameservers answer. The address and the nameservers are “confirmed” when at least one of three attempts got an answer. When you do not know where the problem is: the cable, the router or the DNS servers. | |
| Restart network | Turns all network cards off and on again with the saved settings, after the question “Are you sure you want to restart your network interfaces?”. While it works it says “Please wait while your network is restarting...”, and at the end “Finished restarting your network”. When the router has been restarted or replaced and the receiver has not picked up an address by itself. | ||
| WiFi networks (Wi-Fi card only) | Open, WPA, WPA2, WPA2/WPA3, WPA3, WEP, not supported, Enterprise, not supported | Searches for nearby Wi-Fi networks (“Searching for networks...”) and shows each on its own row: the name, the type of security, the signal in percent and the band. The receiver's Wi-Fi card only receives 2.4 GHz networks. The network the receiver is connected to now has an asterisk in front of it. Below the list: “Networks found: 7” or “No networks found. Press yellow to try again.”. OK or GREEN (“Connect”) on a network asks for the password on the on-screen keyboard (“Password for Sufragerie”), then the connection shows its steps: “Saving the settings for ...”, “Connecting to ... (12 s)...”, “Connected to ..., waiting for the IP address...”, and at the end “Connected to ....” with the IP address. Open networks do not ask for a password. When you connect the receiver to Wi-Fi for the first time, or when you change the router or the Wi-Fi password. | |
| Hidden network (BLUE key in WiFi networks) | WPA2, WPA2/WPA3, WPA3, WPA, Open | For a network that does not show its name: you type the “Name of the hidden network” (32 bytes at most), choose the “Security of the hidden network” from the list, then enter the password. Only if the router has its network name hidden. | |
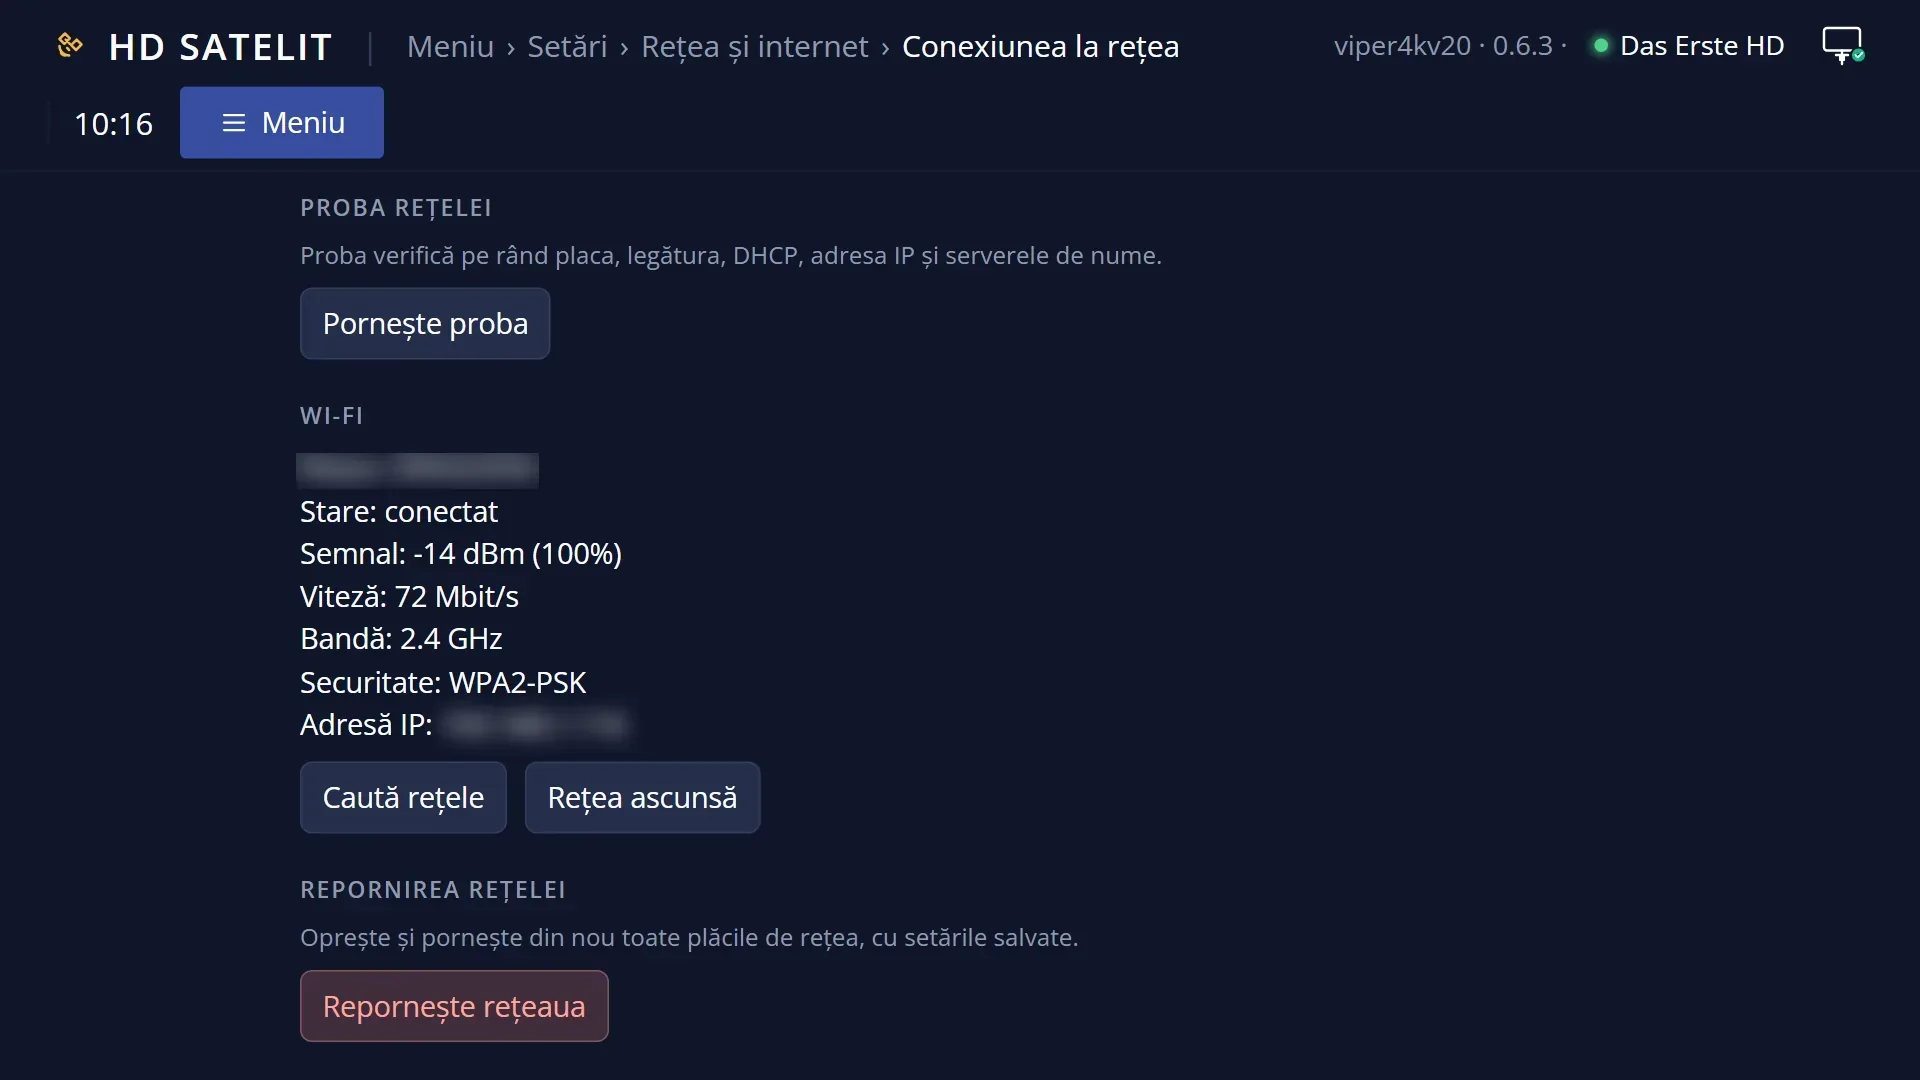
| WiFi status (Wi-Fi card only, when on) | Network, Status: connected / connecting / checking the password / not connected / adapter switched off, Signal: ... dBm (...%), Speed: ... Mbit/s, Band: ... GHz, Security, IP Address | The status of the Wi-Fi link, read again every two seconds: the network, the status, the signal, the link speed, the band, the type of security and the IP address. When Wi-Fi is not on for the card it says “WiFi is not active on ...”. When you are looking for a better place for the router or the receiver: watch the signal. | |
| How busy the Wi-Fi is (Wi-Fi card only) | The same screen as row 4 in Network & Internet, for this card: how many networks are on each channel and which channel is the least busy. See the “How busy the Wi-Fi is” page. | ||
| Default card (YELLOW key in the list) | none chosen | With two cards on, YELLOW makes the selected card the default one, which the receiver uses to reach the internet. The network restarts (“Please wait while we configure your network...”, then “Finished configuring your network”). With only one card on, the key does nothing. When you have both cable and Wi-Fi and want the internet to go through a particular one. |
Keys
| UP / DOWN | Select the card in the list or the row in the card menu. |
| OK or GREEN (“Select”) | In the list: opens the menu of the selected card. In the card menu: opens the selected row. |
| YELLOW (“Default”) | In the list, with two cards on: makes the selected card the default card, then the network restarts. |
| RED or EXIT | Close the screen. In “Adapter settings”, if you have changed something, it asks “Really close without saving settings?”. |
| LEFT / RIGHT | In “Adapter settings”: change the value of the selected row (yes / no). In the card menu: jump to the first or last row. |
| 0 ... 9 | In “Adapter settings”, on the address rows: type the digits of the address. |
| GREEN or OK in “Adapter settings” | Saves the card settings and turns them on, after a question. If you have not changed anything, it just closes the screen. |
| BLUE in “Adapter settings” (“Edit DNS”) | Opens the list of DNS servers. |
| GREEN in “WiFi networks” (“Connect”) | Connects you to the selected network (it asks for the password if the network has one). |
| YELLOW in “WiFi networks” (“Search again”) | Searches for nearby networks again. |
| BLUE in “WiFi networks” (“Hidden network”) | Connecting to a network that does not show its name. |
| RED during the Wi-Fi connection | While it is working: stops the connection and restores the previous settings (“Cancelled.”). When it has finished: closes the window. |
| GREEN in “Network test” | “Start test” starts the test; at the end, “Restart test” runs it again. YELLOW (“Stop test”) stops it halfway. |
| UP / DOWN and OK in “Network test”, after the test | Select a step and OK shows on the right what it checks and what to do if it says “disconnected” or “unconfirmed”. The last one, “Edit settings”, opens “Adapter settings”. RED (“Back”) hides the explanation. |
Step by step
Connecting the receiver to Wi-Fi
- Press MENU 6 9 1, select “WLAN connection” with UP / DOWN, then press OK.
- Select “WiFi networks” and press OK. Wait until it says “Networks found: …”.
- Select your network (for example “Living room”) and press OK.
- Type the password on the on-screen keyboard and confirm it. Watch the connection steps; at the end it says “Connected to …” with the IP address. Press OK.
Giving the receiver a fixed address
- Press MENU 6 9 1, select the card in use (for example “LAN connection”) and press OK, then OK on “Adapter settings”.
- Set “Use DHCP” to no with LEFT / RIGHT.
- Enter the “IP Address” (for example 192.168.1.50), the “Netmask” (255.255.255.0) and the “Gateway” (the router's address).
- Press GREEN and answer Yes to the question. Wait for “Saved. The network settings are now active.”.
Finding the problem with “Network test”
- Press MENU 6 9 1, select the card and press OK, then select “Network test”.
- Press GREEN (“Start test”) and wait for the five rows.
- Where it says “disconnected” or “unconfirmed”, select the row with UP / DOWN and press OK: on the right you see what to check.
Problems and solutions
“LAN connection” says “On, but no cable”.
The cable is not plugged in or is broken. Check the plug at the receiver and at the router; try another cable. The list changes by itself within two seconds of plugging in the cable.
It says “Cable plugged in, no IP address” or “Connected to Wi-Fi, no IP address”.
The router has not given it an address. Check that DHCP is on in the router, or type the address by hand in “Adapter settings”. You can also try “Restart network”.
“Could not connect to … Check the password and the signal.”
The password is wrong or the signal is too weak. Type the password again (it is case-sensitive). The receiver has already restored the previous settings.
“The password must have at least 8 characters” or “The password may only contain letters, digits and the usual signs”.
Wi-Fi passwords have between 8 and 63 characters, with no accented letters. For WPA3 the password cannot contain quotation marks or a backslash.
My network shows “WEP, not supported” or “Enterprise, not supported”.
The receiver cannot connect to these types of network. Set the router to WPA2 or WPA2/WPA3.
I cannot see “WiFi networks” in the card menu.
The Wi-Fi rows only appear for the Wi-Fi card, when the receiver finds its driver. They do not exist for “LAN connection”.
After I changed the settings, the web page no longer responds.
The receiver's address has changed or the card you were connected through has turned off. On the TV, you can see the new address in the list of cards; the page also opens with hdsatelit.local.
YELLOW does nothing in the list of cards.
You can only choose the default card when both cards are on.