

Startup screen: choosing the picture
English screenshots coming: some of the pictures below still show the receiver and the web interface in Romanian. The rows, keys and steps described on this page are the English ones.
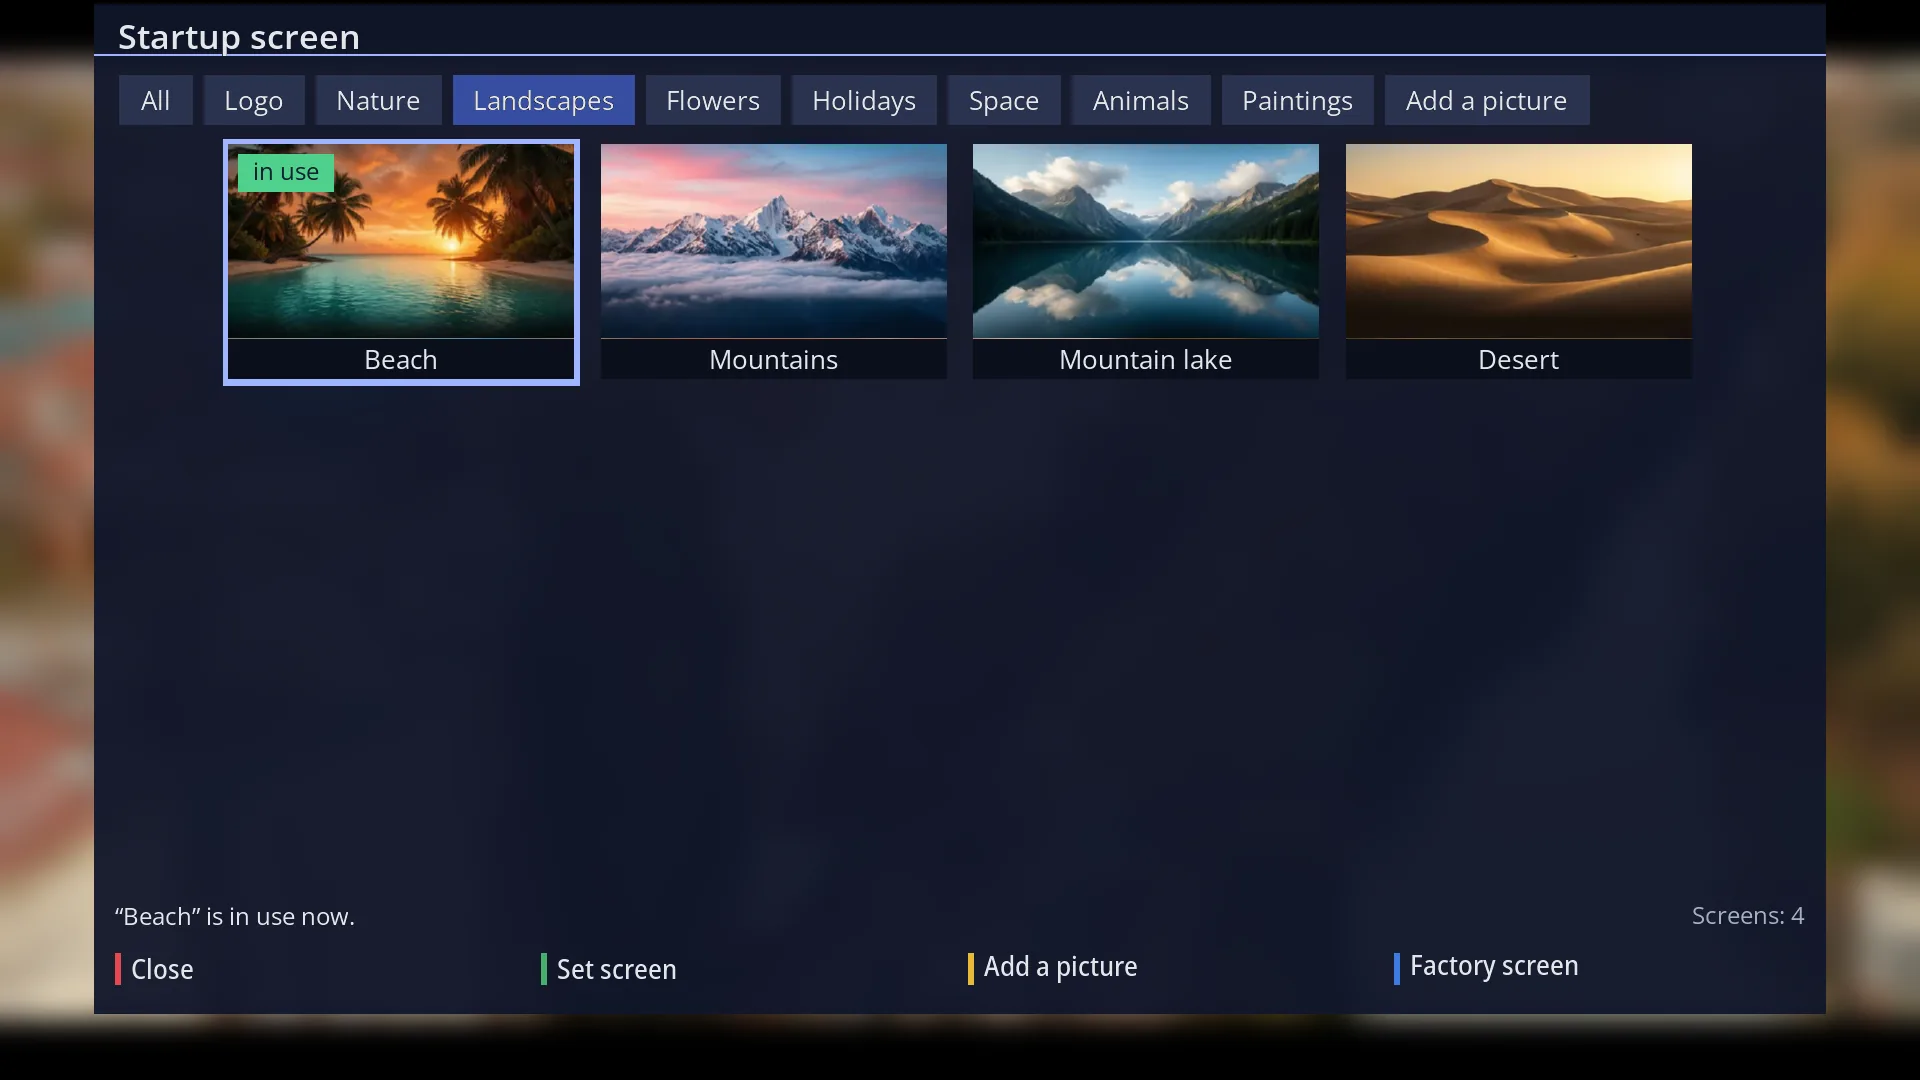
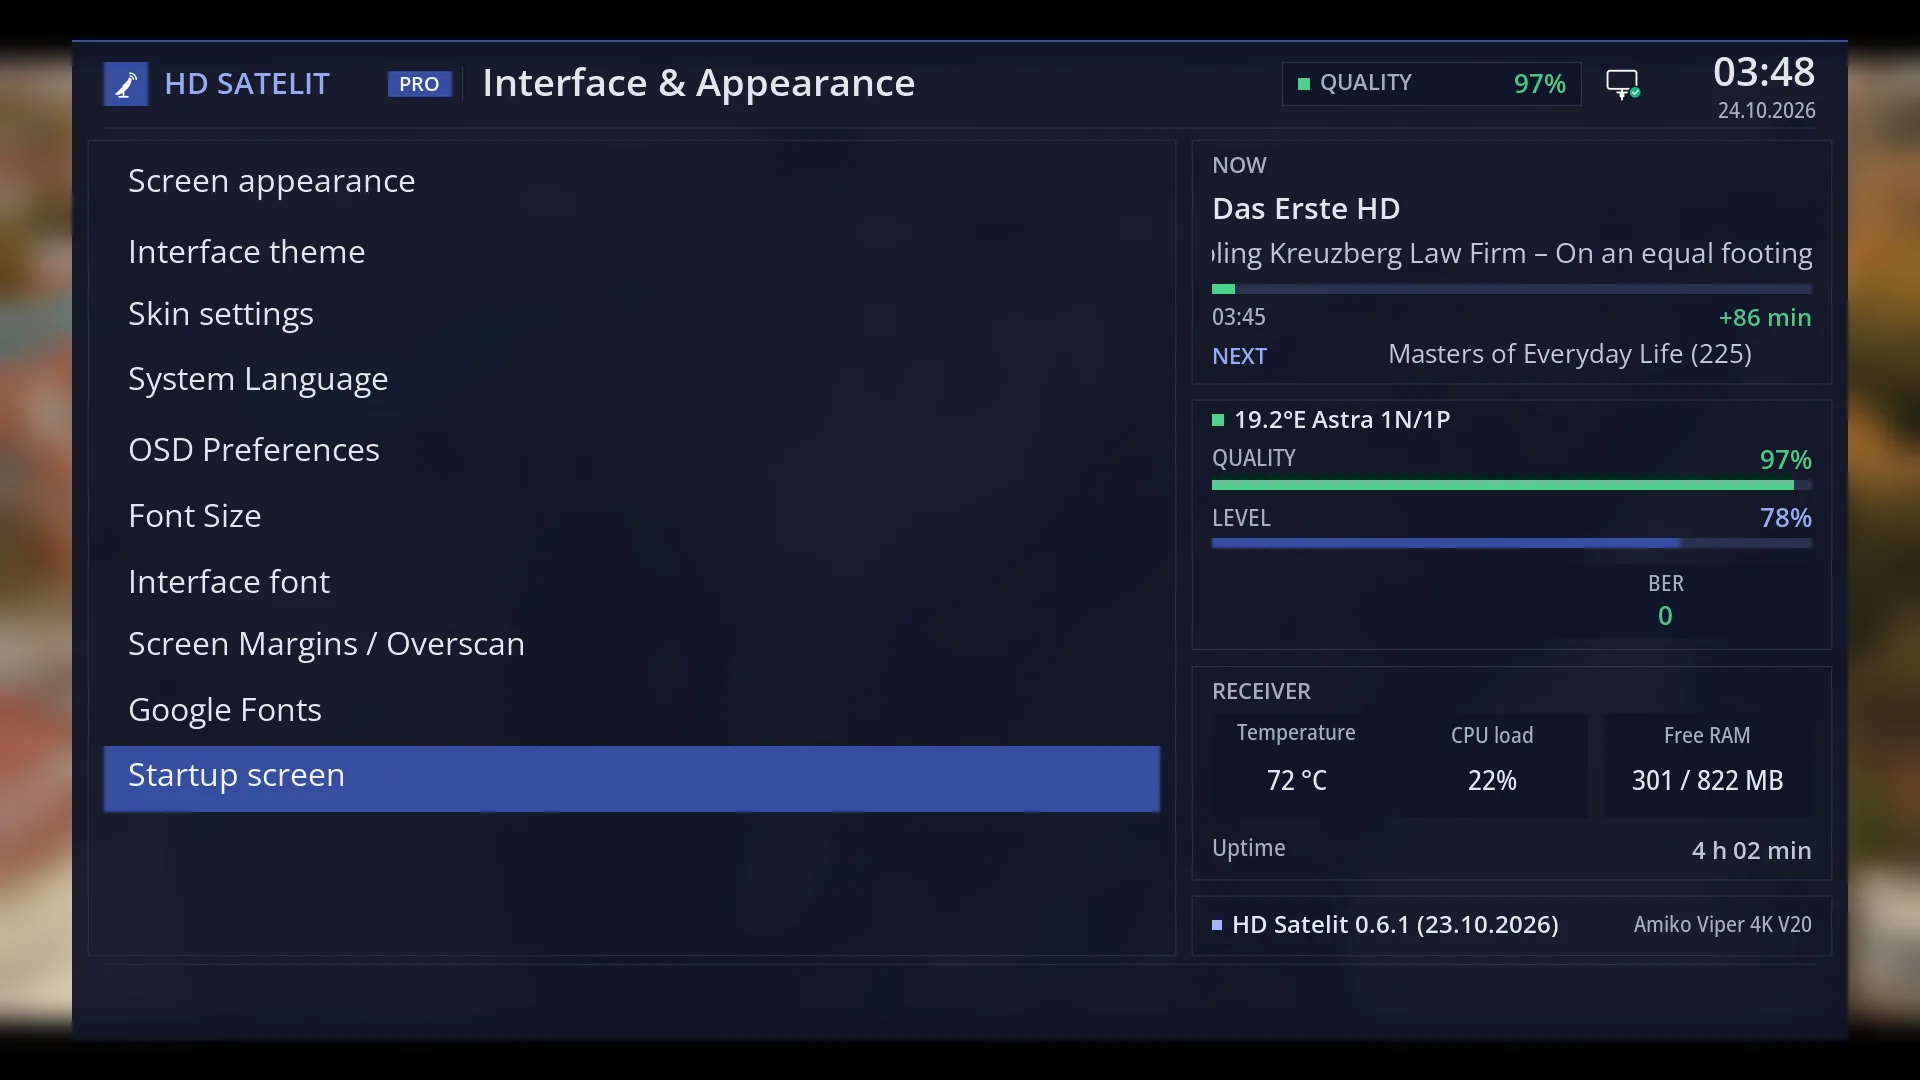
- 1 The selected row.
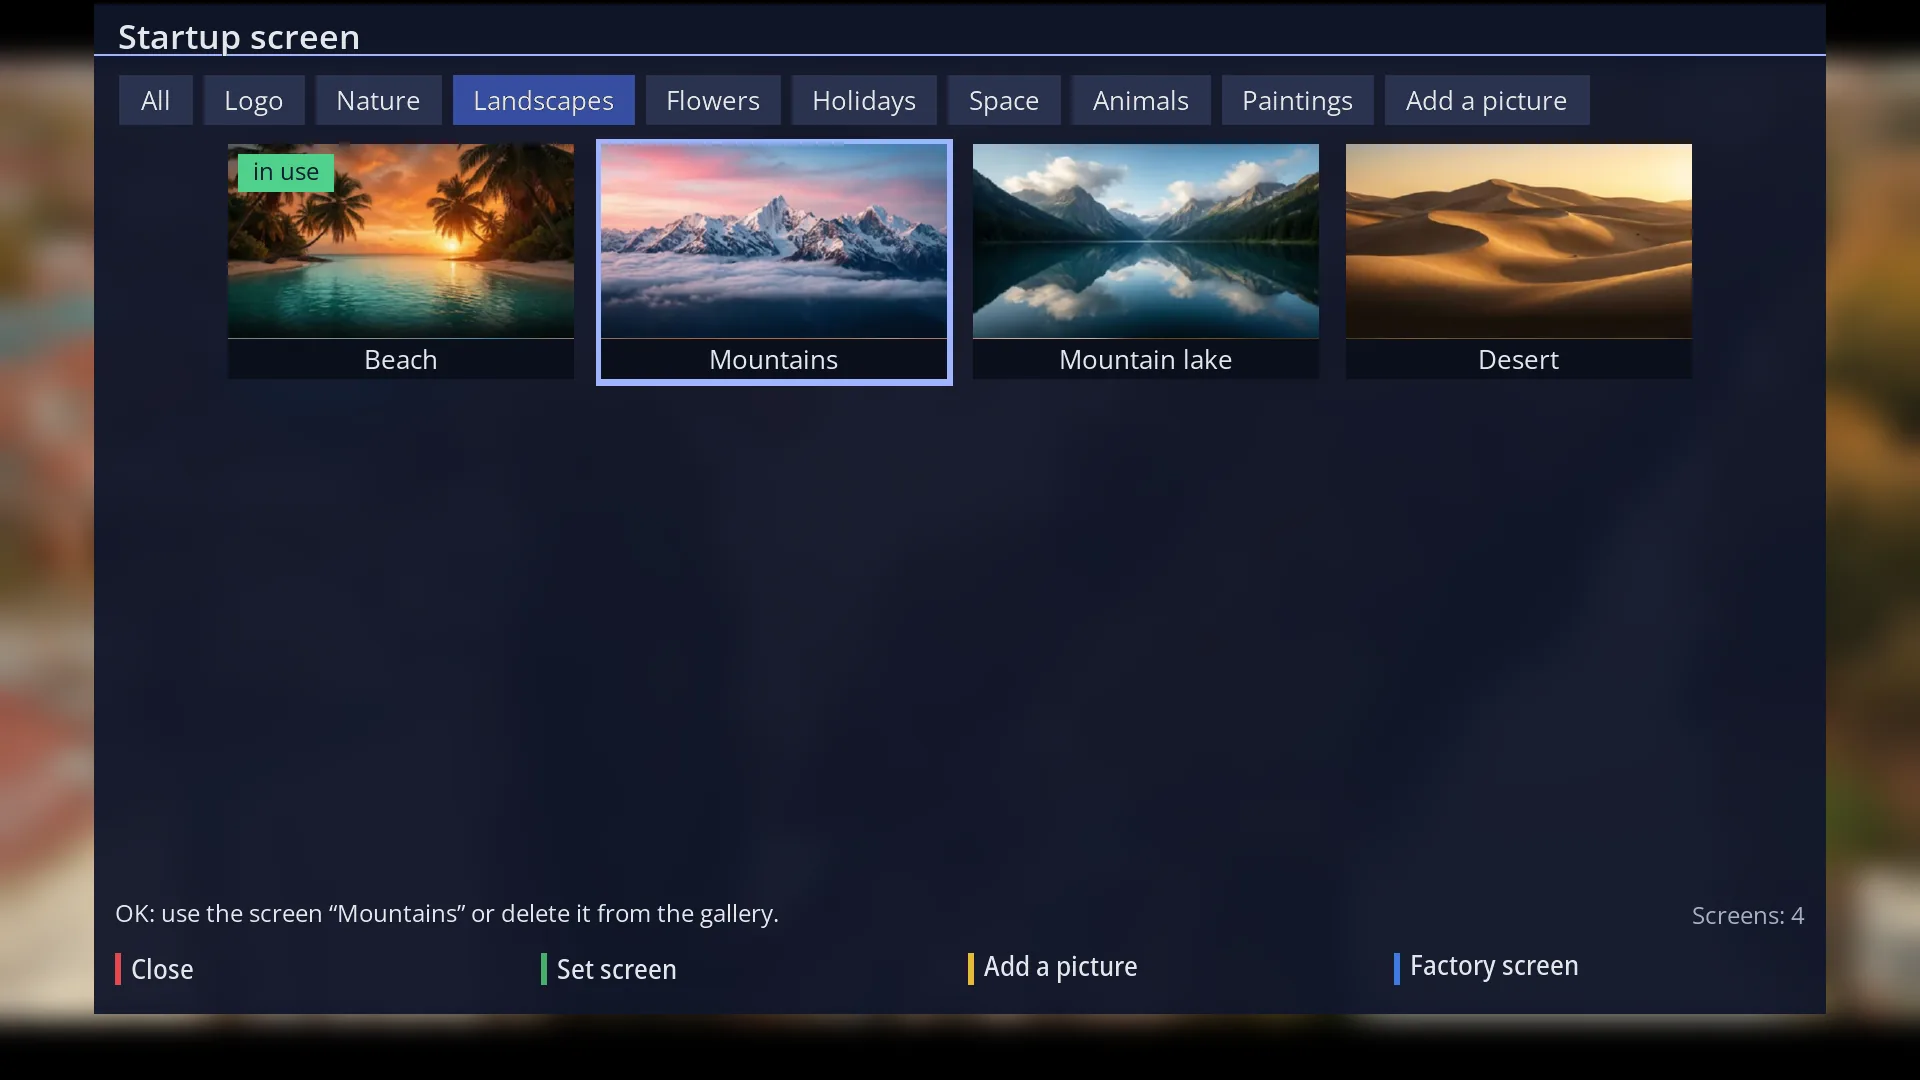
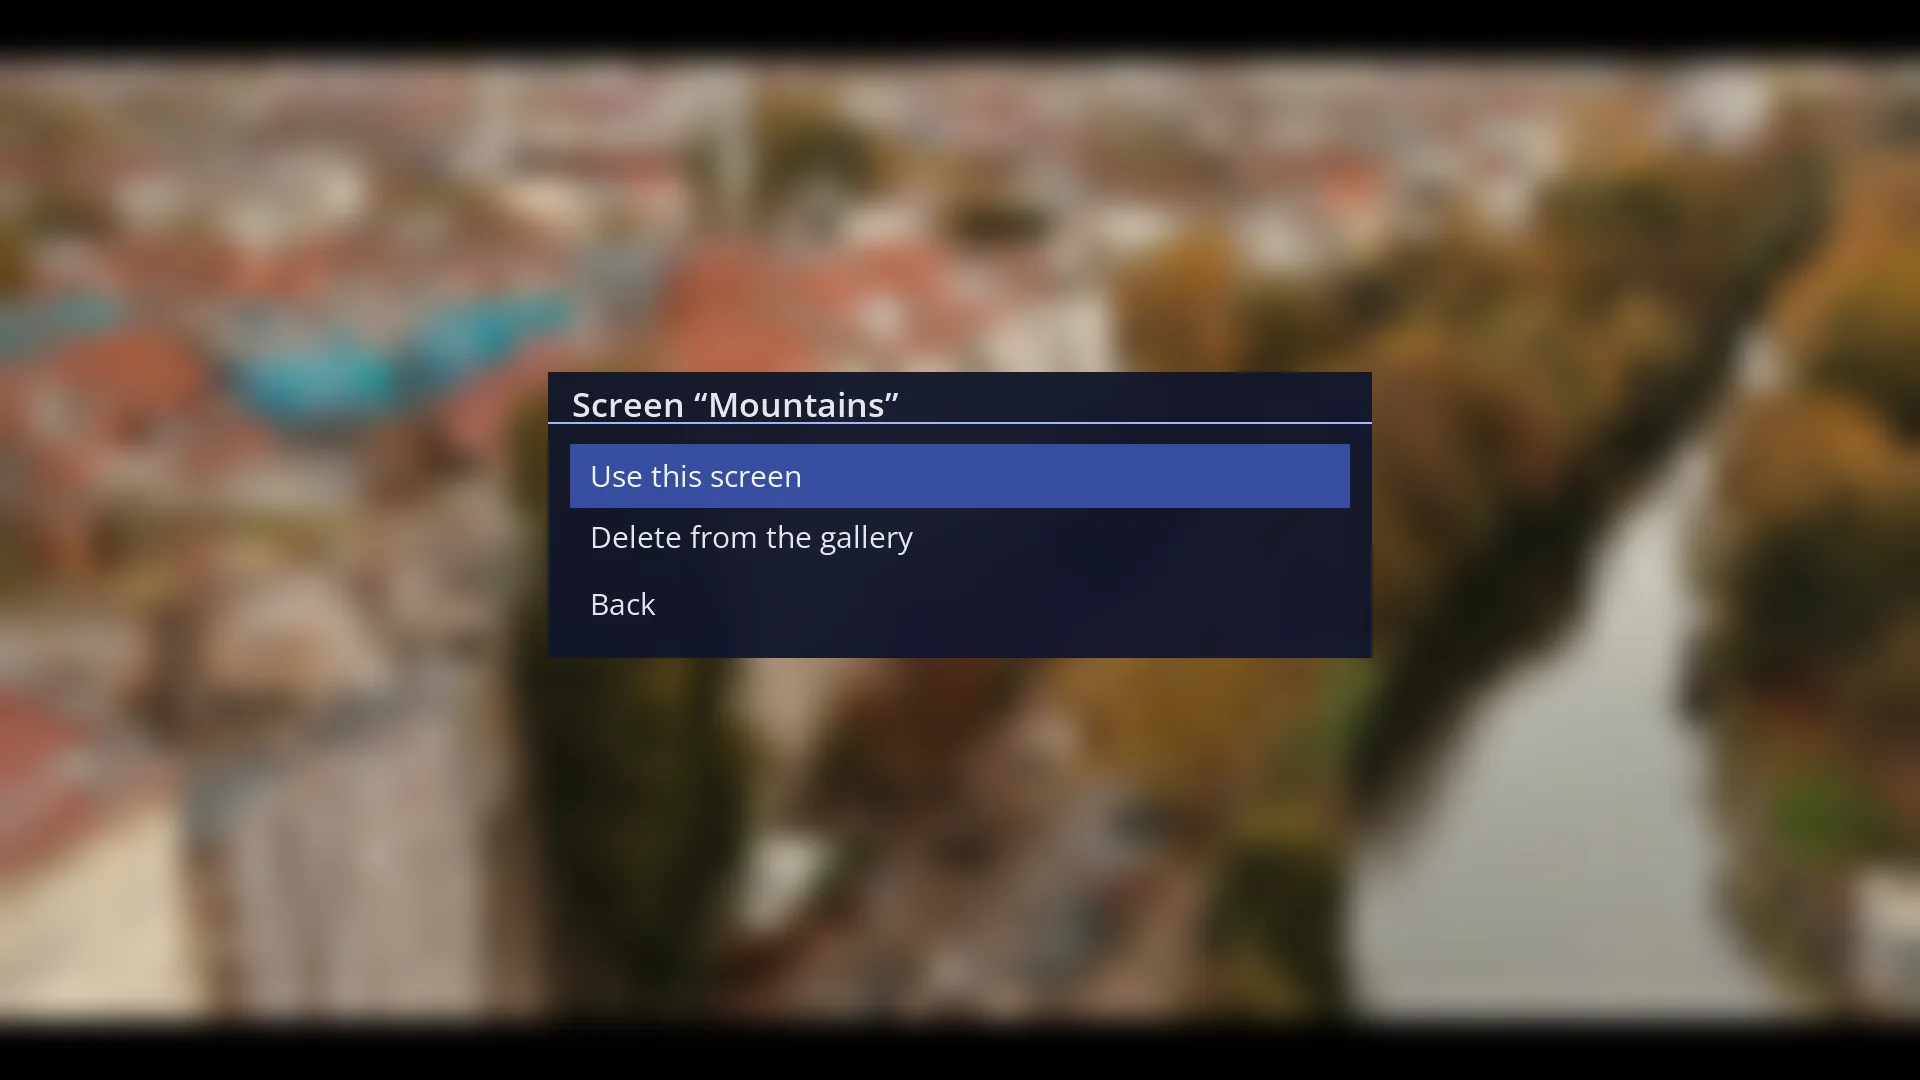
- 1 The selected row.
What it is for
Here you choose the picture the receiver shows while it starts up, before the TV picture appears. It can be a picture from the ready-made gallery or your own picture from a USB stick.
The gallery has groups (Logo, Nature, Landscapes, Flowers, Holidays, Space, Animals, Paintings), each with a few pictures. The pictures contain no text: the receiver writes the line with the image version over the picture at startup.
Your picture (JPG or PNG, up to 8 MB) is resized to 1920x1080 automatically, without being distorted. You can have up to 6 pictures of your own.
The chosen picture appears from the next time the receiver starts. Choosing it does not restart anything.
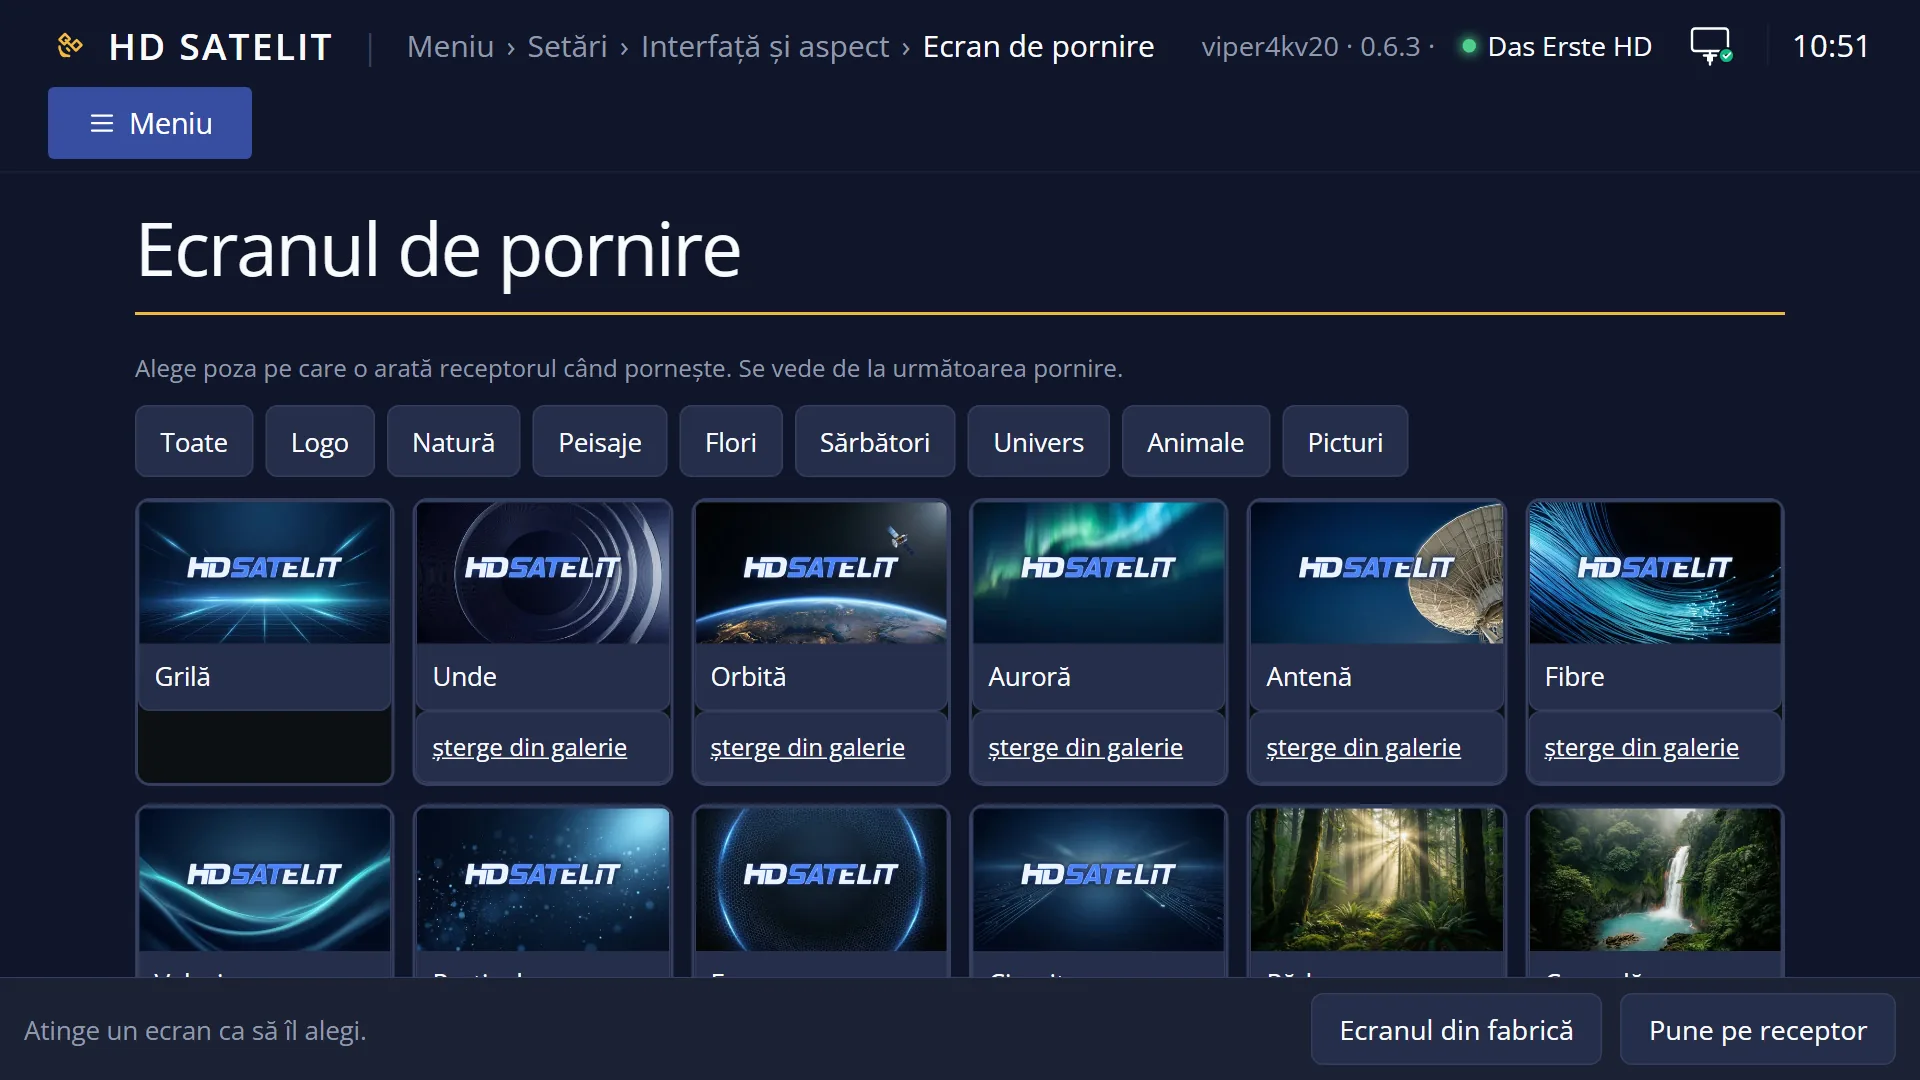
You can do the same from your phone or computer, in the web interface, on the /ecrane page. From there you can send a picture straight from your phone.
How to get here
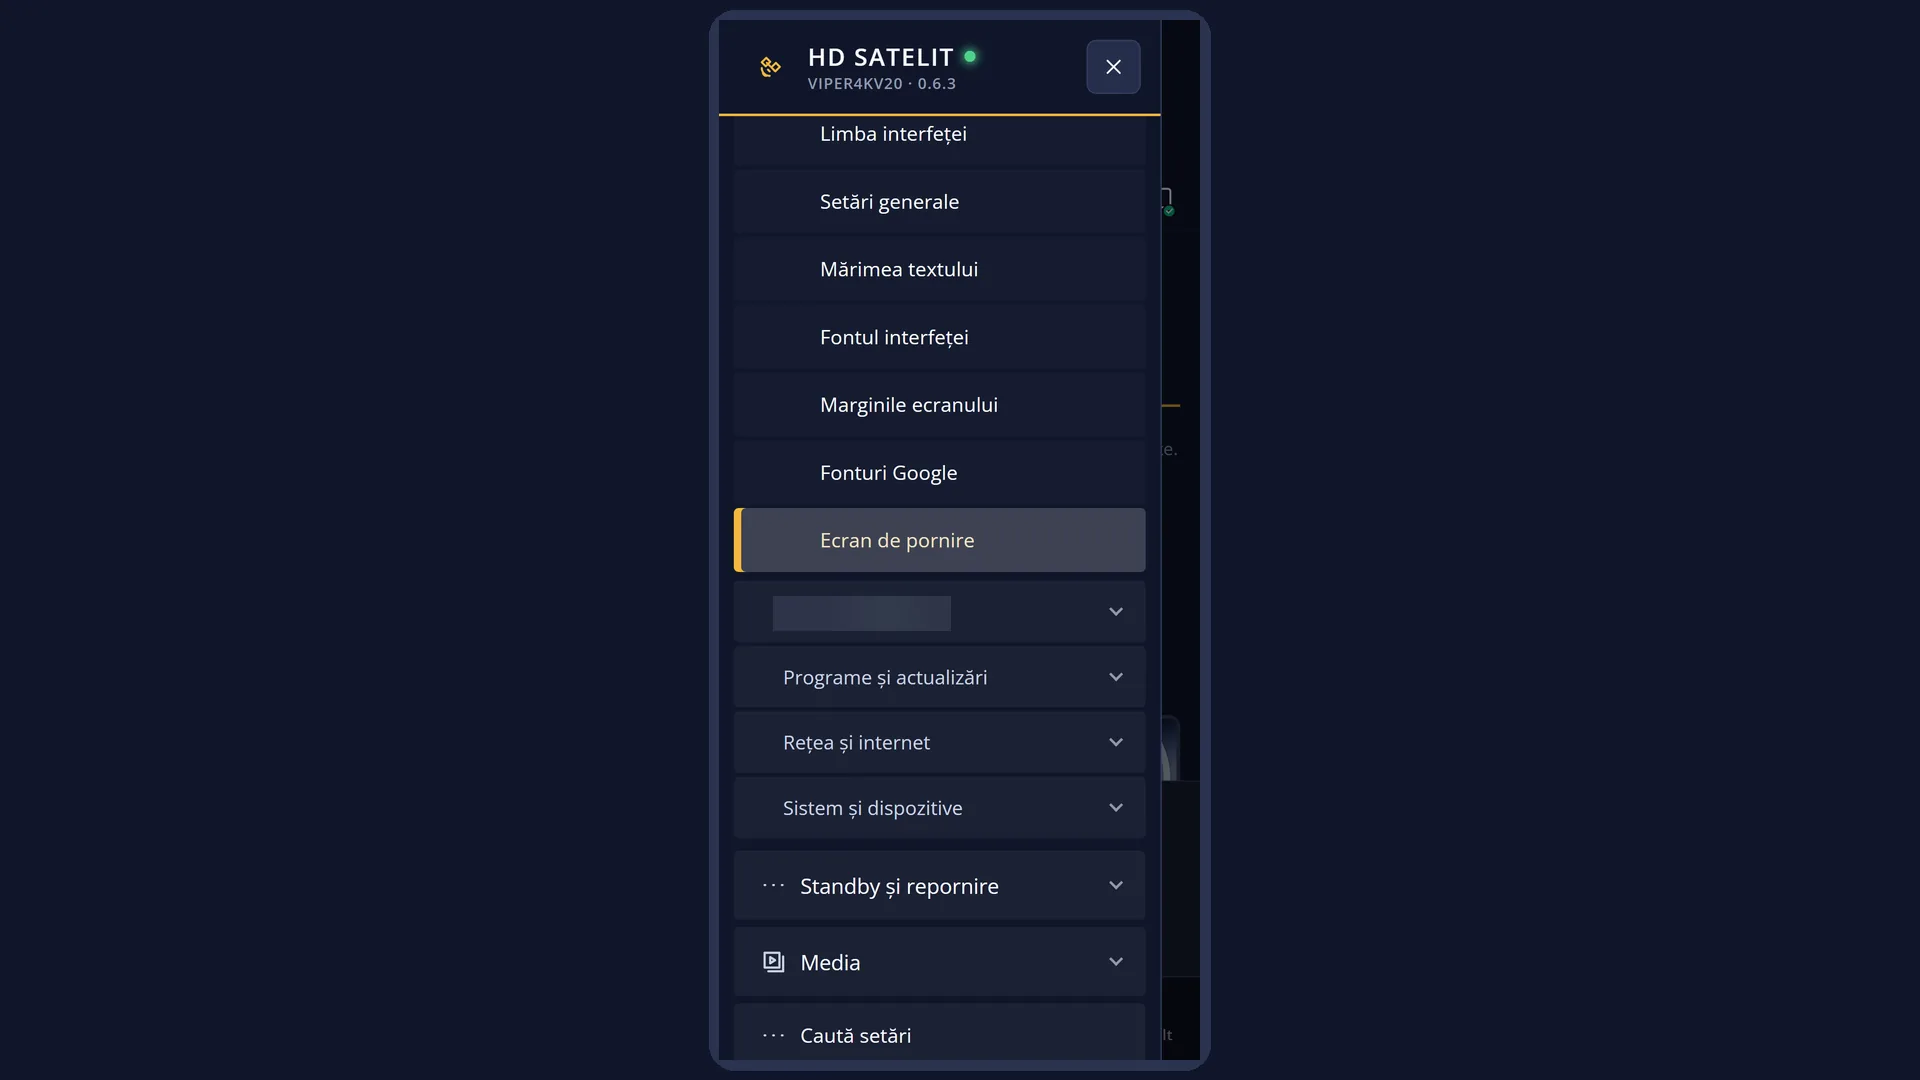
Path: Main menu > Settings > Interface & Appearance > Startup screen (the last row).
Keys on the remote: MENU 6 6 UP OK.
In the web interface: the /ecrane page (“The startup screen”).
What you see on the screen
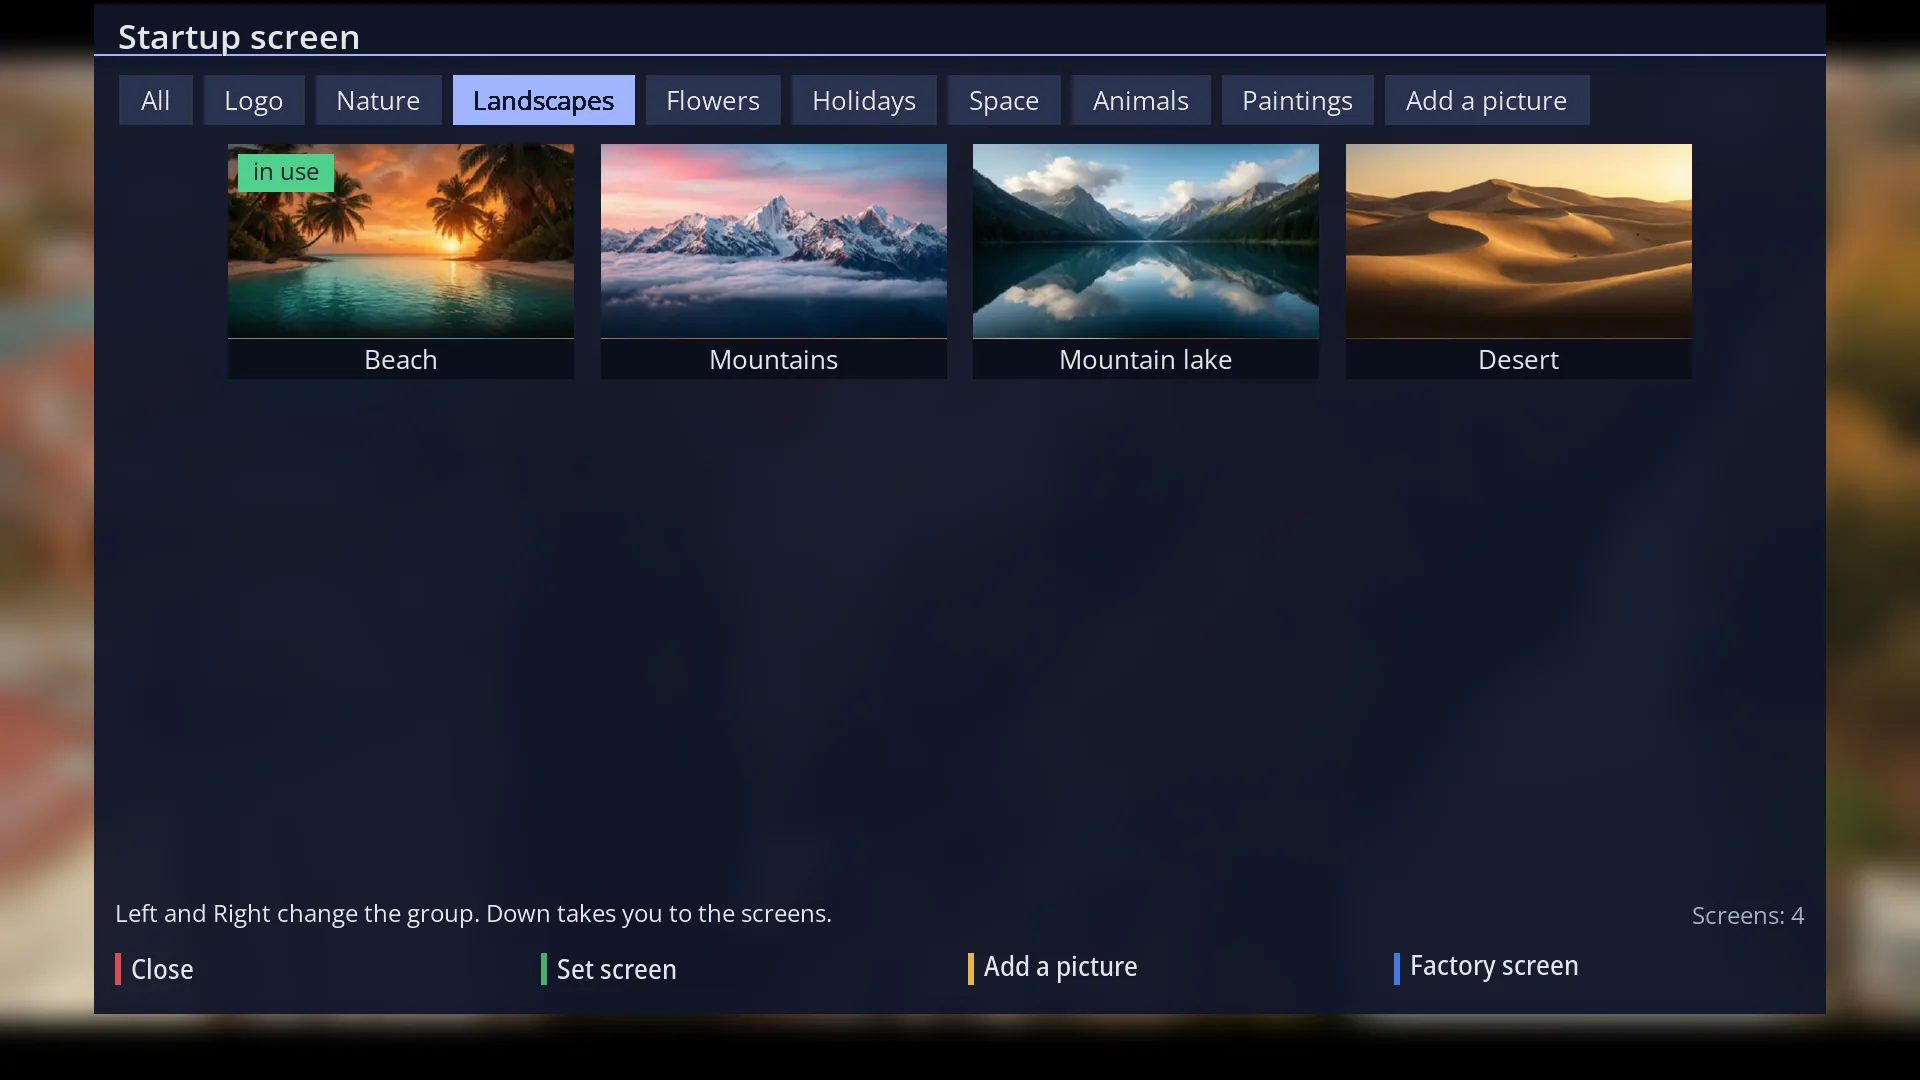
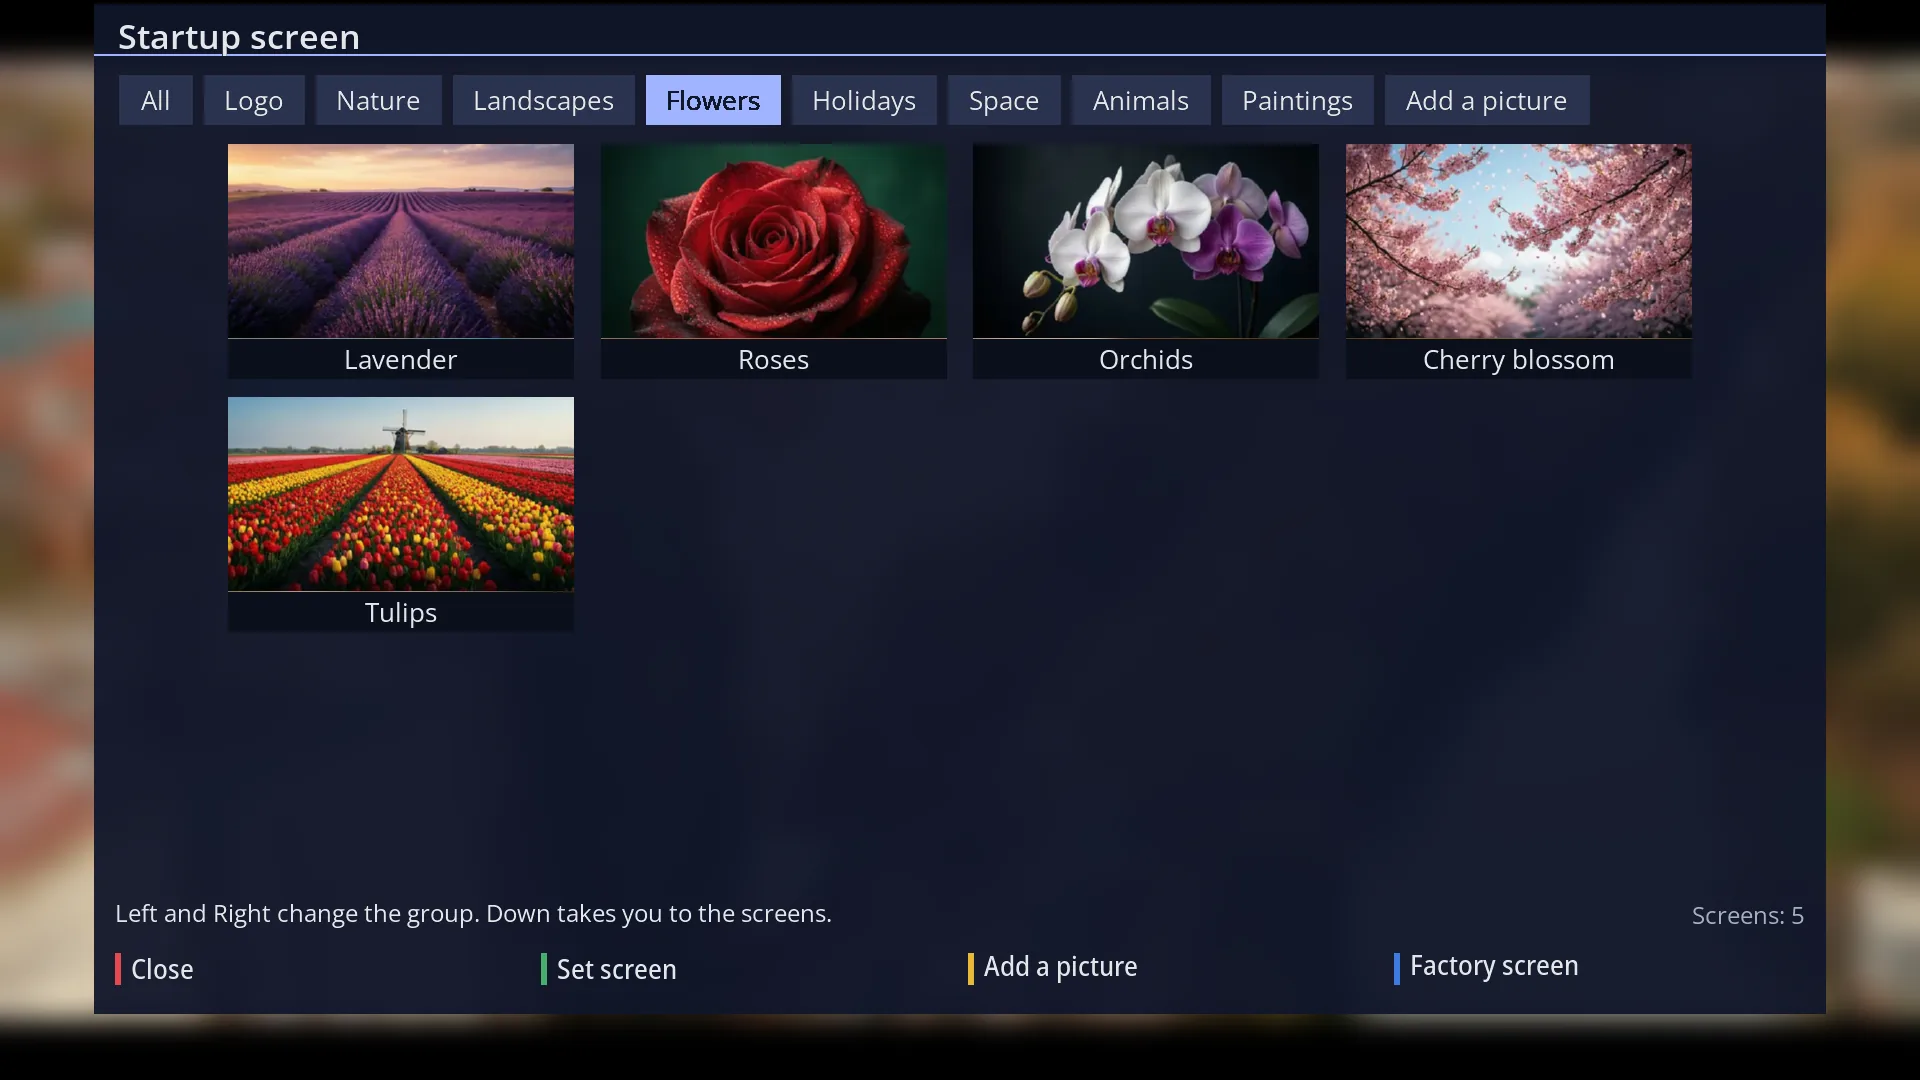
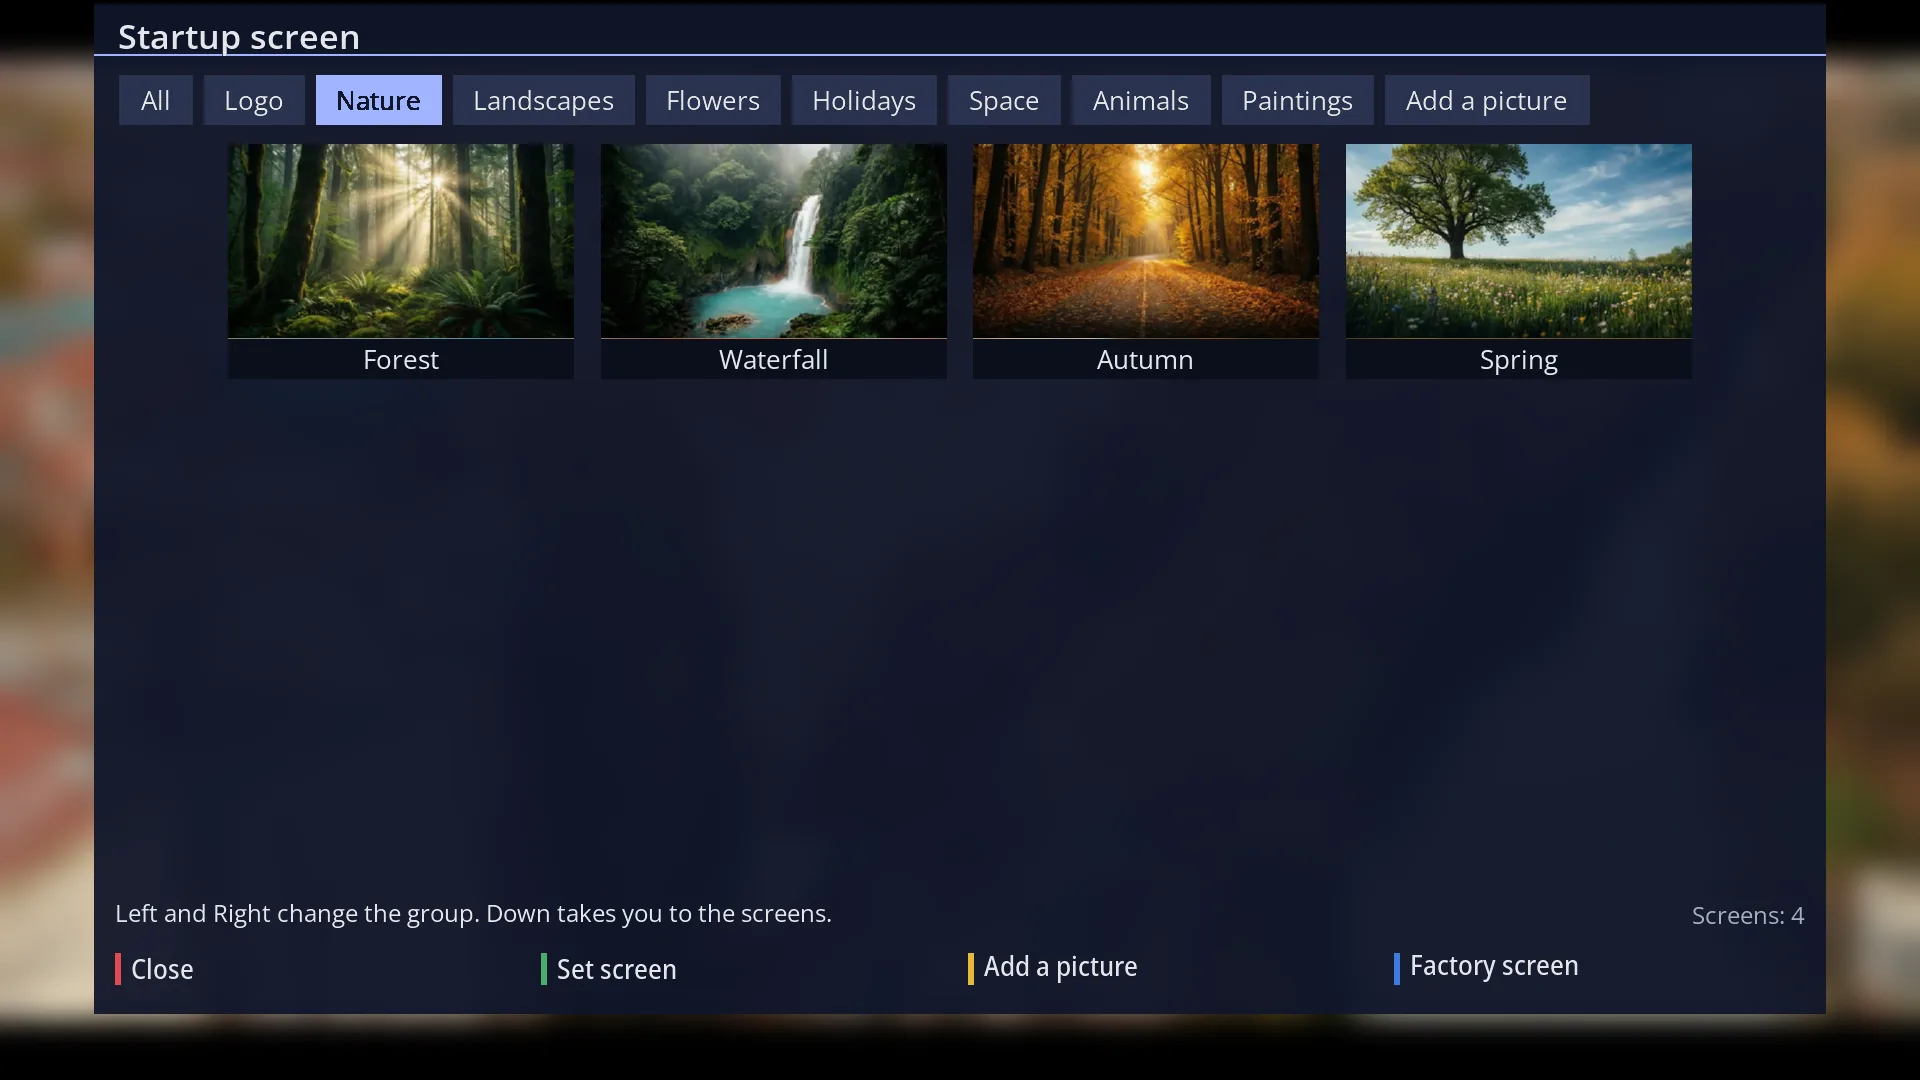
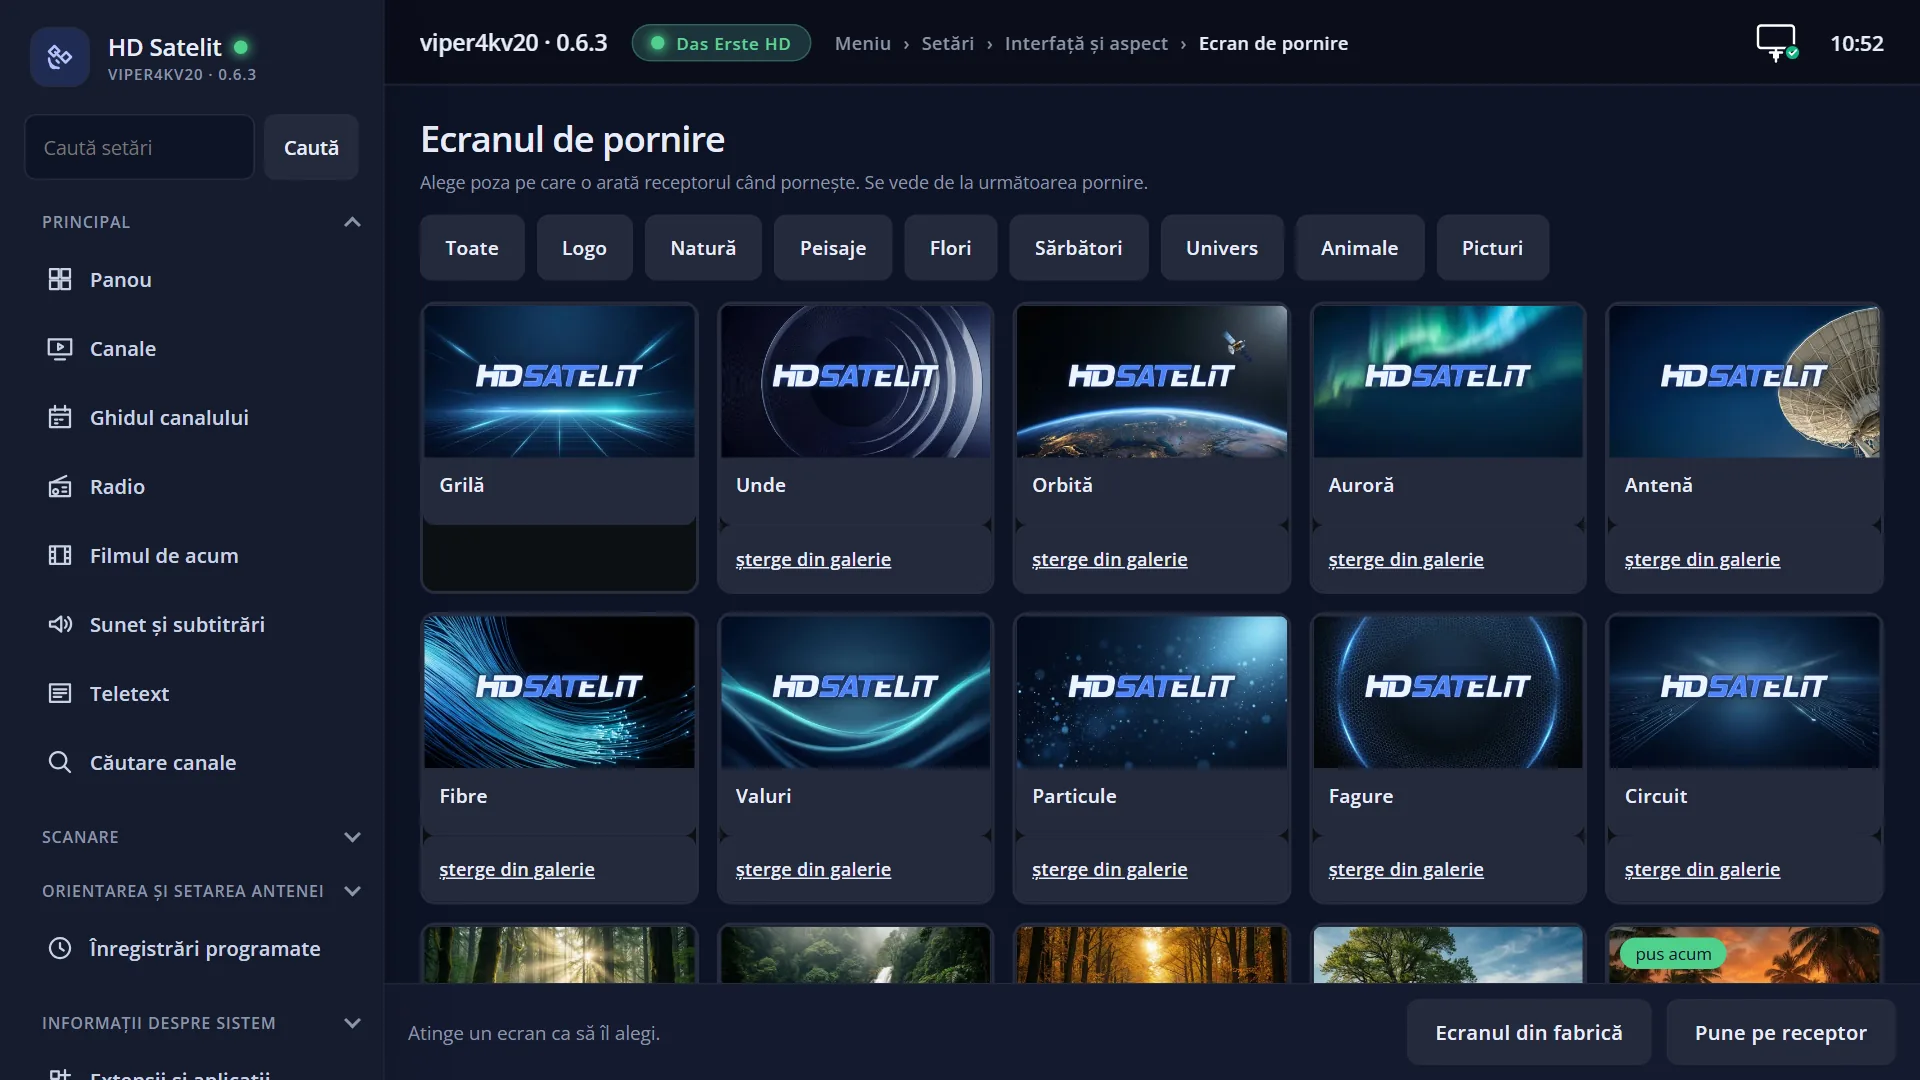
At the top you see the title “Startup screen” and a row of tabs with the groups: “All”, then the gallery groups, “My pictures” once you have added at least one picture of your own, and finally “Add a picture”. The tab of the group shown is blue. When the cursor is on the tabs, its tab is lighter.
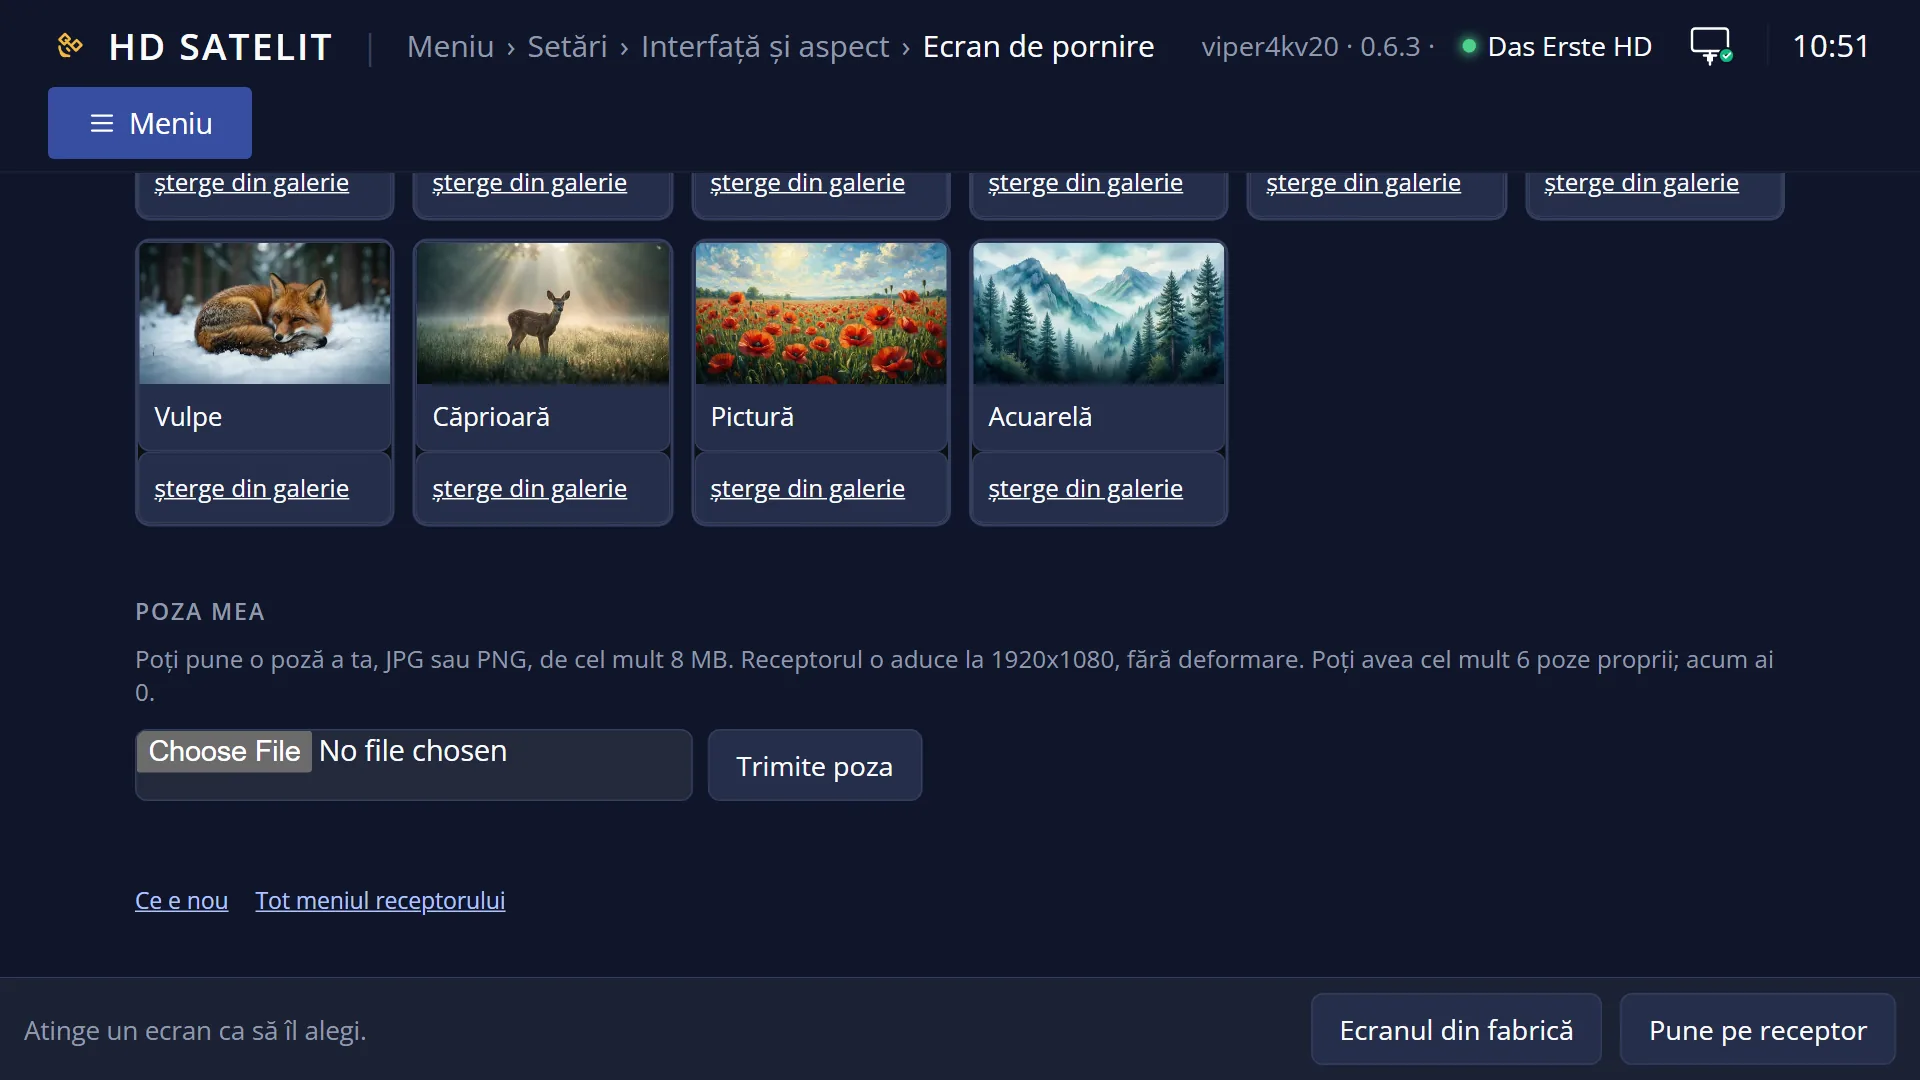
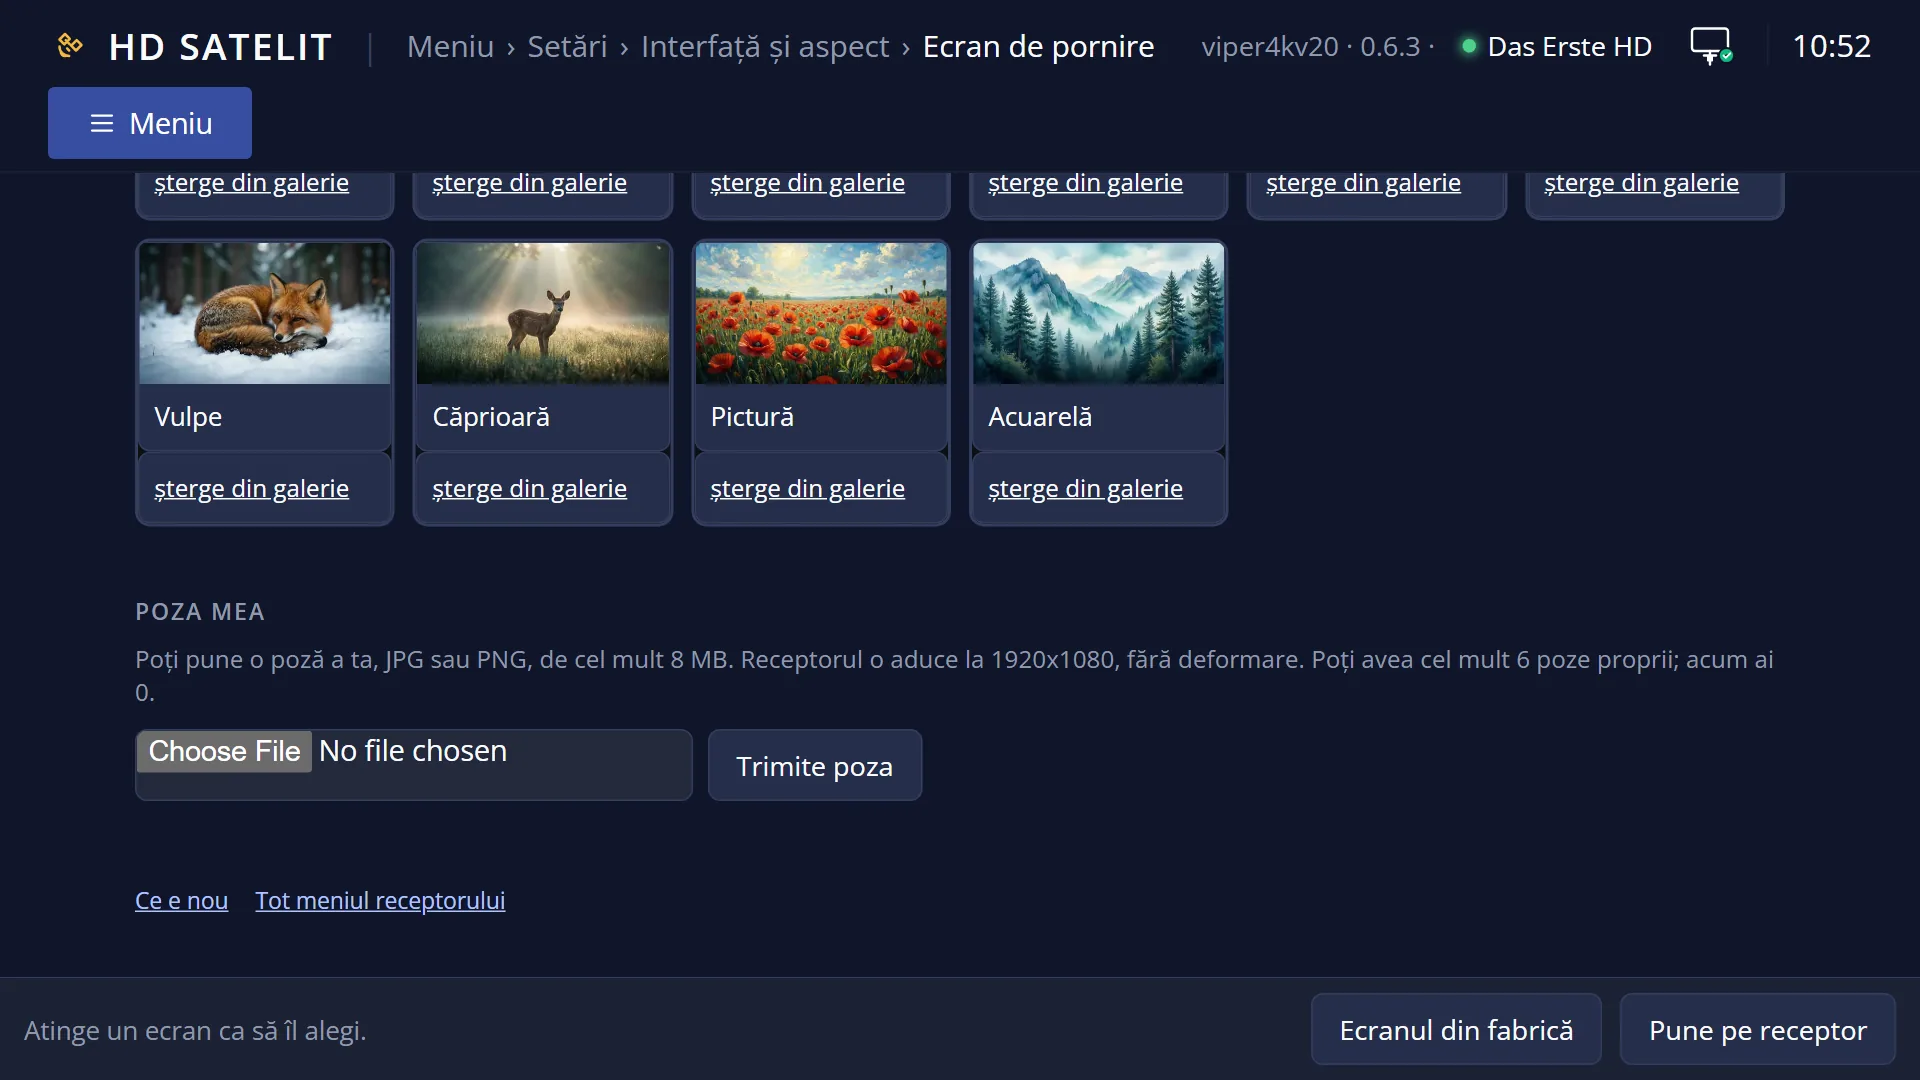
Below are the pictures of the chosen group, 4 per row and 3 rows per page. When the screen opens, you see the group of the picture in use, with the frame on it. Each one has a thumbnail and a name (for example “Beach”, “Mountains”). The picture under the cursor has a light blue frame around it.
The picture in use has the green label “in use”.
At the bottom, the status line tells you what you can do: “Left and Right change the group. Down takes you to the screens.” when you are on the tabs, “OK: set the screen “Mountains” or delete it from the gallery.” on a gallery screen, “OK: set or delete your picture “…”.” on one of your pictures, or ““Beach” is in use.” on the picture in use. To its right you see how many screens the group has (“Screens: 4”) or which page you are on (“1-12 of 30”).
On the “Add a picture” tab, instead of pictures you see an explanation: what kind of picture works, how large it can be, how many more you can add, and “OK: choose the picture from the stick.”.
Last row: the colour keys RED “Close”, GREEN “Set screen”, YELLOW “Add a picture”, BLUE “Factory screen”.
When a picture has no preview, “no preview” appears in its place.
Rows and settings
| Row | Values | Default | What it does |
|---|---|---|---|
| Group tab | All, Logo, Nature, Landscapes, Flowers, Holidays, Space, Animals, Paintings, My pictures, Add a picture | the group of the picture in use | Shows only the pictures of the chosen group. “All” shows them all. When it opens, the screen starts on the group of the picture in use, with the frame on it. A group with no pictures does not appear. “My pictures” appears only after you have added a picture of your own. When you are looking for a picture on a particular subject. |
| A gallery screen (OK on it) | Use this screen, Delete from the gallery, Put back the deleted screens (N), Back | OK opens a small window with the title “Screen “<name>””. “Use this screen” is the first row, so OK, OK sets the picture. “Delete from the gallery” frees space in the receiver's memory (after the question “Delete “<name>” from the gallery?”). “Put back the deleted screens” appears only after you have deleted something. The screen in use and the factory screen cannot be deleted. When you want a different picture at startup. | |
| One of your pictures (OK on it, in “My pictures”) | Use this screen, Delete picture, Back | The window has the title “Your picture “<name>””. “Delete picture” first asks “Delete the screen “<name>”?”. The default answer is No. The picture in use cannot be deleted. When you want to make room for a new picture (up to 6). | |
| Add a picture | JPG, PNG | Opens the file browser (“Choose a picture”), which shows only JPG and PNG pictures on the USB stick or disk. OK or GREEN “Choose” takes the picture. RED “Back” cancels. The receiver checks the picture, resizes it to 1920x1080 without distortion, turns it into the startup screen and sets it straight away. While it works, it shows “Making the startup screen from the chosen picture. It takes a moment.”. When you want a family photo or your own logo at startup. | |
| Factory screen (BLUE) | Puts back the picture that comes with the image, without asking. When you want to go back to how it was. | ||
| Limits for your picture | up to 8 MB, at least 16x16 pixels, up to 10000 pixels per side, up to 6 pictures of your own | A picture larger than 8 MB, a damaged picture or a file that is not JPG or PNG is not accepted. The message tells you why. When the receiver's memory has less than 20 MB free, no more pictures are accepted. |
Keys
| LEFT / RIGHT (on the tabs) | Changes the group. From the last tab you go to the first. |
| DOWN (on the tabs) | Takes you to the pictures of the group. |
| The arrow keys (in the pictures) | Move the frame. LEFT and RIGHT also move from one row to the next. UP from the first row takes you back to the tabs. DOWN, when there is no picture below the frame (the last row is shorter), jumps to the last picture. |
| OK | On a picture: the window with what you can do with it. On the tabs: takes you to the pictures. On the “Add a picture” tab: you choose the picture from the USB stick. |
| MENU | The same window as OK on the chosen picture. |
| GREEN | “Set screen”: sets the chosen picture straight away, without the choice window. |
| YELLOW | “Add a picture”: opens the file browser so you can choose a picture from the USB stick. |
| BLUE | “Factory screen”: puts back the picture that comes with the image. |
| RED / EXIT | “Close”. While the receiver is making the screen from a picture, the screen does not close. |
Step by step
Choosing a picture from the gallery
- Press MENU 6 6, then UP and OK. The screen opens on the picture in use.
- Press UP to go up to the tabs, choose the group with LEFT and RIGHT, then press DOWN.
- Move the frame to the picture you want and press GREEN (or OK, OK).
- You see “The start screen has been changed. You will see it the next time the receiver starts.”.
Adding your own picture
- Copy the picture (JPG or PNG, under 8 MB) to a USB stick and plug the USB stick into the receiver.
- In “Startup screen”, press YELLOW.
- In the browser, go to the picture and press OK.
- Wait for the message that it is done. The picture appears under “My pictures” with the label “in use”.
Going back to the factory picture
- In “Startup screen”, press BLUE.
- The factory picture appears from the next startup.
Problems and solutions
I chose a picture, but at startup I still see the old one.
The picture appears from the next startup. Check on the screen that your picture has the label “in use”. If not, choose it again and press GREEN.
The message “You already have 6 screens of your own. Delete one before adding another.” appears.
Go to the “My pictures” tab, choose a picture you no longer need, press OK, choose “Delete picture”, then Yes.
The message “The picture is too large” appears.
The receiver accepts pictures of up to 8 MB. Make the picture smaller on your phone or computer (a 1920x1080 picture is enough) and try again.
The message “The file is not a JPG or PNG picture.” or “The picture seems damaged” appears.
Save the picture again as JPG or PNG. HEIC pictures from phones do not work.
I cannot delete a screen from the gallery.
The factory screen and the screen in use cannot be deleted. Set a different screen first, then delete this one.
I deleted gallery screens by mistake.
Press OK on any gallery screen, then choose “Put back the deleted screens”. If their files are no longer on the receiver, they come back with the next image update.
The message “The screen gallery is not installed on this receiver.” appears.
You can still use a picture of your own, from the “Add a picture” tab.
The message “The receiver did not finish within 240 seconds.” appears.
The USB stick has stopped responding or the picture is too heavy. You can close the screen. Whatever succeeded shows when you open it again. Try again with a smaller picture or a different USB stick.
Related topics
- The startup screen (what you see while the receiver starts)
- Interface & Appearance
- Main menu
- Matching web page: /ecrane (from there you send the picture straight from your phone).